Well, that sounds impossible, doesn’t it? Not only is it not impossible, it is actually quite simple! And today I am going to show you just how to make a rectangle using only a square framelit die!
I told you that was easy! Please leave me a comment and let me know if you like this trick. Thanks 🙂
If you missed yesterday’s blog post, which created the necessity for me to make a rectangle from the Square Framelit die, you can view that here.
Don’t miss out on the Hostess special going on right now. Host a qualifying order of $300 or more, (or place a large order for yourself and get everything on your wishlist!) and get this exclusive stamp set “Merry Patterns” for free!
Contact me if you would like to host a party, even a Facebook Party so you can earn this stamp set.
Check back with me, I have more to share from the Quilted Christmas product suite!
I finally had my chance I had to play with all of the Quilted Christmas products and even though I am not a quilter (I don’t even sew), I fell head over heels for the product suite!
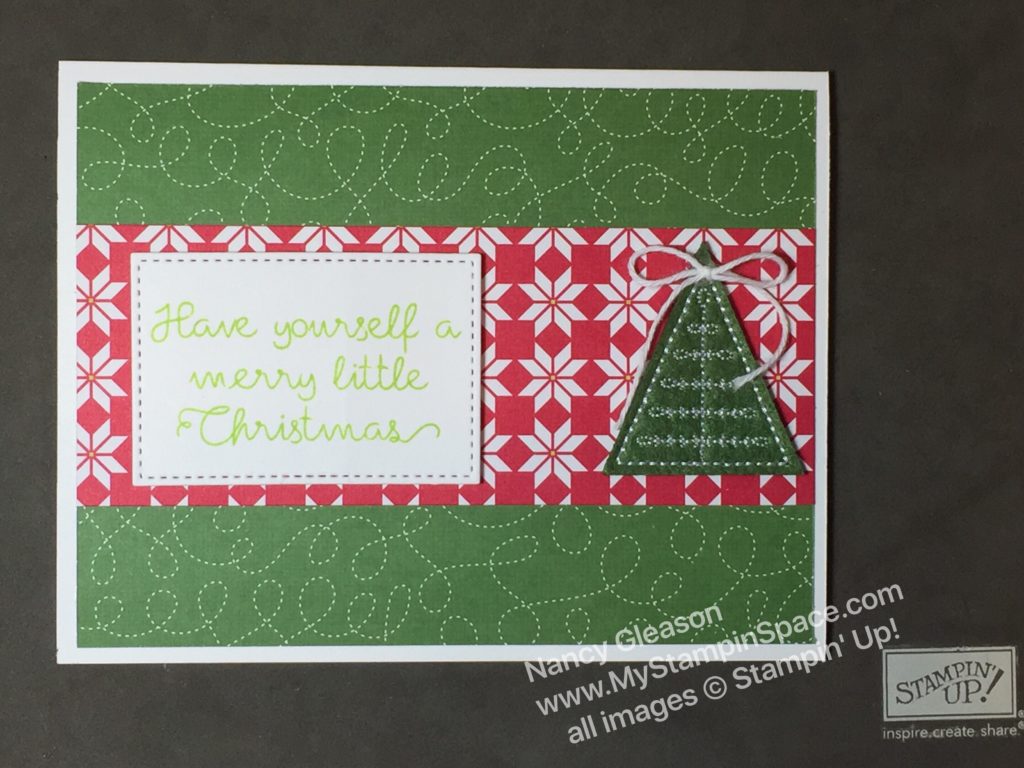
Today I am going to share a video with teaching you how to make a simple Christmas card using this product bundle. This is perfect for beginners as the coordinating products in the bundle do all the work for you to create beautiful cards! Seasoned paper crafters will enjoy this product suite as you can create very detailed quilted projects. #SomethingForEveryone!
Don’t miss my reference to another video within this video! This is a trick that you will thank me for 🙂 You’re welcome!
So without any further adieu, let’s make a Christmas card:
What do you think? Please leave me a comment; I love to hear from you.
Here’s another card I made using the same layout, just a different sheet of paper.
Which one do you like better? The paper used in the video or in the photo?
I taught the ladies in my Mini Christmas Card Club how to make this card and they all loved it! From being so simple, and just using one sheet of paper from the 6×6 stack, they all felt this was a great card when you have to make a lot. It’s also a very versatile layout and the card can be used for any occasion just by switching the patterned paper and sentiment out. With all the beautiful patterned paper that Stampin’ Up! offers, you can really let the paper do all the work!
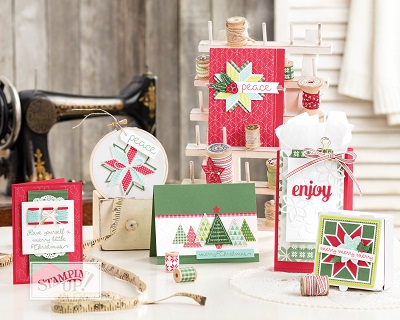
Well, I hope you enjoyed making a card with me. I will be blogging about the other cards I made using the Quilted Christmas product suite. In the meantime, check out some of the inspiration from the catalog:If you like Christmas, don’t forget to sign up for my mailing list. Beginning Oct. 4th, my mailing list subscribers will get my 3rd Annual 12 Weeks of Christmas newsletter complete with an exclusive Christmas project delivered to their inbox each week. If you’re not on my list, you won’t get those 12 Christmas project tutorials.
I’m excited today for two reasons; first I got to break out one of my new stamp sets, Icing on the Cake! Yeah, always fun, right? Second, I get to play along with the Global Design Project this week! And if the designers over there like my entry enough, I may even get the distinct honor of being their Guest Designer! Let’s keep our fingers crossed that they like my entry as they are sorting through all of the entries this week! I think that would be so cool!
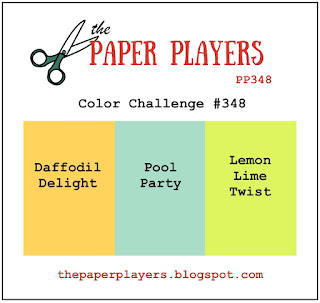
So here’s the Color Challenge from GDP:
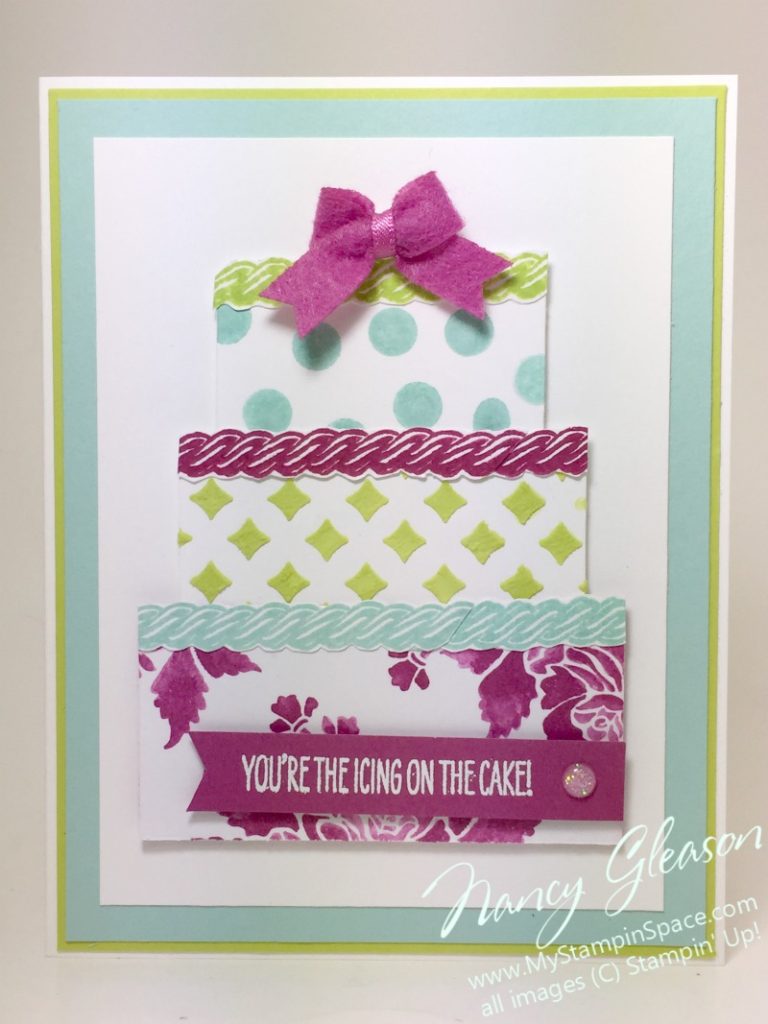
I just love these colors together – so bright and playful!!! Here is my entry:
So many different techniques and textures came together to make this card.
The Recipe:
This card started like so many others; a 5-1/2″ x 4-1/4″ Whisper White card base with a few layers, in this case Lemon Lime Twist and Pool Party. That was followed by another layer of Whisper White which is supporting panel for my focal point; the awesome layer cake! The bottom layer of the cake features a scrap of the Berry Burst Fresh Floral Designer Series paper, the middle layer is a scrap of Whisper White cardstock embossed with our new Embossing Paste that was colored with Lemon Lime ink, and decorative masks. The Top layer is a scrap of whisper white cardstock that was stamped in Pool Party ink with the polka dots from the retired Celebrate Today stamp set. Each layer was topped with a line of frosting from the Icing on the Cake stamp set. A sweet little In Color Bitty Bow in Berry Burst tops it all.
The sentiment was heat embossed in White Embossing Powder on a scrap of Berry Burst cardstock. I think being chosen as a guest designer would be the icing on the cake!
If you like my cake, please leave a comment for me. Then be sure to head over the Global Design Project to see all the other entries. The judges sure will have their work cut out for them!
The Icing on the Cake stamp set is going to be so versatile and I’m sure I’ll be reaching for it quite a lot for upcoming birthdays. If you want to order this stamp set, or any of the items on your wish list, then you’ll want to make sure you take advantage of our Bonus Days promotion going on now.
What are Bonus Days you ask? For every $50 you spend in my online store between July 1-31, you will earn a $5 Bonus Days coupon that you can redeem in August! Bonus! To learn more, click here.
To start shopping and earning free stuff, Click here.
Thanks for stopping My Stampin Space, and for shopping with me! I love to have here. Have a safe and happy Independence Day!
I got so many new stamps and such this week and I want to use them all! But since I can only use one, or two, stamp sets at a time, I will have to carve out time each day to make something creative! The color challenge from the Paper Players served to stretch my creativity and I’m so glad I played along! Here is the color palette I had to work with:
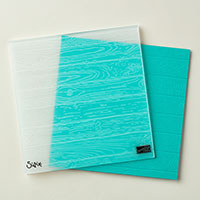
The honest truth is that I probably never would have paired these colors on my own, but I forced myself to use them. That got me thinking that, other than a floral, I would have to use 3 of something – one for each color. Looking thru my new stamps for something that would work, the clothespins wrapped in baker’s twine from the Crafting Forever stamp set would be perfect! I played with a layout and ultimately, this is what I came up with: I used the new Pinewood Planks TIEF to add texture to the background layer of Pool Party. Then a layer of Lemon Lime Twist card stock behind the main Whisper White panel repeats the Lemon Lime splattered on that panel. Touches of Texture was used for the splatters. The saying is stamped in Pool Party ink. Each clothespin wrapped in Baker’s Twine is stamped in the three colors from the Color Challenge: Daffodil Delight, Lemon Lime Twist and Pool Party, and then fussy cut. The new Mini Dimensionals propped up these little guys with no trouble! (Thank you, Stampin’ UP! for added those mini’s – they are the Best.Thing.Ever!)
Do you like my entry to the Paper Players? I really, really love how this card turned out, and I have the Paper Players to thank for that! This really stretched my creativity but I’m so glad I participated! Hop over to the Paper Players and see what others did with this color challenge. But before you do, please leave me a comment and tell me what YOU think of my project.
Then make sure to come back here again because I have something juicy and zesty to share with you! I have a class tomorrow night so I may not be to write another blog post tomorrow, even though I have my project ready to share. (I’ll try to remember to snap some photos and share them on my Facebook page. My class is centered on the Color Theory bundle and we’ll be making some cool cards just in time for summer reading!) Remember, if you want to get any of the products I used tonight, you can click on the item below, or just click here to start shopping. A host code for June is listed to the right for any order you place with me that is less than $150 dollars. Thanks,
Do you follow me on Facebook? If you don’t, you missed out on seeing my bestie fav, My Favorite Daisy, that I made with new catalog products. So click here to Like my page right now. I’ll wait. Ahh, all done. Now, you won’t miss another thing from me again!
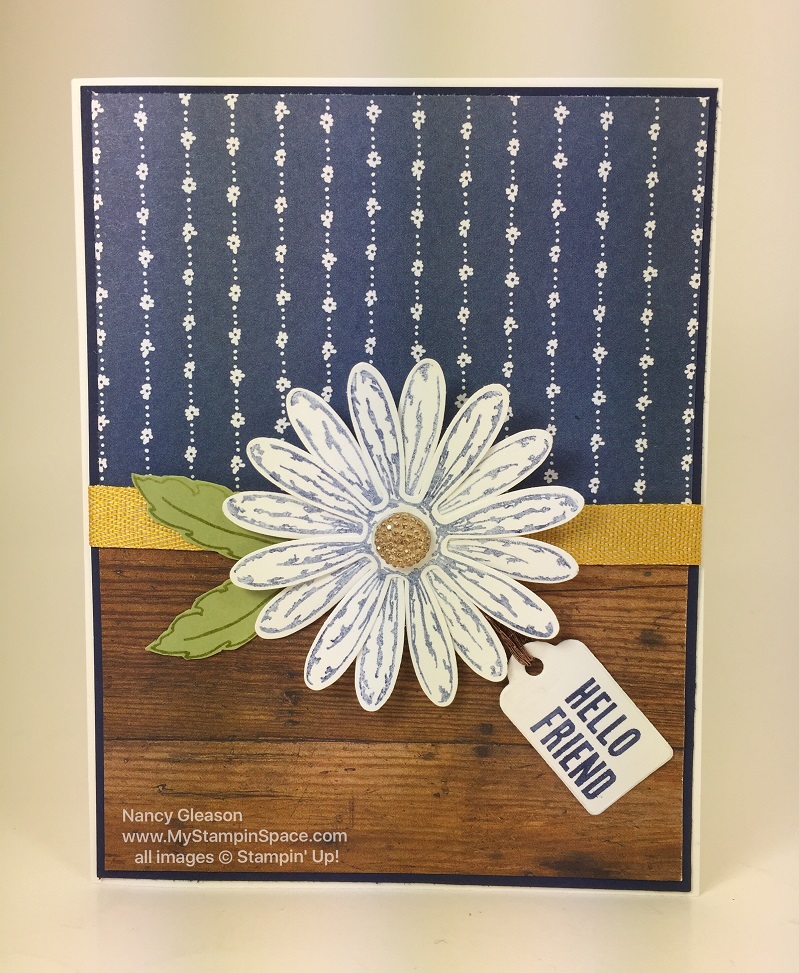
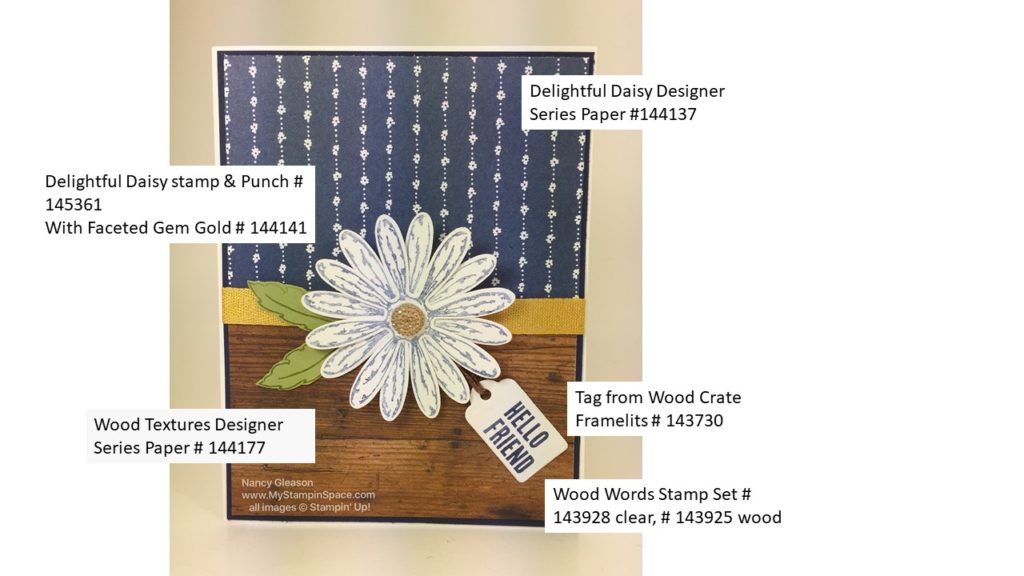
Back to my favorite card. The wood grain designer series paper was one of the things calling my name the loudest! And that Daisy stamp and punch! And the embellishments and ribbon. Combine it with the luscious patterned Designer Paper in the Delightful Daisy suite and mix it all together and what do you get? This:
The star of the show is the Delightful Daisy! This stamp set and punch bundle has been uber popular since making it’s debut at the OnStage event in April where it was available as a pre-order for demonstrators. As such, the Daisy Punch is currently on backorder and expected to be available at the end of the month, along with the Faceted Gems (clear and gold) . The Daisy Delight stamp set is available.
Did you notice the cute little tag? Of course you did! It’s from the Wood Crate Framelits die set. The sentiment is from Wood Words stamp set ( I used a marker to isolate and stamp each word individually to make it fit on the tag), and that gorgeous Copper 1/8″ ribbon adds the finishing touch!
I think the Daisy Delight product suite is going to be one of your favorites too! You can see other projects I made with the Daisy Bundle here. Please place your order for this bundle as soon as it becomes available again, so you are assured of getting it. Now that you follow me on Facebook, I’ll be sure to keep you updated of the status of the punch, the bundle, the Faceted Gems and the 1/8″ Copper trim.
Thanks for hanging out in My Stampin Space with me today. I hope you enjoy it here. Please leave me a comment at the end of this post and tell me what you think of this card. I love to hear from you!
And thanks for shopping with me when you need to place orders for your stampin’ supplies. I’m always grateful! I like to show my thanks by sending an email or even a handmade ‘thank you’ card in the mail, but when you select “No Contact”, I don’t even know who placed that order! So a big ‘thank you’ to who placed an order – I don’t know who you are, but I’m still thankful for you!
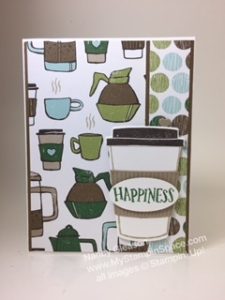
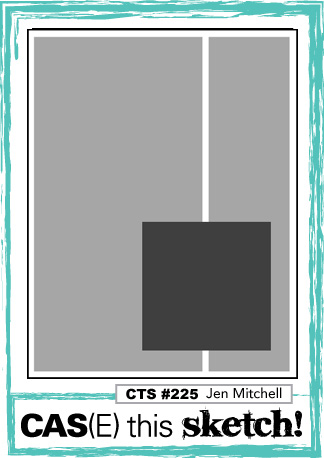
When I first saw this sketch challenge from Case This Sketch, I knew EXACTLY what I wanted to do! The problem? Everything I wanted to use to make it was in transit. Hurry up, Mr. UPS-man! So he got here today, and this is what I made!
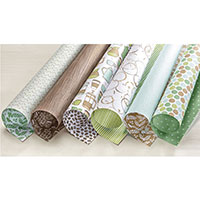
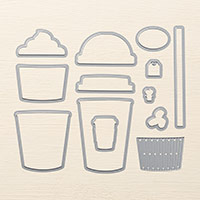
It’s so retro, and while I usually don’t gravitate towards paper with a busy design, I just Love this! Maybe it’s all the different types of coffee pots and cups. The polka dot pattern is just plain fun and playful! Then there’s the coffee cup itself. It’s so realistic looking thanks to the Coffee Cafe stamp set and coordinating Coffee Cups framelit dies. (Bundle and Save 10%!) The lid popped on in a snap (no worries about spills either!) The corrugated cardboard sleeve keeps my hand from getting burned and it makes a nice place for the oval die cut featuring the word “Happiness”. I do believe that coffee = happiness, but the word “happiness” is cropped from the sentiment. The rest of the sentiment is on the inside:
How true, right? And I’m glad that I can share this with my friends over at Case This Sketch.
And it makes me so happy so share MyStampinSpace with you! I’m honored when you choose to spend time with me and hang out here at My Stampin’ Space. Feel free to kick back and enjoy a cup of coffee while you’re here! My hope is that you will be inspired to make your own paper projects and that you’ll pick up some tips and tricks along the way.
If you want to get this stamp set, or all of the products in the Coffee Break Suite, pg. 30-31, (there’s ribbons and corrugated elements, too!) please head over to my online store.
I’ve gotten so many items in my delivery today and I can’t wait to share eeverything with you so please stop back again. Like me on Facebook, and subscribe to my newsletter so you won’t miss a thing!
One of my favorite perks of being a Stampin’ Up! demonstrator is getting sneak peeks of new catalogs and products before everyone else and attending events, like OnStage in April in Richmond, VA, and getting FREE products just for attending! One of the stamp sets I got is a set called Tabs For Everything, and it has a coordinating punch (which I didn’t get, but it’s on its way to me now!) You can save 10% when you purchase this as a Bundle.
This set has so much potential for making tabs when used with the coordinating punch, and I think it will be a match made in heaven paired with the new “Love Today” Planner Kit! You can see how awesome the Planner is by watching the video here.
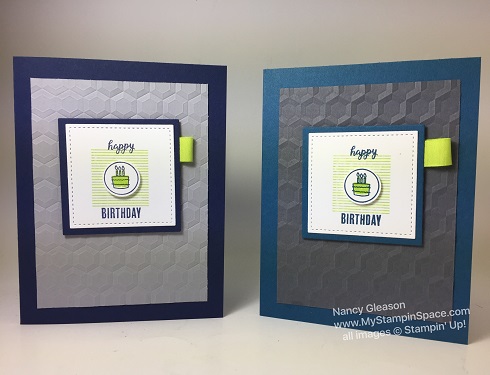
It also has great potential for making fabulous cards! Like this one:
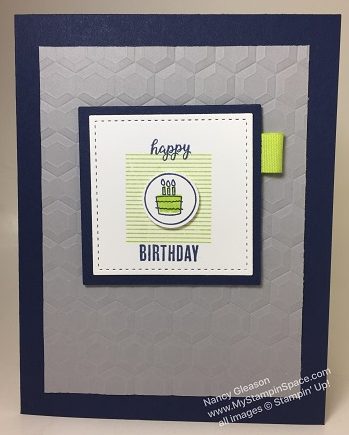
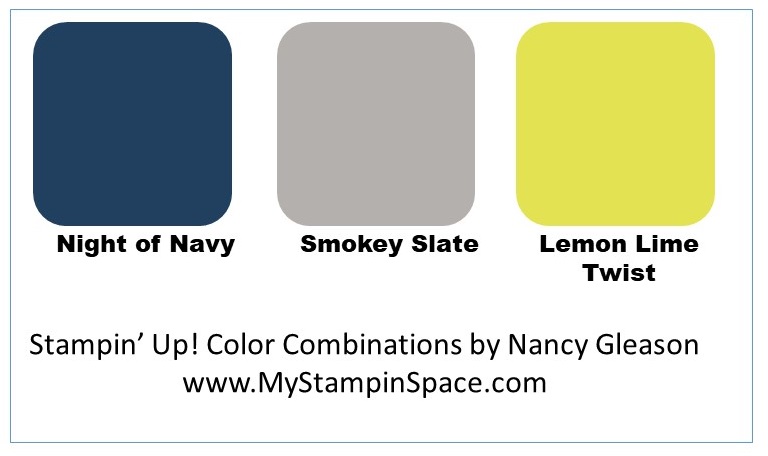
I was inspired for the color combination of Night of Navy, Smokey Slate, and LemonLime Twist by the jacket a fellow was wearing the other day. (I see Stampin’ Up! colors everywhere!) I mentioned to a fellow stamper that I could make a card with those colors, and she said she couldn’t wait to see what I came up with!
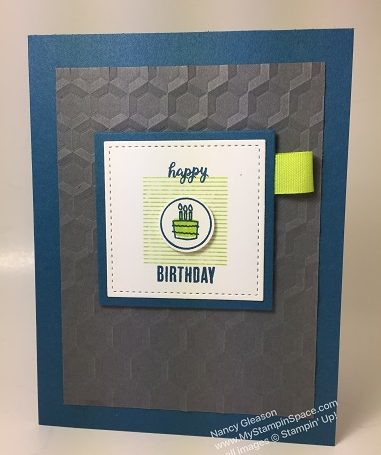
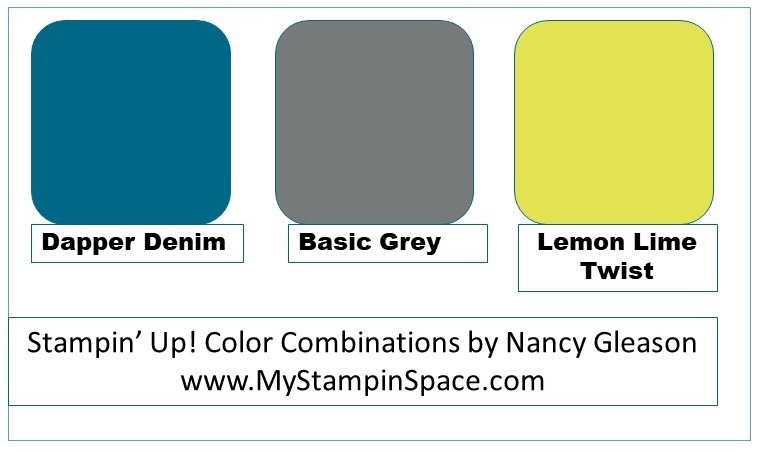
I liked this card, and color combination so much that I decided to make another card in a similar color combination of Dapper Denim, Basic Grey and Lemon Lime Twist. What do you think?
Here are the two colors side by side:
So which color combination do you like best? Leave me a comment with your choice.
Here are the color combinations for your reference:
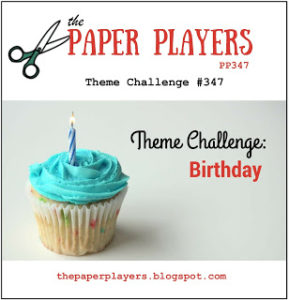
Because this is a birthday card, I decided to enter this into The Paper Players challenge.
See how well this fits into the challenge? Simple, right? You can click here or on the picture above to head over to the The Paper Players challenge and be inspired by all the other entries featuring Birthday themed projects.
I hope you’ll seriously add the new “Love Today” Planner Kit! and the Tabs For Everything Bundle to your next order. You can click here to shop my online store. Please use the Host Code shown on the top of this page.
Thanks for visiting me in My Stampin Space today. Come again, the door is always open and the Keurig is always on, ready to brew you a fresh cup!
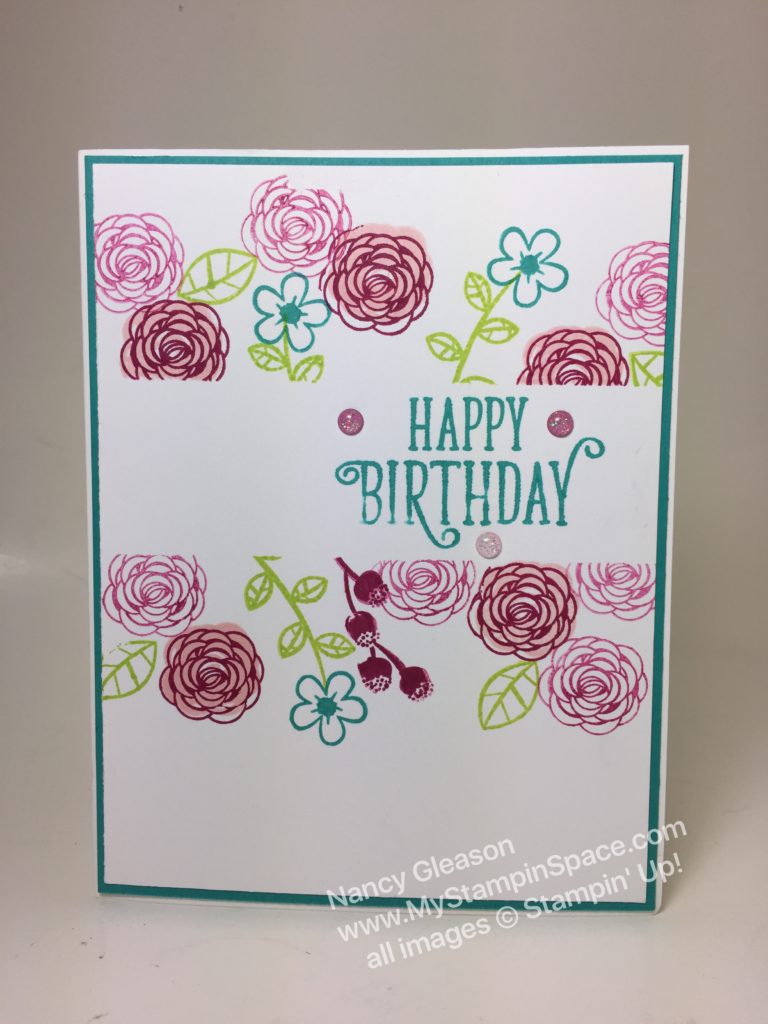
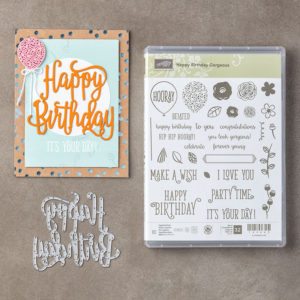
Happy Birthday, Gorgeous. I have to admit I I ‘passed over’ this stamp set my first, and probably second, trip thru the catalog. I did like the die that is bundled with it, and LOVED that Stampin’ Up! is now offering adhesive sheets for the intricate dies like the “Happy Birthday” die. But the stamp set just wasn’t calling my name, truth be told. But I earned this bundle for free, so I started taking notice of the potential of this ‘sleeper’ stamp set and discovered how much I LOVE this bundle called Happy Birthday, Gorgeous! The flowers works great with the 2-step stamping and just as well on their own.
I needed a project to do at a workshop. I wanted something easy for any skill level, yet something that would have some ‘Wow!” factor. These flowers are so easy to work with, and a simple masking technique creates the “Wow!” factor.
A few of the absolutely gorgeous Glitter Enamel Dots add the finishing touch!
You can easily recreate this card – just place a 1-1/4″ strip of scrap paper across the center; stamp your flowers then remove the scrap paper. You’ll be left with a nice clean slate to stamp your sentiment. Easy Peasy!
You can purchase this stamp set by itself or bundle it with the HappyBirthday die and save 10%.
This is one bundle that I would highly recommend make it to the top of your ‘must-have’ list. It is so versatile and fun and everyone needs birthday cards so you’ll reach for this over and over again, and every project can have a totally different look! From the flowers to the balloons to the banners and the great sentiments that can be paired together and the various font and sizes, it’s an all around winner!
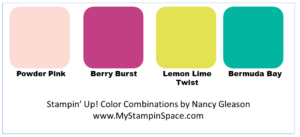
The colors I used to create this card are Powder Pink, Berry Burst, Lemon Lime Twist and Bermuda Bay. A great colorful color combination! Feel free to save this color combination for your own use. You can ‘pin’ this picture.
Thanks for visiting My Stampin Space today. Be sure to visit my online store to grab your Happy Birthday Gorgeous bundle today! Please leave me a comment and tell me what you like most about this card!
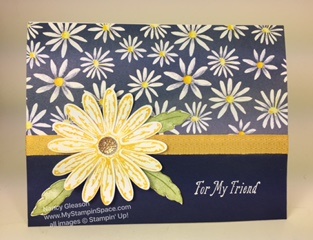
Daisies, the quintessential flower of summer. Who doesn’t love daisies? They are simple, whether grown in your garden, or growing wild in a field or meadow. White petals or yellows, daisies are simple and carefree. And I think the new product suite from Stampin’ UP! (available June 1st) called Delightful Daisy will be a top customer favorite! When you see everything in this suite, you’ll agree that everything is coming up daisies!
There is Daisy Delight stamp set, a Daisy punch, Delightful Daisy Designer Series Paper, 1/4″Double stitched ribbon in Daffodil Delight, and, be still my beating heart!….Faceted Gems in both clear & gold! This little babies are the 2nd best new embellishment being introduced in the new 2017-18 Annual Catalog.
Want to see what I made with this new product suite? Of course you do! So here it is:
Gorgeous, right? I love this just-the-right-size daisy, the faceted gems that make the best flower center, and the designer series paper that really is delightful. The really good news is that the 16 piece photopolymer stamp set and the punch are available as a bundle (save 10%). You’ll want to add this bundle and coordinating products in this Suite to your wish list!
Follow me on Facebook – I’ll be offering a video class featuring the Delightful Daisy Product Suite to anyone who purchases the Daisy Delight Bundle thru me. Details to follow. So make sure you follow me on facebook, and sign up for my newsletter so you don’t miss out.
I’ll also be showcasing more projects featuring new products, and some featuring retiring products that you will want to snatch up before they’re gone, in the coming weeks. I’m also working on a class schedule for May, June, July & August, and planning a Facebook Party to kick off the new catalog so everyone, whether near or far, can join me! Because I don’t want to you miss out, and I know you don’t want to miss out, make sure you follow me here, in my newsletter, and on social media.
If you follow my Facebook page (and you should!), then you know that I just spent the weekend at a Stampin’ Up! event called OnStage in Richmond, VA. Along with seeing so many other Stampin’ friends, and making many new friends, the hi-light of the event is the reveal of the 2017-2018 Annual Stampin’ UP! Catalog, including the new 2017-2019 InColors, and the new products being introduced in this catalog.
While I LOVE, LOVE, LOVE seeing the new catalog, do you know what I love even more? Yes, my hubby & son, of course. But aside from that, more than seeing the new products, I love getting the new products! And part of the event includes getting several stamp sets that I get to take home with me. How cool is that? Of course I had to break out these new stamps and play with them today.
My new friend to play with? This little piggy:
Isn’t this little just absolutely adorable? I love him (or her)! And I’m pretty sure that you love him too, am I right? This is just perfect for coloring in, I just grabbed my aqua painters, and took a little bit of Flirty Flamingo ink from my ink pad, and filled in a bit of color. Easy-peasy! It took me longer to decide if I wanted Flirty Flamingo baker’s twine, Wild Wasabi Baker’s twine, or Linen Thread. As you can see, I decided on the Linen Thread. It was just the right weight to add a little something without taking your eye away from the darling piggy! The Flirty Flamingo flower DSP (Designer Series Paper) in the paper adds to the light-hearted, happy, flowery feeling!
Leave me a comment below if you like this little Piggy, and tell me what you would name him/her. I think the perfect name would be Daisy.
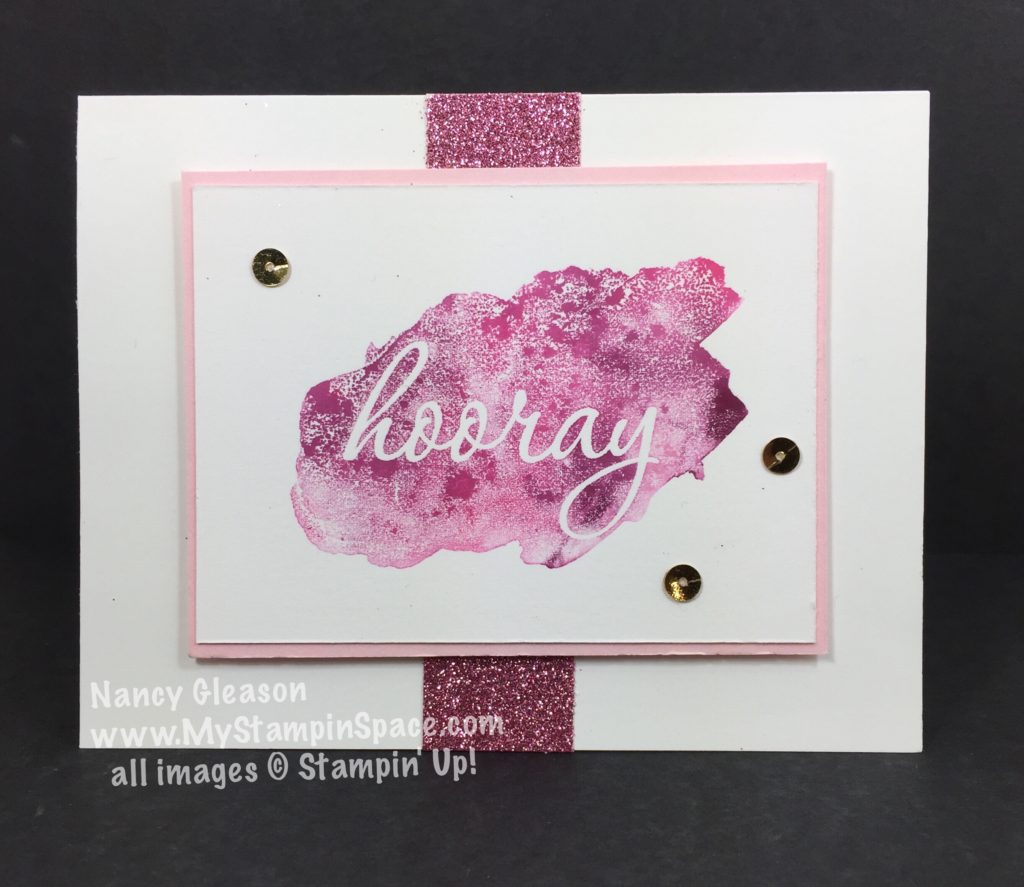
Last night I taught the “Baby Wipe Technique” to the ladies in my stamp class. It’s a really fun way to create a mottled, multi-colored effect and it’s perfect for any stamp with a large image area.
We had a really fun class and I always love when new people join me for a class! I consider it a great compliment when a regular student invites a friend to come! I had two ‘regulars’ invite friends and had 3 new peeps in class! It really was a great night. And despite the impending snowstorm/blizzard headed our way, everyone wanted to come to class! We decided since the snow wasn’t supposed to start until around 11PM, we could have class and get home before any real snow started. Here is the first project we made:
For this card, we used the Reverse Words stamp set (available for FREE thru March 31st during Sale-A-Bration). I used Pink Piourette, Melon Mambo and Rich Razzleberry ink. A bit of bling from the Glimmer Paper Assortment (also FREE during Sale-A-Bration!) and a few metallic sequins finished it off. Quick, easy and so much WOW!
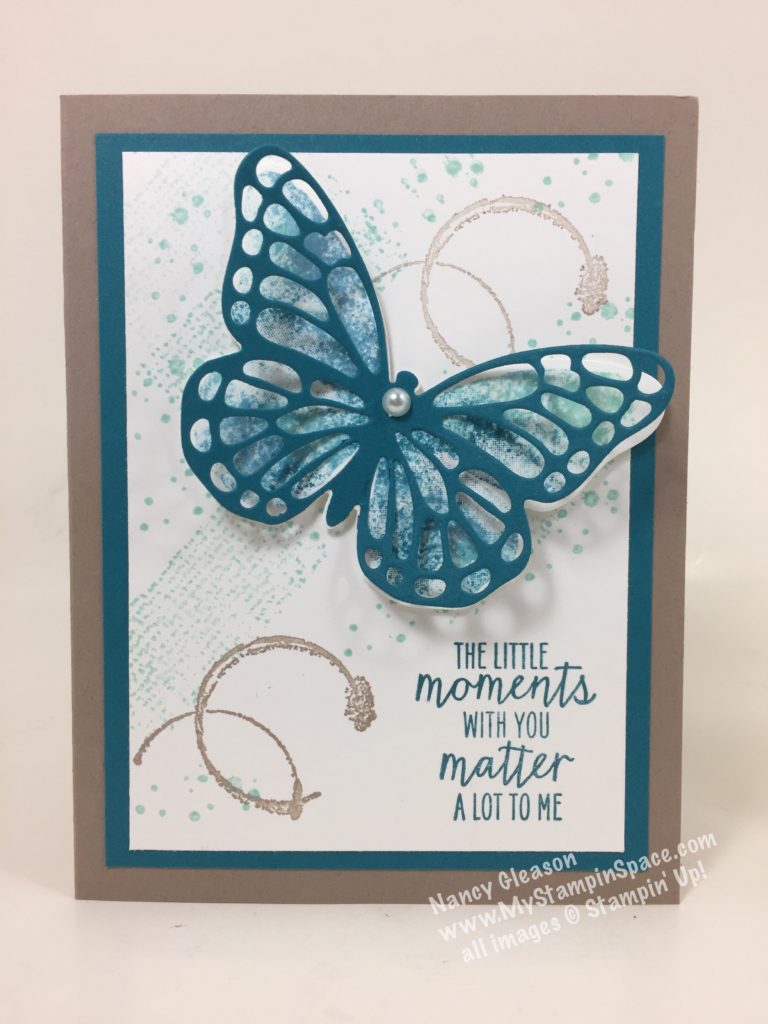
The next project also featured the Baby Wipe Technique, but we stepped it up a bit with more layers and stamping.
The Baby Wipe Technique was used to color the background layer of the butterfly which was stamped using an image from the Watercolor Wings stamp set and cropped out using Bold Butterfly Framelits. A detailed Butterfly was cropped from the Butterflies thinlits from Island Indigo cardstock and layered on top.
The Whisper White layer was stamped using the Timeless Textures stamps in Pool Party and Tip Top Taupe. The sentiment, from Watercolor Wings, was stamped in Island Indigo ink.
I love this color combination, and I hope you do too! Don’t forget that Tip Top Taupe will be retiring in a few months. Stock up now on your favorite Tip Top Taupe items before they are gone.
If you would like to learn how to do the Baby Wipe Technique you can watch a video tutorial I made here:
Don’t forget to subscribe to my YouTube channel.
Please leave me a comment and tell me what you think of the Baby Wipe Technique, and my projects! I love to hear from you and cherish each and every comment 🙂
If you want to purchase any of the items I’ve used here, please head to my online store and place your order. Remember, for every $50 you order (before shipping & tax) you earn 1 FREE Sale-A-Bration item! Please use Host Code SZYAENSF if you place an order that is less than $150 dollars. Thank you!
Well, if you’re in the Northeast and affected by Blizzard Stella, stay safe and warm! It’s a good day to hunker down and stamp, in between rounds of shoveling & snowblowing. Happy Stampin’!
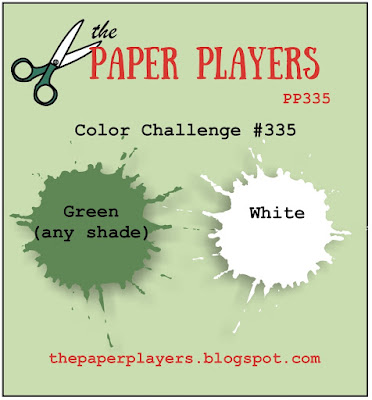
I just love when I make a project, and before I have a chance to post it anywhere, I discover that it fits the bill for a challenge. Well that’s exactly what happened here when The Paper Players posted their color challenge today.
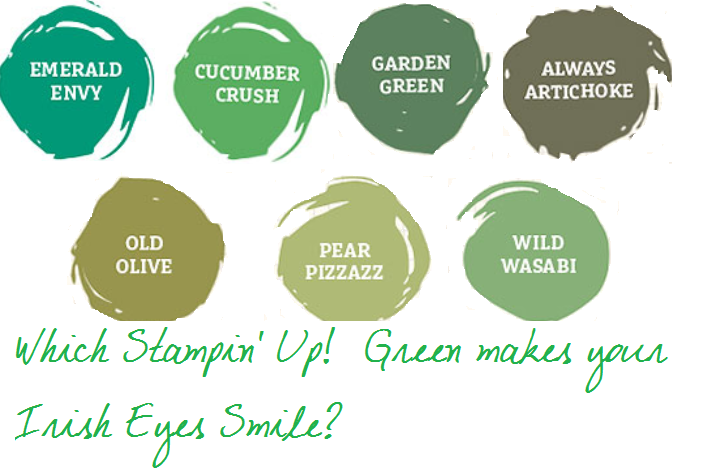
I posed a question on my Facebook page, asking my readers to respond with their favorite choice of green for St. Patty’s Day. I promised to randomly select a winner from all the comments to send a St. Patrick’s Day treat. When I selected the winner, I wanted to send along a card, and of course the card had to be green, Cucumber Crush, to be exact! I thought a touch of gold was fitting. So here is my card:
Lots of white and Cucumber Crush green accented with gold! Just perfect for the Paper Players challenge:
I started with a Stampin’ UP! notecard in Whisper White, added a layer of Cucumber Crush & White diagonally striped paper, a layer of Whisper White adorned with Washi Tape in gold, and a few gold metallic enamel shapes, and a star stamped in Cucumber Crush ink from the Confetti Celebration stamp set. A few snips from my paper snips cut out the shape in no time! Fast. Easy. Wow!
By the way, My Green Color Quiz? It was a dead heat between Emerald Envy and Cucumber Crush!
Don’t forget, we are in the final days of Sale-A-Bration! Your chance to earn all of these fabulous items is running out. Place a qualifying order of $50 or more from my online store to earn a free Sale-A-Bration item. Not sure what Sale-A-Bration is? Everything you wanted to know about Sale-A-Bration can be found here.
HOST CODE for March is SZYAENSF – please use this code if you place an order thru my online store that is less than $150 (before shipping and tax). If your order is over $150, do not use the host code.
So thanks for playing with me and The Paper Players today. Please follow my Facebook page, and sign up for my mailing list, so you won’t miss any contests that I run! Thanks for stopping by, come back soon.
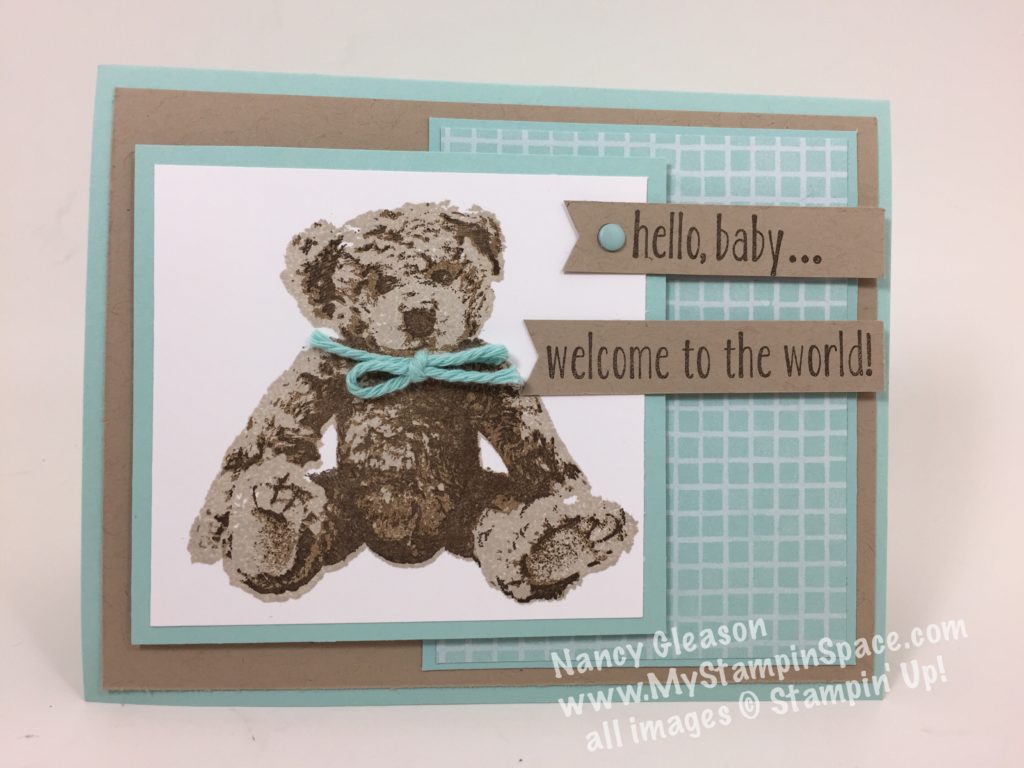
A friend and fellow stamper just had a baby boy, so I needed to make a Baby Card to send to her, and I knew the Baby Bear Baby Boy card was just the ticket! (Phew, that’s a mouthful!) A few weeks back, I made a baby card for another friend who had a baby girl. You can see the Baby Girl card here.
Well, one of the sayings I’m fond of saying is “when you find something that works, stick with it”! So I decided to make the same card, substituting Pool Party Blue for the Flirty Flamingo pink in my original card. Here it is:
I used the same layout, and the Crumb Cake and white but changed the color from Flirty Flamingo that I used on the baby girl card to Pool Party for today’s Baby Bear baby boy card.
The Pool Party patterned paper is from the Tasty Treats Designer Series Paper. I love how the Pool Party grid design is cheerful with a nod to masculine, compared to the Flirty Flamingo polka dot paper that has touch of whimsy and a feminine feel. Here are the two side by side:
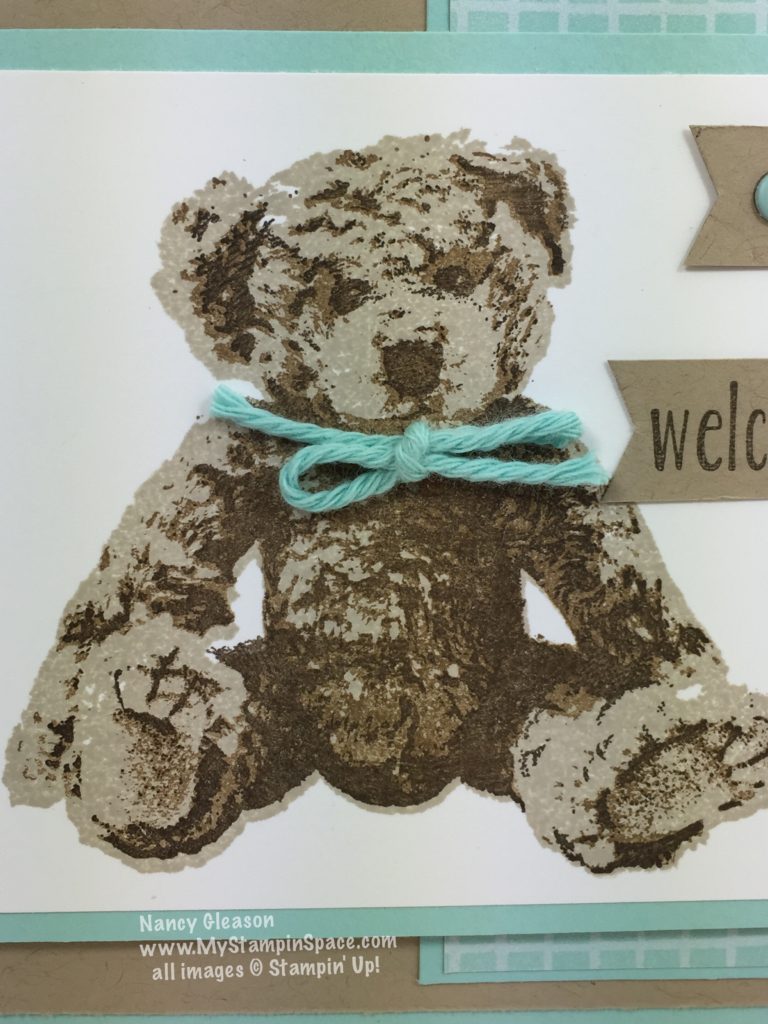
It’s easy to make a baby card using the Baby Bear stamp set. The triple stamp creates the life-like fuzzy texture of the bear, and the photopolymer stamps allow for perfect placement of the 3 images. The crumb cake and white is a great neutral color combo that works well with so many colors, and the Flirty Flamingo and Pool Party are no exceptions. While I used a piece of thick Baker’s Twine in a matching color, I placed the bow under the Baby Boy Baby Bear‘s chin, and on the Baby Girl Baby Bear’s head. For the girl card, I used 3 pearls as an embellishment, while on the boy card, I used a candy dot.
If you need to make a baby card anytime soon, I suggest you get this Baby Bear stamp set. Remember Sale-A-Bration is in full swing which means that you will get a Free Sale-A-Bration item for every $50 worth of product you order. Find out all about Sale-A-Bration here. To place an online order, click here.
Please leave me a comment below and let me know how you like this card. And please sign up for my mailing list using the sign up box on the right. Thanks,
I’m excited to share a bonus tutorial video with you today featuring the WaterColor Pencils and the Dragonfly Dreams bundle. I’ve been in love with the WaterColor Pencils when I first saw them back in November. (Yes, November – as a Stampin’ Up! demonstrator I get to see new products before the catalogs are released! My favorite perk! If you want to share in these perks, there’s no better time to join than now. Ask me how.)
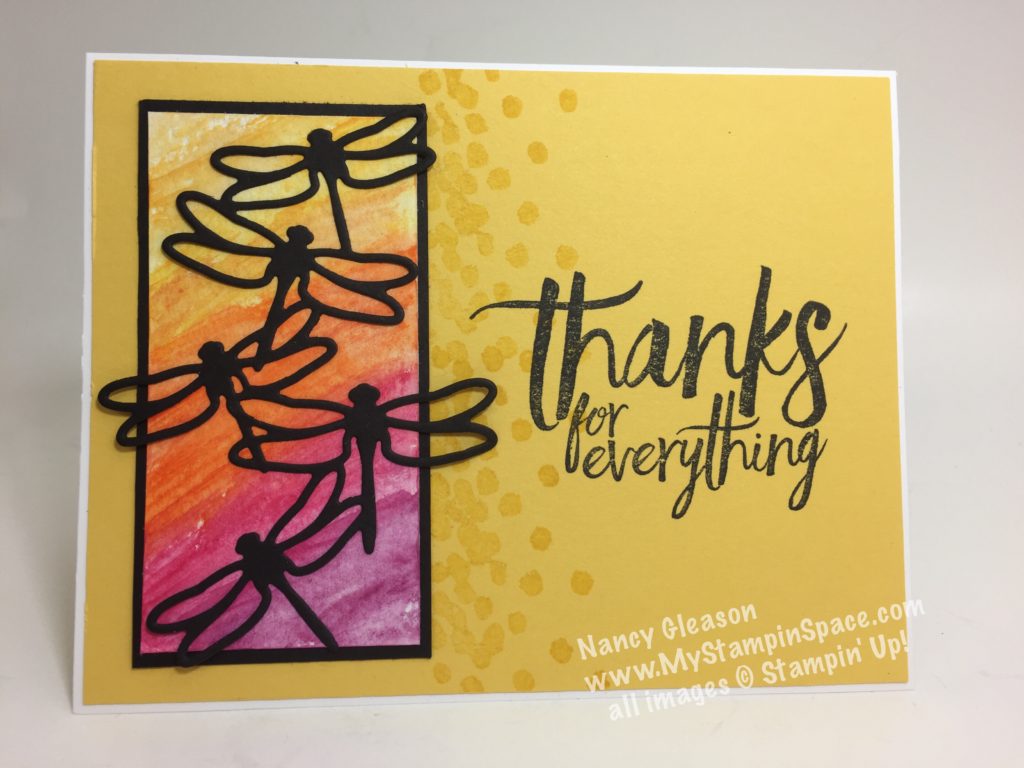
Here is the card I made and taught to my stamp club last week. The ladies loved it, and I hope you do too!
Daffodil Delight and Black are a striking color combination, don’t you agree? But what really makes it is the pop of color from the water colored panel. I used the WaterColor Pencils with an Aqua Painter to create this focal point.
I created a video to show you how I made it: Wow, this is like taking a class from me without the drive! And without the brownies 🙂
Now I know you just want to jump out of your seat and get some watercolor pencils for yourself so you too can join in on the Watercolor Craze! Supplies are very limited and are expected to go on backorder soon, SO ORDER THEM RIGHT NOW!Don’t wait. Don’t forget to add some Watercolor Paper, Aqua Painters and Blender Pens. You’ll also want Memento Tuxedo Black Ink if you want to stamp an outline image and then color in with watercoloring. When you place your order, remember two things: 1) To order in $50 increments so you can earn FREE Sale-A-Brationitems with each order, and 2) to use HOST CODE D3ZEY3UJ when you place an order that is less than $150.
Why use a Host Code? The host code allows me to earn Stampin’ Rewards on all orders placed thru my online store. They are used for products that I give away to my customers.(Just ask Vicky Blackwell who won a Party Animal Prize package as part of my SuperBowl contest. – Read all about that here.) Learn about Stampin’ Rewards here. If your order totals $150 or more (before tax & shipping) then DO NOT use the host code, but rather redeem the Stampin’ Rewards for yourself.
Please let me know if you enjoyed my tutorial video. If you like that, then you’d love attending one of my in person classes. Not only do we have fun and eat brownies, but we make a few projects and I try to teach one new technique at each class. Click here for a list of upcoming classes. Not in NE Pennsylvania? Let me host a Facebook Party for you and your friends instead.
Thanks for stopping by My Stampin Space today, please come back again soon. If you like what you see, sign up for my mailing list, Like me on Facebook and follow me on Instagram.
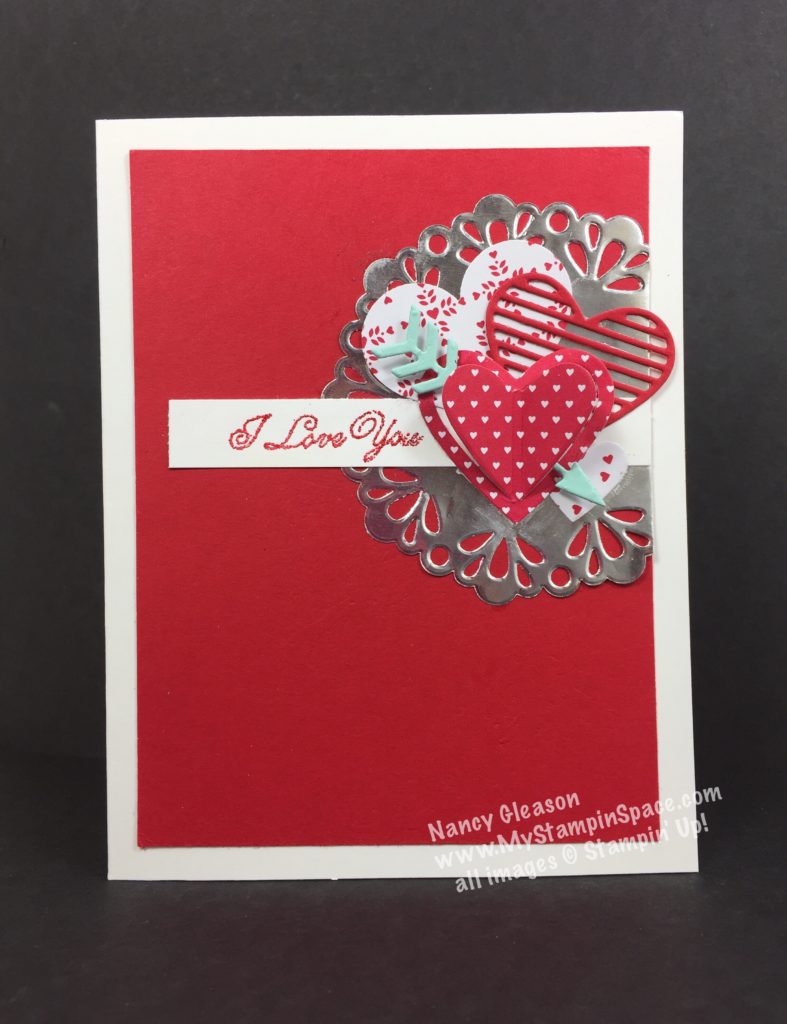
As soon as I saw this sketch from Freshly Made Sketches, I knew I wanted to use hearts for the 3 elements. And since I wanted to make a Valentine’s Day card with my Stamp Class this week, it was the perfect opportunity to make 1 project that fit the bill for both!
And here is the sketch that inspired this design.
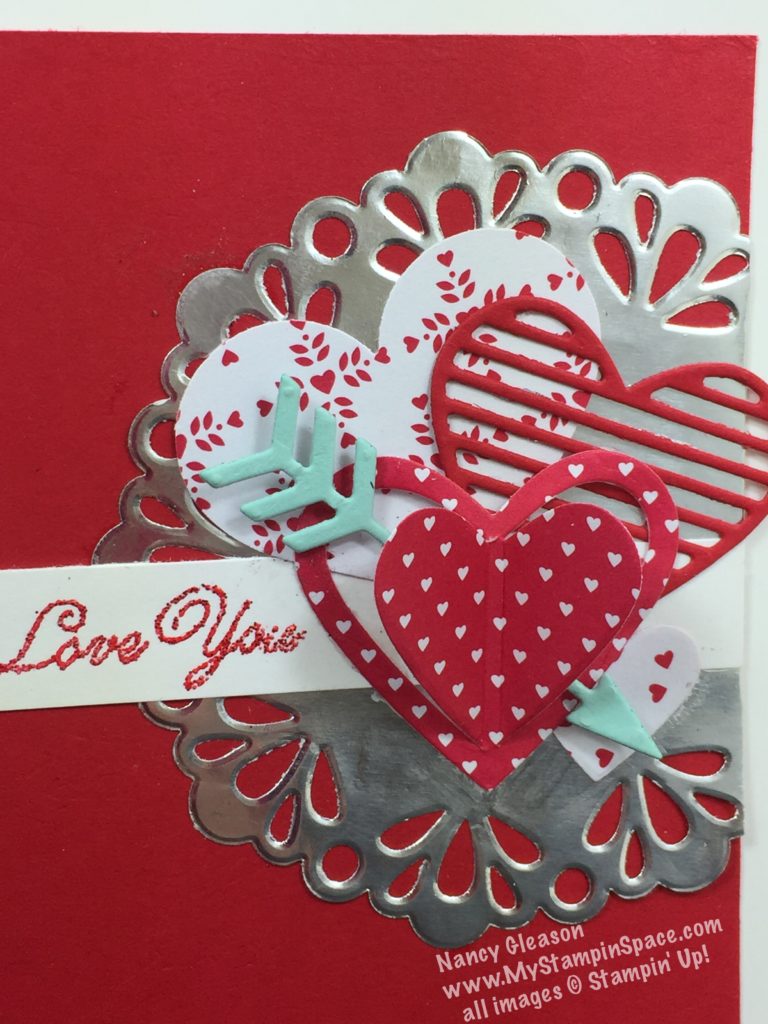
A Silver Metallic Foil Doilies is the perfect backdrop for all of the different hearts in the Sending Love product suite, including the 3D heart which is just perfect for being pierced by an arrow!
I’m so glad that I picked up the Metallic Real Red Embossing Powder from the 2016 Holiday catalog – it adds just the perfect amount of bling for the sentiment. I originally wanted to use Silver foil sheets for the arrow, but it really didn’t stand out. I tried black; that really stood out but I wasn’t sure about black on a Valentine’s Day card, so I opted for Pool Party. It provides enough contrast, but it is subtle enough that it doesn’t jump out as the first element you see. I am happy with the way it worked out.
The Love Notes Framelites dies are hugely popular: it was just announced that they are now being backordered until the end of February. You can still get the other products in this product suite, including the Sealed With Love stamp set, the Sending Love Designer Series Paper Stack, and more. If you really want the framelits, I would order them now, so that you’ll be among the first to get them when they are back in stock. I made a few other projects using the product suite which you can see here.
I’ll be making this card with the ladies in my Stamp Class Monday evening. I hope that they enjoy making this card as much as I did.
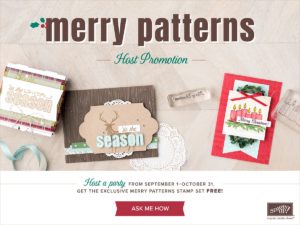 Don’t miss out on the Hostess special going on right now. Host a qualifying order of $300 or more, (or place a large order for yourself and get everything on your wishlist!) and get this exclusive stamp set “Merry Patterns” for free!
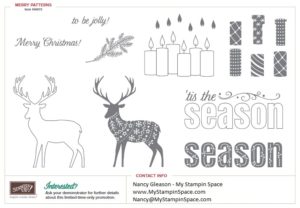
 If you like Christmas, don’t forget to
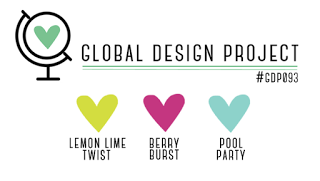

 I used the new


 When I selected the winner, I wanted to send along a card, and of course the card had to be green, Cucumber Crush, to be exact! I thought a touch of gold was fitting. So here is my card:
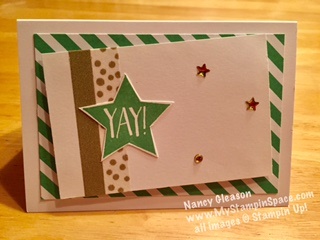
 Don’t forget, we are in the final days of