Hello Fabulous!

So once a month I host a Club; nick-named the “Craft Cult” by one of the ladies’ husband! The name stuck and we’ve been calling ourselves the Craft Cult ever since! Well both last month and this month, we’ve had to meet via Zoom. It’s been fun trying to come up with projects that we can all make together, separately from our own homes, using whatever cardstock, stamp sets, inks, & embellishments we each have.

This past weekend, I made two projects for our Craft Cult; each with a new technique, and I’d like to share one of those with you here.

Nesting Spotlight Technique

I don’t know if this has a name or not but I’m calling it the Nesting Spotlight. Basically you use any shape of nesting dies; I used the Layering Circle dies here. Simply nest and cut two different sizes at the same time. You’ll be left with a ‘donut’ and a full circle. The donut is garbage but you keep the smaller circle. You may want to use tiny strips of Washi Tape to hold your nesting dies in place as it running through the die cutting machine.
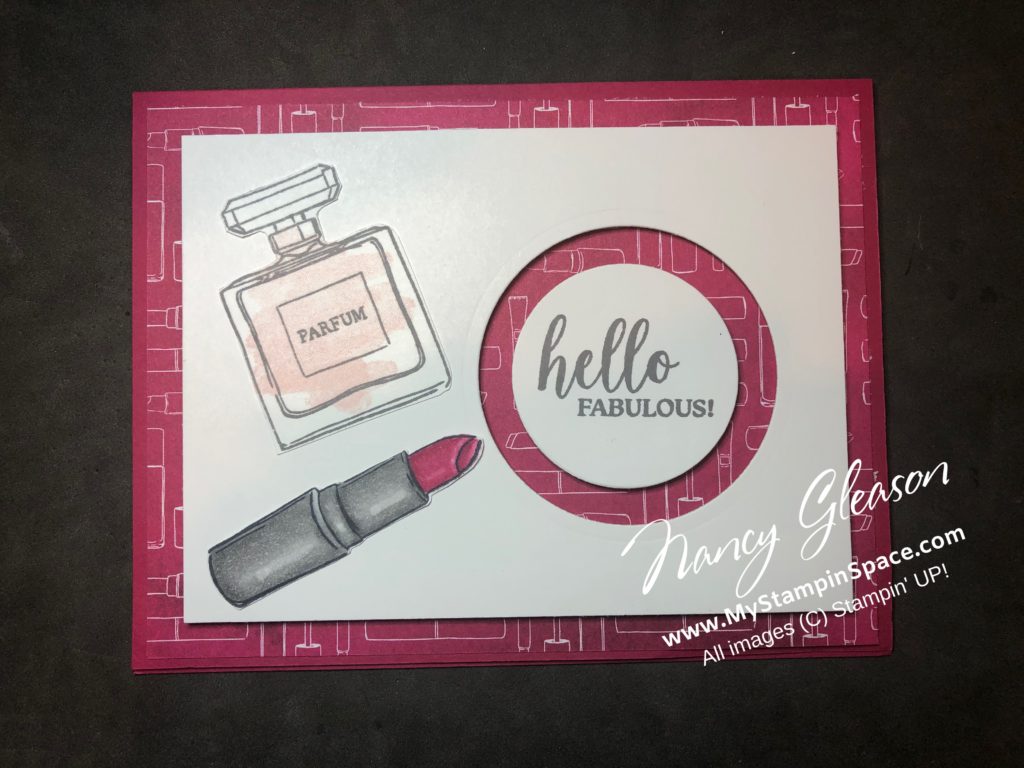
How to make this card:

I used Lovely Lipstick ( a Retiring 2018-2020 In Color – you can see my tribute post to all the Retiring 2018-2020 In Colors here) cardstock as my card base. My card base is an 8-1/2″ x 5-1/2″ piece of cardstock scored & folded in half. I used a piece of Best Dressed DSP cut to 5-1/4″ x 4″ on top of the card base. Then I used a piece of Whisper White 3-1/2″ x 4-3/4″. This is layer that I cut my nesting circles out of. I decorated this with stamped images from the Dressed To Impress stamp set and I stamped the Hello Fabulous greeting onto the small circle left behind. Then I propped this up on the card base with stamping dimensionals, added the circle, also on dimensionals. The negative space around the smaller circle just causes your eye to laser in on the sentiment. Very easy and adaptable to any stamp set and DSP that you have on hand.

I chose the lipstick patterned sheet of DSP to compliment the tube of lipstick that I decorated the front of the card with. Let’s take a closer look at the lipstick:
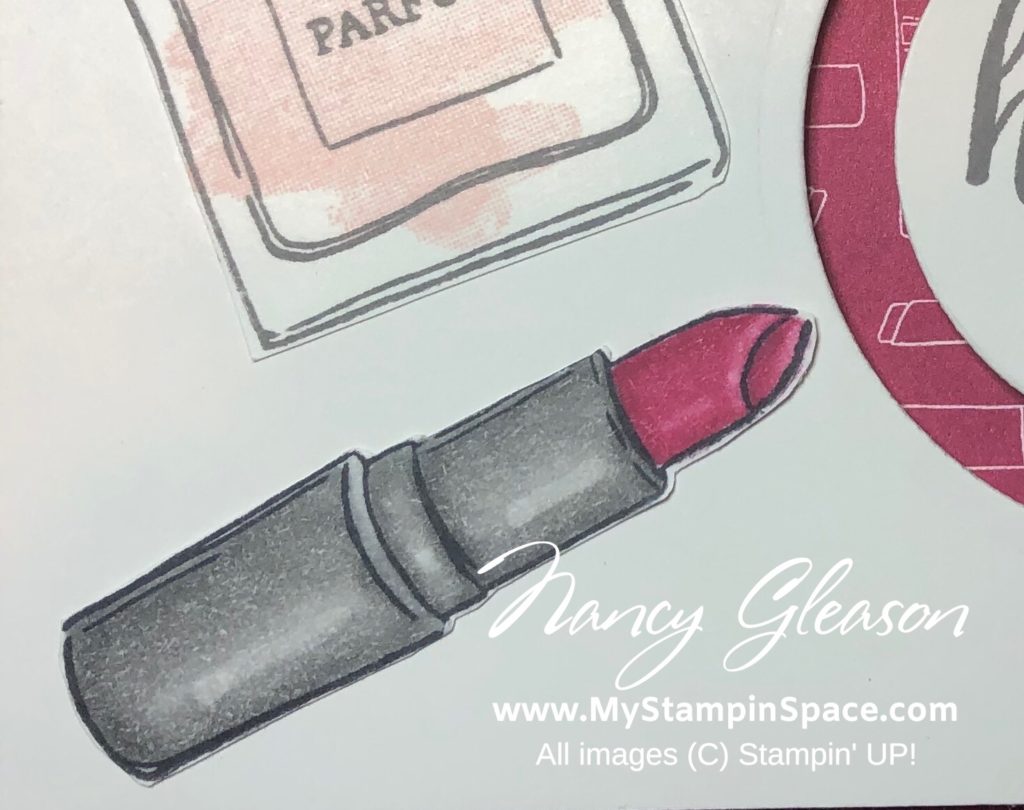
Stampin’ Blends

I colored this lipstick tube with the Stampin’ Blends markers. If you would like to learn to use the Stampin’ Blends to color like this, I just announced that I am starting an Online Class Series called “How to Use Your Stampin’ Blends”. If you are interested in this class, you can get all the details and register for that class here.

Please leave me a comment and let me know what you think of this technique. Is this a technique that you’d like to try? I’d love to hear your thoughts.

And now Hello Fabulous needs to jump into an envelope and head on over to a lovely lady who needs some cheering up while she’s isolating at home alone.

Nancy

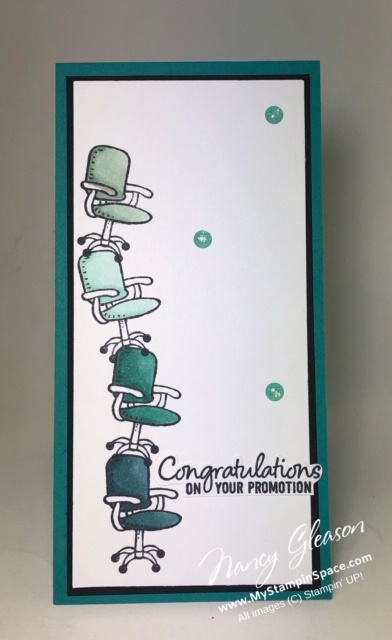
Stackin’ ‘Em Up! – a card for a co-worker who got a promotion

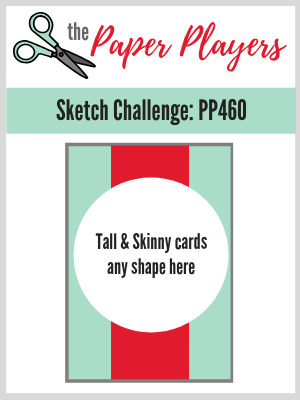
Today’s project is for the Paper Players Challenge – a tall and skinny card. It’s the perfect layout as I need to make a card for a co-worker who got a promotion. Actually, it is my boss who just got promoted and she’ll soon be leaving us and moving on to bigger and better places. I quickly added the “Welcome to the Team” stamp set to my order as I knew it would get a workout with my boss leaving, and a new person coming in to take her place. Plus it has several sentiments perfect for co-workers in many situations. You can see the Welcome to the Team stamp set here.

Now let’s take a look at my card:

All Stacked Up for a Promotion -a tall and skinny card by Nancy Gleason for the Paper Players Challenge #460

The tall and skinny layout is perfect for stacking the chairs up. I thought the stacked chairs represented moving up in the world, which is what happens when you get a promotion, right?

The Paper Players Challenge # PP460

Click on the challenge picture to head over the Paper Players blog and play along.

Paper Players Challenge #PP460

Stampin’ Blends were called in to create an ombre effect of office chairs. I love coloring with the Stampin’ Blends. I’ve been teaching a Stampin’ Blends Color Club Class, once a month for the past 8 months and the more I use them, and work with them, the more I love them! (Spoiler Alert – I’m going to start offering the Stampin’ Blends Color Club Class as an online class! If this interests you, let me know). Take a closer look at the shading and blending:

Stampin' Blends create an ombre effect in the stack of office chairs

The Details

I used a different color of Stampin’ Blends markers on each chair, from the top I used Mint Macaron, Pool Party, Bermuda Bay and Pretty Peacock. Using the darkest color on the bottom visually ‘grounds’ your elements. I stamped the chairs in Momento ink (perfect when using the Stampin’ Blends), and the sentiment on a scrap of cardstock. I used my paper snips to fussy cut the sentiment- this made it fit better and gave the visual interest of overhanging the layer as well. A few Glimmer Enamel Dots add some bling.

To create the Tall & Skinny, I started with a piece of Bermuda Bay cardstock 2-3/4″ x 11″ scored and folded in half. Then a piece of Basic Black cardstock cut to 2-1/4″ x 5-1/4″, and finally Whisper White Cardstock cut to 2-3/8″ x 5-1/8″.

This card was so fun to make! I hope that you enjoy it, and even more so, I hope that I inspired you to make a card like this yourself if you need to make a card for a co-worker who got a promotion. To order any of the supplies I used to make this card, visit my online store here.

If you are placing an order, don’t forget to visit the Clearance Rack, it was just recently re-loaded with lots of items which are available at deep discounts while supplies last.

Update: Purple Posy Ink is now available to order! You can order an individual Purple Posy ink pad, or the 2019-21 InColor Ink Pad Collection.

Have you signed up for my Mailing List? My mailing list subscribers get members only exclusive project tutorials, tool tips and more! Click here to sign up for my Mailing List.

Like me on Facebook to follow me on Social Media.

Thanks for stopping by My Stampin’ Space. See ya soon! – Nancy

Stamparatus Accessories

When you find that perfect dress, what do you do?  You add just the right necklace and purse, and of course, new shoes, right?  We all know the accessories make the outfit.  Well our favorite toys and tools need the right accessories to complete them, too.  Introducing, Stamparatus Accessories.  The perfect compliment to your Stamparatus!

Stamparatus Accessories

NEW Stamparatus Accessories Now Available to Order

We know that owning a Stamparatus means it was love at first sight and we wanted to give you even more love about this versatile stamping tool by introducing Stamparatus accessories!

The new accessories are:

  • Small Grid Paper (#149621, $6.50) – Grid paper perfectly sized to fit the Stamparatus for precision stamp alignment every time.  (50 sheets)
  • Stamparatus Plates (#149693, $15.00) – Additional plates allow you to have multiple stamp arrangements ready to go!  (2 plates)
  • Stamparatus Foam Mat (#150081, $3.00) – Extra foam mat for photopolymer stamping.  (1 mat)
  • Stamparatus Accessories Pack (#151049, $24.50) – Includes two Stamparatus plates, grid paper, 1 foam mat.
  • Magnets (#148213, $12.00) – Replacement magnets for the Stamparatus.  (2 magnets)

Order your Stamparatus Accessories here.

See the Stamparatus Accessories in action in this video:

World Card Making Day

Perfect for beginner card makers and seasoned card makers alike, there are kits and supplies on sale this week just for the World Card Making Event.

Check out this PDF flier of sale items here.

Shop the World Card Making Day Sale here.

Don’t forget that the Stamparatus, and the Stamparatus Accessories, are great for card makers of all skill levels.  When you order your  World Card Making Day Sale kits, don’t forget to grab a Stamparatus and Stamparatus Accessories to make your card making and rubber stamping more precise!

LAST CALL!making Christmas Crafts   Would you like to receive tutorials for 12 exclusive Christmas projects   for FREE.   I’m sure the answer to that is a “Of course I want to!”  My 4th annual 12 Weeks of Christmas newsletter is slated to begin this week.   Only the folks who have subscribed to my mailing list will receive this newsletter and the 12 project tutorials delivered to their in-box for the next 12 weeks.  It’s not too late, you can subscribe to my mailing list right here, or fill in the box that pops up when you come to my blog.  And please be sure to pass this on to your friends who want to receive 12 free Christmas project tutorials in their in-box also.  Friends don’t let friends miss out on a great deal!
Happy Stampin,

Nancy


I’m addicted to coloring!

My name is Nancy Gleason, and I’m addicted to coloring!  Adult coloring is such a popular hobby but when you are coloring with the Stampin’ Blends markers and the new stamp sets from Stampin’ Up!, it’s like adult coloring on steroids!  And I’m not ashamed it’s created an addiction!

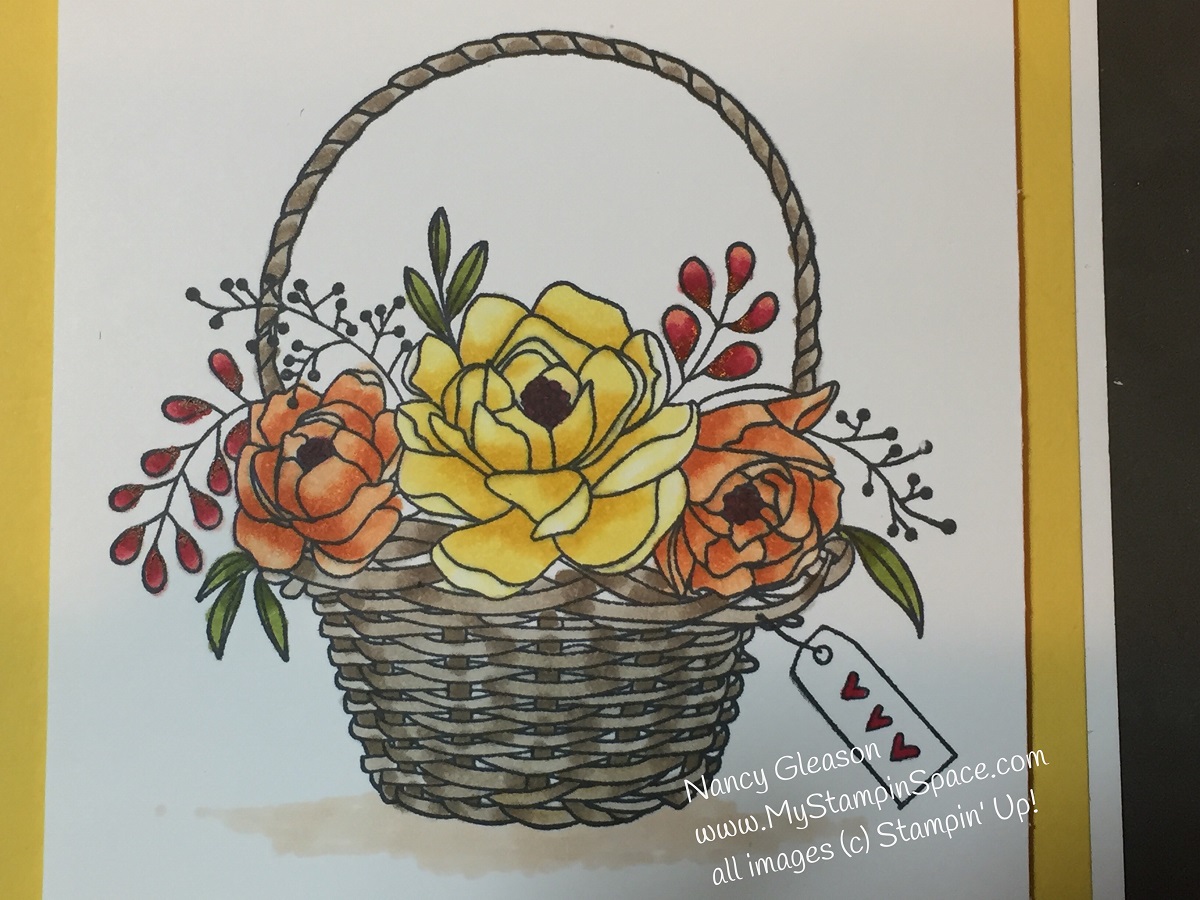
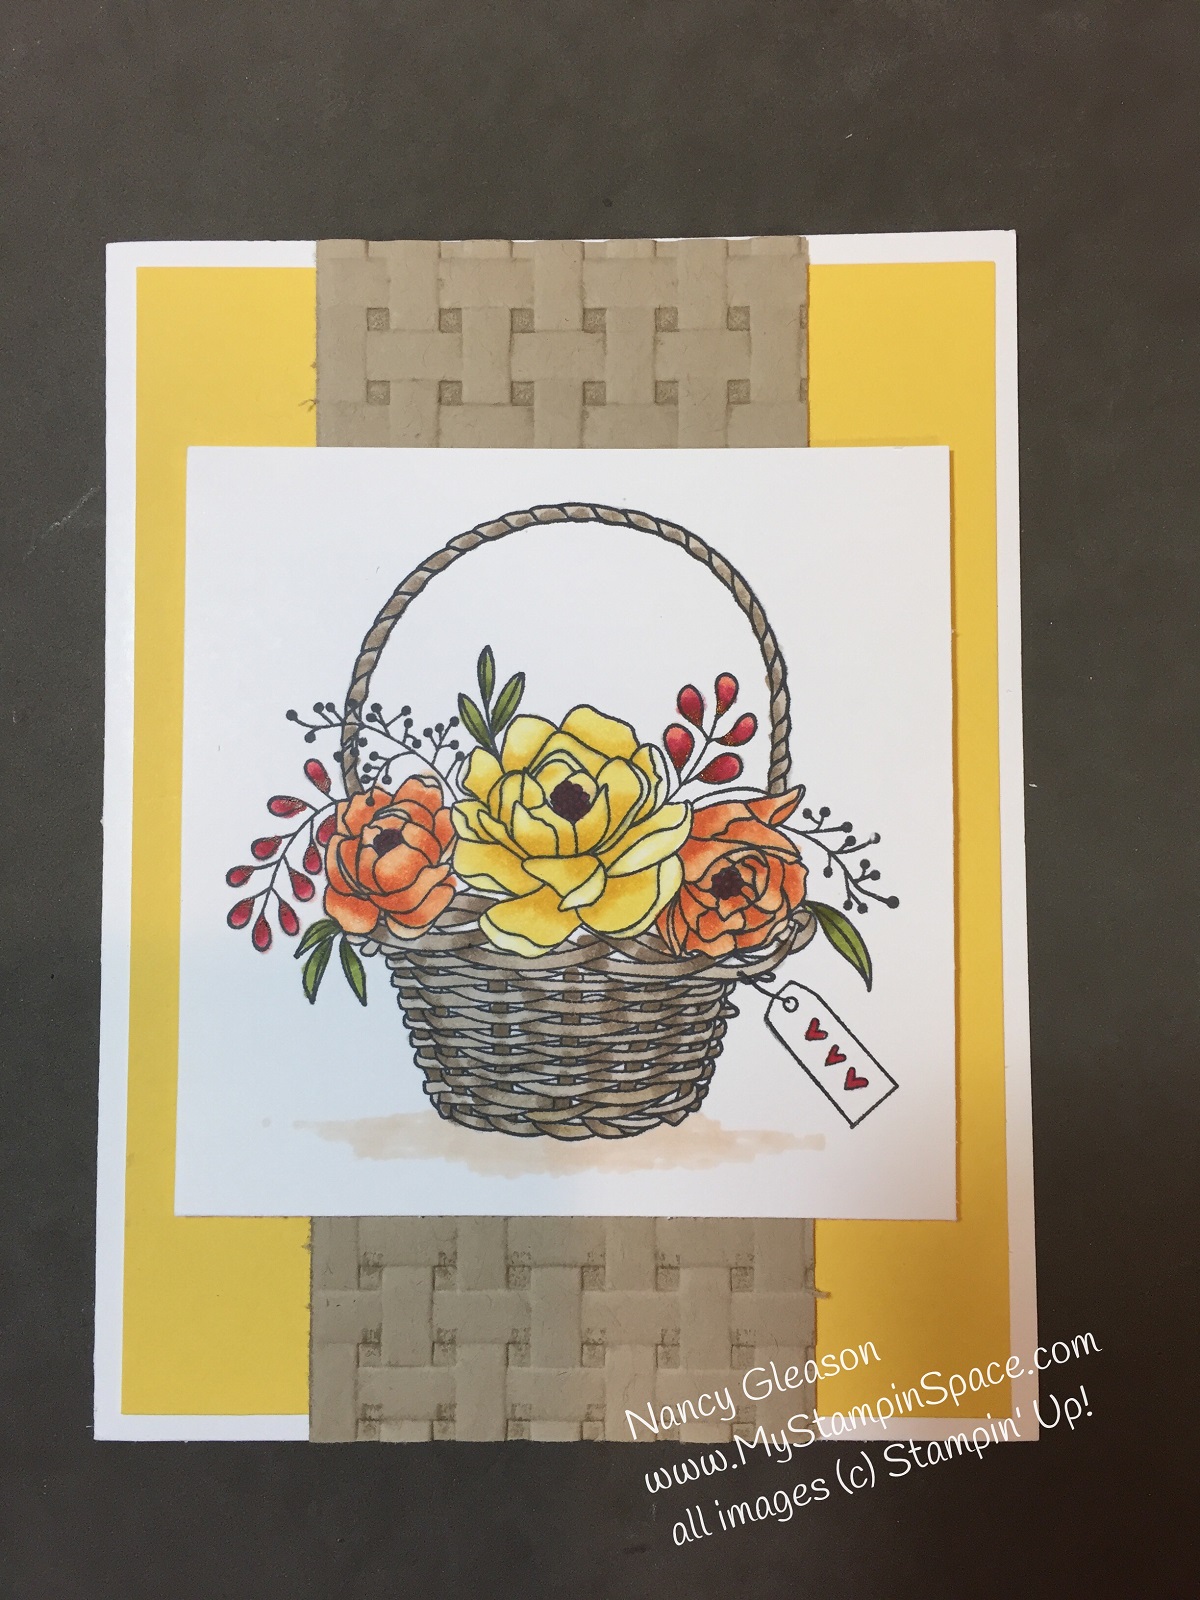
The new round of Sale-A-Bration was just released on Feb. 16th and this new Blossoming Basket bundle with the Blossoming Basket stamp set and coordinating Basket Weave TIEF is enabling my addiction!  Let me show you what I’ve been working on:Blossoming Basket stamp set colored with Stampin' Blends

The coordinating Basket Weave Textured Impression Embossing Folder has a deep texture that is just the perfect compliment to this basket.  I added some ink to the TIEF to create even more depth!  A 2″ strip adds just enough texture to this card.

The more I use the Stampin’ Blends markers the more I love them!   Look at the shading you can achieve:  I used Crumb Cake for the basket, Daffodil Delight on the large rose, Calysp Coral for the smaller roses, Cherry Cobbler for the berries, and Old Olive for the leaves.  A small swipe of Ivory under the basket helps to ground it.

Blossoming Baskets in Yellows & Oranges

Have you tried the Stampin’ Blends yet?  I can’t get enough of them!  You can see some other projects I made with Stampin’ Blends here and here.  Come back again as I’ll have another card that I made with this stamp set but in a totally different color combination.

Sale-A-Bration

Blossoming Basket

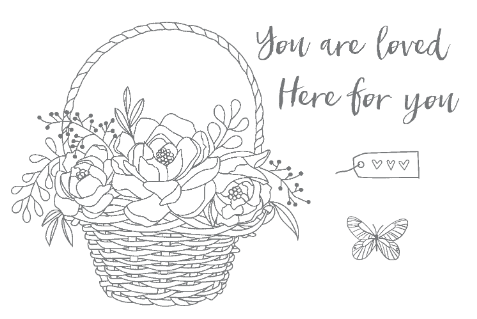
This is the stamp set Blossoming Basket that is available for free during Sale-A-Bration with a qualifying order.  You can always order Stampin’ Blends to qualify for this stamp set which comes bundled with the Basket Weave TIEF. You can watch a video from Stampin’ UP! here on the Blossoming Basket bundle.

Click here to place an online order now.

So much to color and not enough time to do it!  Too bad I have to go to work every day!  I’d rather stay home and stamp and color all day! That would be much more fun, don’t you think?  After looking at what you can do with Stampin’ Blends markers, it’s not really a bad thing that I’m addicted to coloring!


How to Use the Stampin’ Blends and How to Get them on Sale!

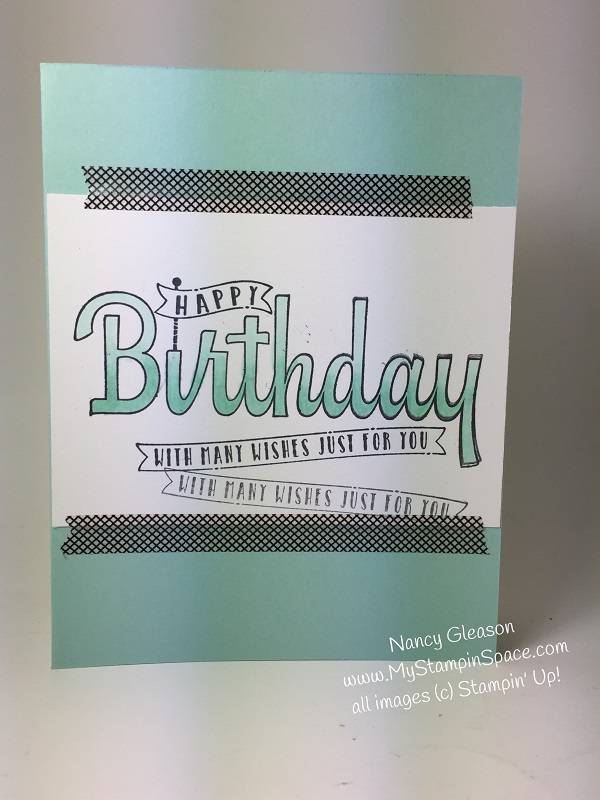
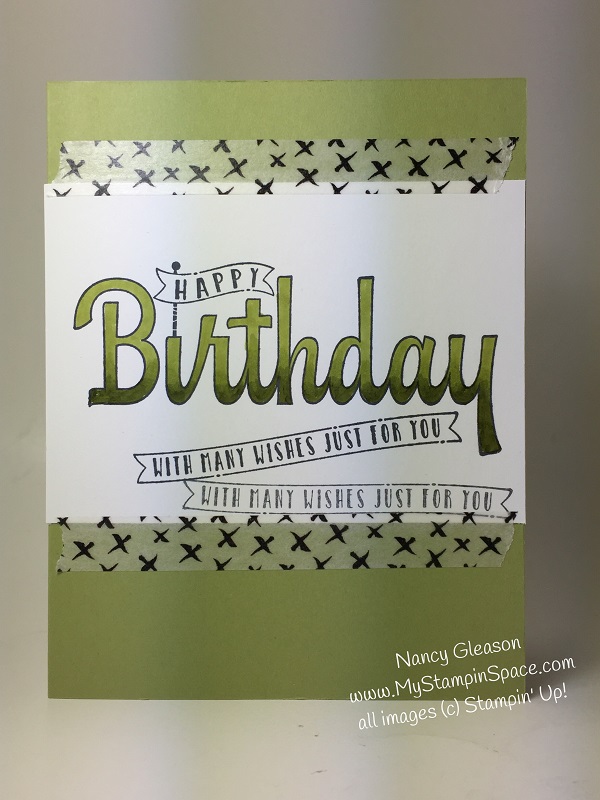
Today’ I am going to show you how to use the Stampin’ Blends markers to achieve a soft, gradated or ombre look. I recently taught a class on how to use the Stampin’ Blends and I want to share that project with you.  This example uses Pool Party Stampin’ Blend markers.

How to Use Stampin' Blends with the Birthday Wishes for You Stamp Set
See how the color is darker at the bottom of each letter and lighter towards the top? That’s the beauty of the Stampin’ Blends markers!

I used the Birthday Wishes For You, #145742 stamp for the Happy Birthday, and used the light and dark of each shade of color to get my results.

There are a couple of tips you should know about to get good results with the Stampin’ Blends.  First, use the Memento Tuxedo Black Ink,  #132708 to stamp the outline stamp.  There are several stamp sets in our Annual Catalog, as well as the Occasions catalog that will work wonderfully with the Stampin’ Blends.  Secondly, you need the light and dark version of each color.  You will always want to color with a scrap piece of paper under the piece you are working on.  The markers do bleed thru the cardstock and you don’t want to ruin your work surface.  

Here are other versions of the same card – This one uses Old Olive Stampin’ Blends and Old Olive cardstock:

How to Use Stampin' Blends with the Birthday Wishes for You Stamp Set

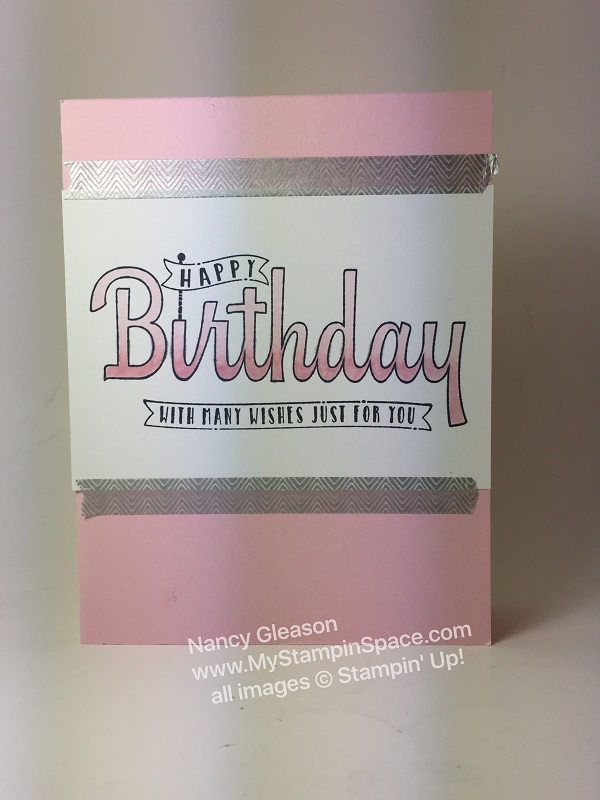
Here we go with Pink Pirouette Stampin’ Blends and Pink Pirouette cardstock:How to Use Stampin' Blends with the Birthday Wishes for You Stamp Set

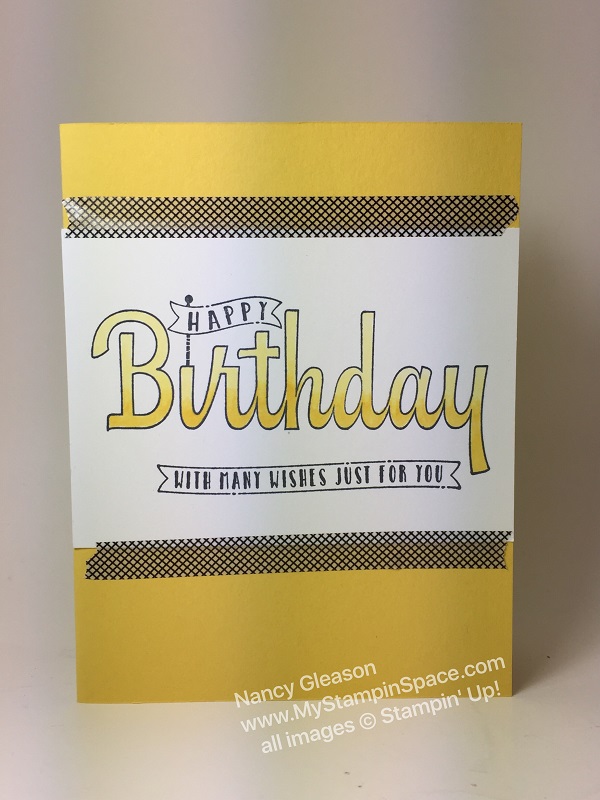
And lastly, below is Daffodil Delight Stampin’ Blends and Daffodil Delight cardstock:How to Use Stampin' Blends with the Birthday Wishes for You Stamp Set

Do you have a favorite?  I have to say that whatever color I was coloring at the time was my favorite; I love them all!

This is a great stamp set to practice with the Stampin’ Blends as it very forgiving.  I started with the dark shade at the bottom of each letter, working 2-3 letters at a time, then I went in with the lighter shade working from the top down.  I overlapped the light shade over the ‘line’ where the light and dark met.  This coloring back and forth across that line allowed the colors to blend so that the colors blended together, rather than having a hard line.

I recently taught the ladies at my Wine Down Wednesday stamp class how to make this card.  Everyone walked away with a card they were proud to show off, and loved the Stampin’ Blends!

I’ll be showing a more detailed image colored with the Stampin’ Blends later this week so make sure you come back to see that. In the meantime I wanted to share with you how you can get Stampin’ Blends for yourself.

what’s the best way to get stampin’ blends?

You can buy the markers individually for $4.50 each or $9.00 for the set of Light and Dark shades of each color.  There are 12 Colors plus a Bronze, and Ivory, and a Color Lifter pen for a total of 27 markers.  You can purchase the Stampin’ Blends Marker Collection for $121.50 plus 10% shipping. Or you can purchase the Stampin’ Blends Collection for $99 and get free shipping.  Which option will you choose?  If you want to order the Stampin Blends Marker Collection for $121.50, or buy individual markers, CLICK HERE.

If you want to get the entire set of 27 Stampin’ Blends markers for only $99, you can purchase the $99 Starter Kit.  You get to choose $125 worth of products, and get free shipping.  With this option you can elect to become a ‘wholesale customer’ or ‘hobby demo’.  You can also choose to become a ‘business builder’.  Either way you get the same perks and benefits and you get to enjoy the discount, the early catalog reveal and more.  You’ll become part of my team, My Stampin’ Circle, too!

I hope that you’ll take advantage of the $99 Starter Kit deal to get the complete set of Stampin’Blends as this is the best bang for your buck!  Oh, and did I mention that you will also get to choose 2 FREE Stamp Sets (any value) when you purchase the $99 Starter Kit during Sale-A-Bration (thru March 31st)?  Which 2 stamp sets will YOU choose for Free with YOUR starter kit?

If you enjoyed the projects in today’s post please COMMENT HERE  I love hearing from you. If you have any questions, feel free to EMAIL ME.  And don’t forget to SUBSCRIBE to my FREE monthly newsletter & exclusive offers.

I hope you enjoyed learning How to Use the Stampin’ Blends Markers and how you can get them discounted by purchasing the $99 Starter Kit.

Happy Stampin’

Nancy Gleason. Stampin' UP! demonstrator, teacher, and blogger


I’m still Quilting!

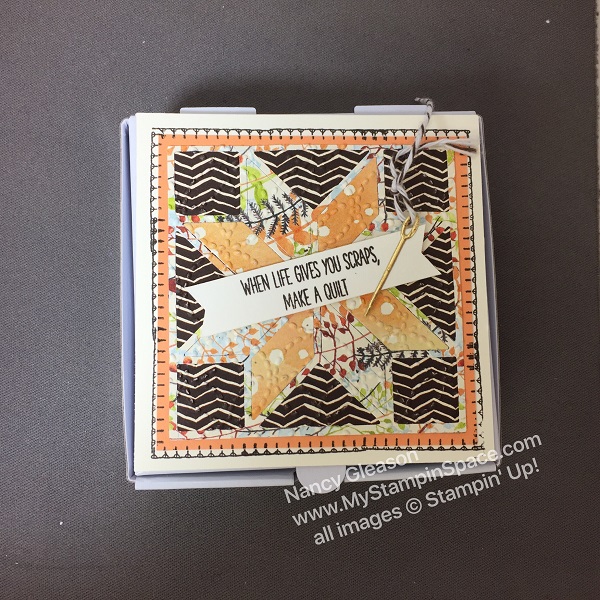
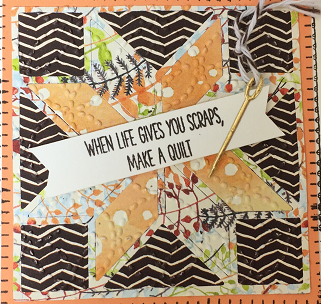
I just can’t put down the new Quilted Christmas suite of products!  I’ve already made quite a few Christmas cards using this set, (you can see a simple Quilted Christmas card here and even watch a video of how to make it!).  Today I wanted to make something using Autumn colors for the TicTacToeChallenge, and I’m still Quilting!  Who says the Quilted Christmas suite is just for Christmas?  Look what I made:I'm Still Quilting for Autumn!

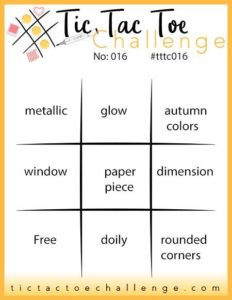
TIC, TAC TOE CHALLENGE #16

For this challenge I used the diagonal from upper right to lower left; Autumn colors, paper piece and Free.

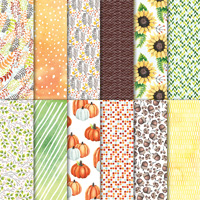
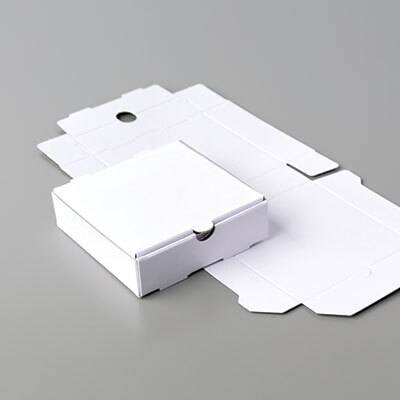
TTTC16My quilt square adorns a mini pizza box.     The autumn colors came from the Painted Autumn Designer Series paper.  The Quilt Builder Framelit dies make easy work of paper piecing.For free I chose to add metallic, which you can see is the sewing needle cropped from gold foil sheets.

Let’s take a closer look at the paper piecing.  paper piecing

Christmas:

I’m going to be featuring more of the Quilted Christmas in the next few days, including a Quilted Christmas special offer you won’t want to miss!  Make sure you come back to my blog, or better yet, subscribe to my mailing list so you won’t miss any offers from me!

And if you like Christmas, then you definitely want to make sure that you subscribe to my mailing list.  Beginning October 4th, I will be sending out my annual 12 Weeks of Christmas newsletter featuring an exclusive Christmas project each week for, yup you guessed it, 12 weeks!  These projects will NOT be available to anyone other than my mailing list subscribers as my gift to you.  So if you’re not on the list, you won’t get the newsletter.

Order Online:

If you want to purchase any of the products I used to create this little pizza box, head over to my online store, or click on any of the images below.  Don’t forget to hop over to the TicTacToeChallenge to see some of the other great projects.  But before you go, please leave a comment for me and let me know if the Quilted Christmas suite is on your wish list.

Thanks for stopping by My Stampin Space today!  Come back and stamp with me again.

Nancy Gleason

How to Make a Rectangle using only a Square Framelit Die

Well, that sounds impossible, doesn’t it?   Not only is it not impossible, it is actually quite simple!  And today I am going to show you just how to make a rectangle using only a square framelit die!

I told you that was easy!  Please leave me a comment and let me know if you like this trick.  Thanks 🙂

If you missed yesterday’s blog post, which created the necessity for me to make a rectangle from the Square Framelit die, you can view that here.

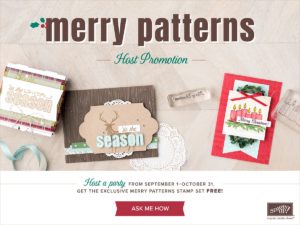
merry patterns Don’t miss out on the Hostess special going on right now.  Host a qualifying order of $300 or more, (or place a large order for yourself and get everything on your wishlist!) and get this exclusive stamp set “Merry Patterns” for free!
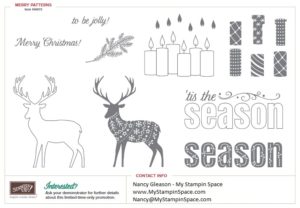
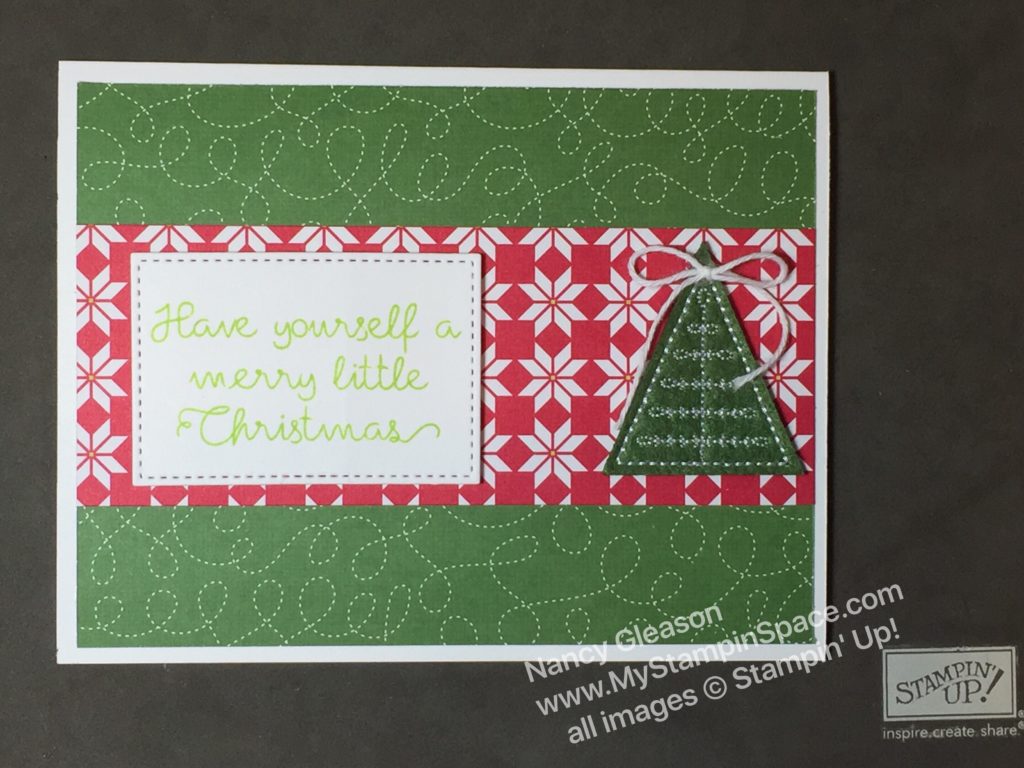
Merry Patterns, argyle sweater on deer, tis the season, candles

Contact me if you would like to host a party, even a Facebook Party so you can earn this stamp set.


Check back with me, I have more to share from the Quilted Christmas product suite!

Happy Stampin’

How to Make a Simple Card

Hi Friends,

I finally had my chance I had to play with all of the Quilted Christmas products and even though I am not a quilter (I don’t even sew), I fell head over heels for the product suite!

Today I am going to share a video with teaching you how to make a simple Christmas card using this product bundle.  This is perfect for beginners as the coordinating products in the bundle do all the work for you to create beautiful cards!    Seasoned paper crafters will enjoy this product suite as you can create very detailed quilted projects.  #SomethingForEveryone!

Don’t miss my reference to another video within this video!  This is a trick that you will thank me for 🙂  You’re welcome!

So without any further adieu, let’s make a Christmas card:

What do you think?  Please leave me a comment; I love to hear from you.

Here’s another card I made using the same layout, just a different sheet of paper.

How to make a simple card using the Quilted Christmas suite

Which one do you like better?  The paper used in the video or in the photo?

I taught the ladies in my Mini Christmas Card Club how to make this card and they all loved it!  From being so simple, and just using one sheet of paper from the 6×6 stack, they all felt this was a great card when you have to make a lot.  It’s also a very versatile layout and the card can be used for any occasion just by switching the patterned paper and sentiment out.    With all the beautiful patterned paper that Stampin’ Up! offers, you can really let the paper do all the work!

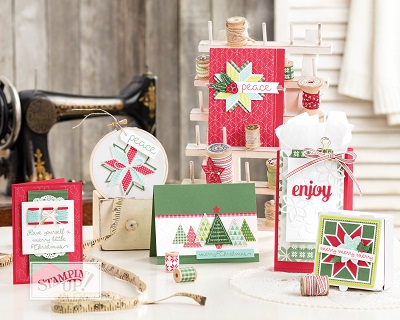
Well, I hope you enjoyed making a card with me.  I will be blogging about the other cards I made using the Quilted Christmas product suite.  In the meantime, check out some of the inspiration from the catalog:Quilted Christmas Product SuiteIf you like Christmas, don’t forget to sign up for my mailing list.  Beginning Oct. 4th, my mailing list subscribers will get my 3rd Annual 12 Weeks of Christmas newsletter complete with an exclusive Christmas project delivered to their inbox each week.  If you’re not on my list, you won’t get those 12 Christmas project tutorials. 

If you would like to purchase the Quilted Christmas bundle, or any other products, click here to shop my online store.

Happy Stampin’,

Nancy

WaterColor Pencils

Yesterday I shared a card that I made which featured a floral stamp colored in with the WaterColor Pencils.

In case you missed it, you can view that project here.

I made a video showing just how amazing our WaterColor Pencils are.  You can view that video here.

Please subscribe to my YouTube Channel.

Our water color pencils are simply amazing and something you definitely want to add to your paper crafting supply.  You can create awesome backgrounds, fill in color on stamps, use them on watercolor paper, shimmery cardstock, or standard cardstock. Use them alone, with blender pens, or aqua painters.  The possibilities are endless! And since the colors are standard Stampin’ Up! colors you get that color coordination with all the great Stampin’ Up! papers, inks, ribbons, embellishments, etc.

So if you don’t  already own them, order your WaterColor Pencils today.  Right now!  I’ll wait.  And pick up a blender pen and aqua painter and the different paper types.  Then have fun!  Share with me your favorite way to use our WaterColor Pencils in the comments below.

Thanks, friends.

Nancy

How My Bad Hair Cut will Help YOU become a Better Paper Crafter

I’m still suffering the trauma of a bad hair cut the other day.  Not your average bad cut, mind you.  I’m talking a BAD. HAIR. CUT.  Really Bad!!! The kind that makes me want to put a bag over my head before going out in public Bad.  Yes, it’s really that bad.  Butchered might even be the best way to describe it.

I always liked my long hair, and my husband loved it.  He would always compliment me and tell me how pretty my hair looked, and how he loved it long.  My hair was much longer than shoulder length; it was middle of my back.  Well, I’ll let the video tell the rest of the story….

So how does My Bad Hair Cut Make YOU a Better Paper Crafter?  Mistakes.  We all make them.  I’m sure that the gal who cut my hair was not malicious in her intent; it was a mistake.  Admittedly a big one.  But she made a mistake.  In a few years I might look back and laugh.  After all, it’s only hair and it will grow back… eventually.

When it comes to paper crafting, I’ve made a lot of mistakes.  For a funny story of a big mistake I made while teaching a class, you can see this blog post that I shared.   My mistakes have become good teachers.  I’ve never made the same mistake twice because I’ve learned from it.  In fact, if you’ve ever taken a class with me, you’ll know that I’m fond of saying  “A well placed embellishment can cover most mistakes, for the rest, well, there’s always a new piece of paper!”  A fresh start, a clean slate, a redo.  I can usually recover from a mistake quite well because of all I’ve learned the hard way.

I’ve never condemned anyone in my classes for making a mistake.  (I usually have extra paper on hand just for such occasions!)  And now, I’m going to share with you some tips and tricks to make you a better paper crafter based on the bits of wisdom I gleaned from making mistakes.

For starters, there’s always the basic, “Check the direction of the fold on your card base BEFORE gluing anything down!”  If you want to know why I’m always saying that (and checking my own card base)  read this blog post.

My next favorite saying while I’m teaching my classes is “Dry fit your layers BEFORE applying glue!”  It just works a lot better if you know where you’re going before you put glue on it.  Trust me.

Please make sure you use the buttons on the right to sign up for my newsletter AND like my Facebook page, AND subscribe to me on YouTube.  I’ll be making some videos in the next few days showing you some tips I’ve learned from my mistakes.  Hopefully, you will learn from my mistakes and you’ll just be wiser and pick up a few pointers.

2017 Stampin' Up! Annual CatalogThe new Annual Catalog Release is Thursday, June 1st and I’m hold a Facebook party to celebrate!  Please join me at 7:00 PM EST on Thursday June 1st on Facebook Nancy Gleason’s 2017 Stampin’ UP! Catalog Debut Party.   You can request to join me by clicking on the link.  There will be Door Prizes, Demos, Games & Prizes, fun and of course, SHOPPING from the new catalog!  Good times!
Hope to see you soon!

Nancy

Save

Baby Wipe Technique with Video Tutorial

Last night I taught the “Baby Wipe Technique” to the ladies in my stamp class.  It’s a really fun way to create a mottled, multi-colored effect and it’s perfect for any stamp with a large image area.

We had a really fun class and I always love when new people join me for a class!   I consider it a great compliment when a regular student invites a friend to come!  I had two ‘regulars’ invite friends and had 3 new peeps in class!  It really was a great night.  And despite the impending snowstorm/blizzard headed our way, everyone wanted to come to class!   We decided since the snow wasn’t supposed to start until around 11PM, we could have class and get home before any real snow started.  Here is the first project we made:

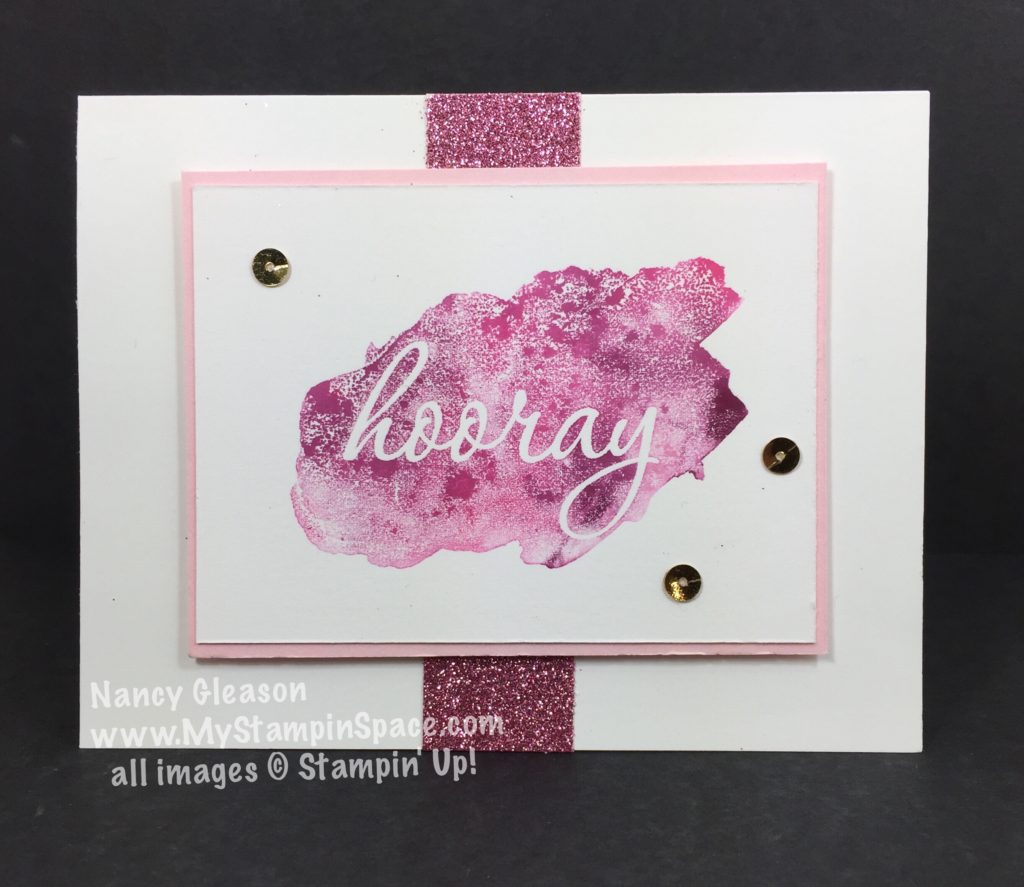
Baby Wipe Technique, Reverse Words, SaleABration, HoorayFor this card, we used the Reverse Words stamp set (available for FREE thru March 31st during Sale-A-Bration).  I used Pink Piourette, Melon Mambo and Rich Razzleberry ink.   A bit of bling from the Glimmer Paper Assortment (also FREE during Sale-A-Bration!) and a few metallic sequins finished it off.  Quick, easy and so much WOW!

The next project also featured the Baby Wipe Technique, but we stepped it up a bit with more layers and stamping.

Baby Wipe Technique, Watercolor Wings, Butterfly, Timeless Texture

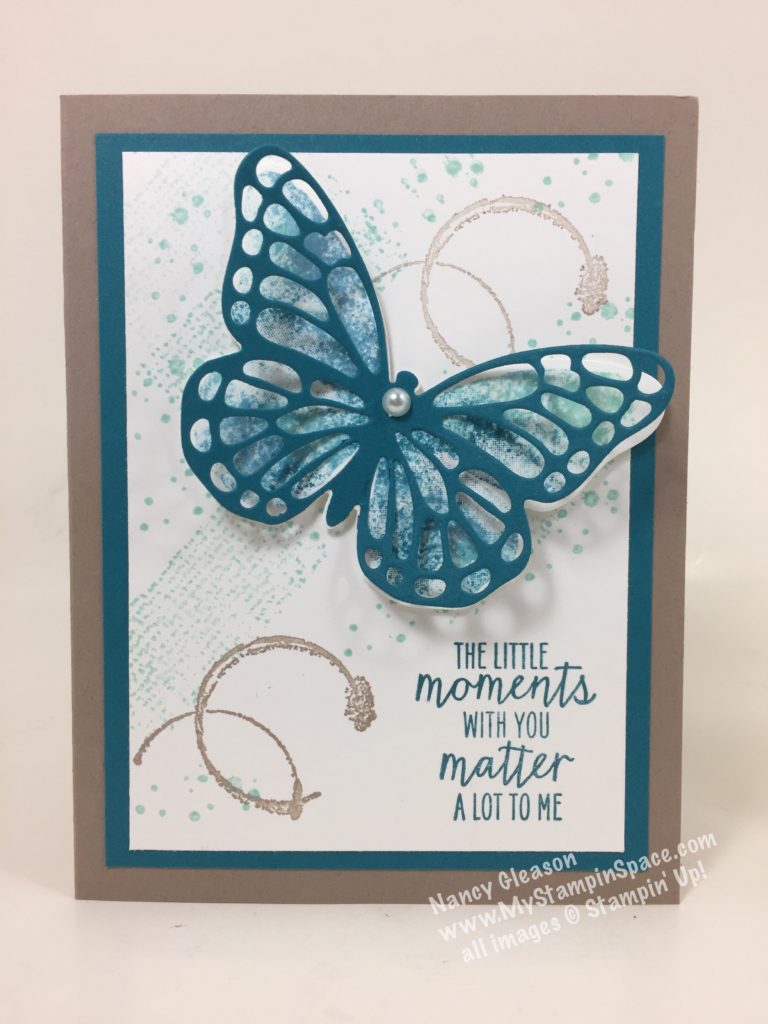
The Baby Wipe Technique was used to color the background layer of the butterfly which was stamped using an image from the Watercolor Wings stamp set and cropped out using Bold Butterfly Framelits.  A detailed Butterfly was cropped from the Butterflies thinlits from Island Indigo cardstock and layered on top.

The Whisper White layer was stamped using the Timeless Textures stamps in Pool Party and Tip Top Taupe.  The sentiment, from Watercolor Wings, was stamped in Island Indigo ink.

I love this color combination, and I hope you do too!  Don’t forget that Tip Top Taupe will be retiring in a few months.  Stock up now on your favorite Tip Top Taupe items before they are gone.

If you would like to learn how to do the Baby Wipe Technique  you can watch a video tutorial I made here:

Don’t forget to subscribe to my YouTube channel.

Please leave me a comment and tell me what you think of the Baby Wipe Technique, and my projects!  I love to hear from you and cherish each and every comment 🙂

If you want to purchase any of the items I’ve used here, please head to my online store and place your order. Remember, for every $50 you order (before shipping & tax) you earn 1 FREE Sale-A-Bration item!  Please use Host Code SZYAENSF if you place an order that is less than $150 dollars.  Thank you!

Well, if you’re in the Northeast and affected by Blizzard Stella, stay safe and warm!  It’s a good day to hunker down and stamp, in between rounds of shoveling & snowblowing.  Happy Stampin’!

Nancy

Save

Save

Save

Save

Save

Save

Save

Save

Save

Save

Save

Save

WaterColor Pencils Craze & Bonus Video

I’m excited to share a bonus tutorial video with you today featuring the WaterColor Pencils and the Dragonfly Dreams bundle.  I’ve been in love with the WaterColor Pencils when I first saw them back in November.  (Yes, November – as a Stampin’ Up! demonstrator I get to see new products before the catalogs are released!  My favorite perk!  If you want to share in these perks, there’s no better time to join than now.  Ask me how.)

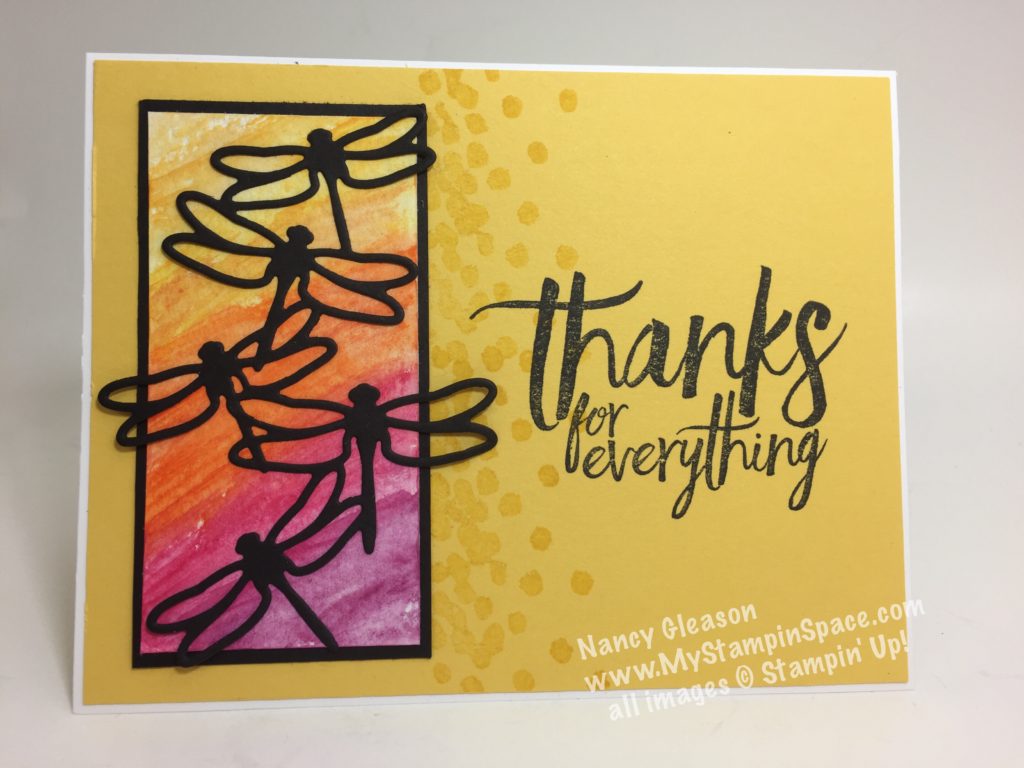
Here is the card I made and taught to my stamp club last week. The ladies loved it, and I hope you do too!

Dragonfly Dreams, Detailed Dragonfly & Watercolor Pencils

Daffodil Delight and Black are a striking color combination, don’t you agree?  But what really makes it is the pop of color from the water colored panel.  I used the WaterColor Pencils with an Aqua Painter to create this focal point.

I created a video to show you how I made it:  Wow, this is like taking a class from me without the drive!  And without the brownies 🙂

Now I know you just want to jump out of your seat and get some watercolor pencils for yourself so you too can join in on the Watercolor Craze Supplies are very limited and are expected to go on backorder soon, SO ORDER THEM RIGHT NOW!  Don’t wait.  Don’t forget to add some Watercolor Paper, Aqua Painters and Blender Pens.  You’ll also want Memento Tuxedo Black Ink if you want to stamp an outline image and then color in with watercoloring.  When you place your order, remember two things: 1)  To order in $50 increments so you can earn FREE Sale-A-Bration items with each order, and 2) to use HOST CODE D3ZEY3UJ when you place an order that is less than $150.

To learn more about Sale-A-Bration, click this picture.

Why use a Host Code?  The host code allows me to earn Stampin’ Rewards on all orders placed thru my online store.    They are used for products that I give away to my customers.  (Just ask Vicky Blackwell who won a Party Animal Prize package as part of my SuperBowl contest. – Read all about that here.) Learn about Stampin’ Rewards hereIf your order totals $150 or more (before tax & shipping) then DO NOT use the host code, but rather redeem the Stampin’ Rewards for yourself.

Please let me know if you enjoyed my tutorial video.  If you like that, then you’d love attending one of my in person classes.  Not only do we have fun and eat brownies, but we make a few projects and I try to teach one new technique at each class.  Click here for a list of upcoming classes.  Not in NE Pennsylvania?  Let me host a Facebook Party for you and your friends instead.

Thanks for stopping by My Stampin Space today, please come back again soon.  If you like what you see, sign up for my mailing list, Like me on Facebook and follow me on Instagram.

Nancy

Save

Save

Save

Save

Save

Save

Save

Save

Save

Save

Welcome to the World!

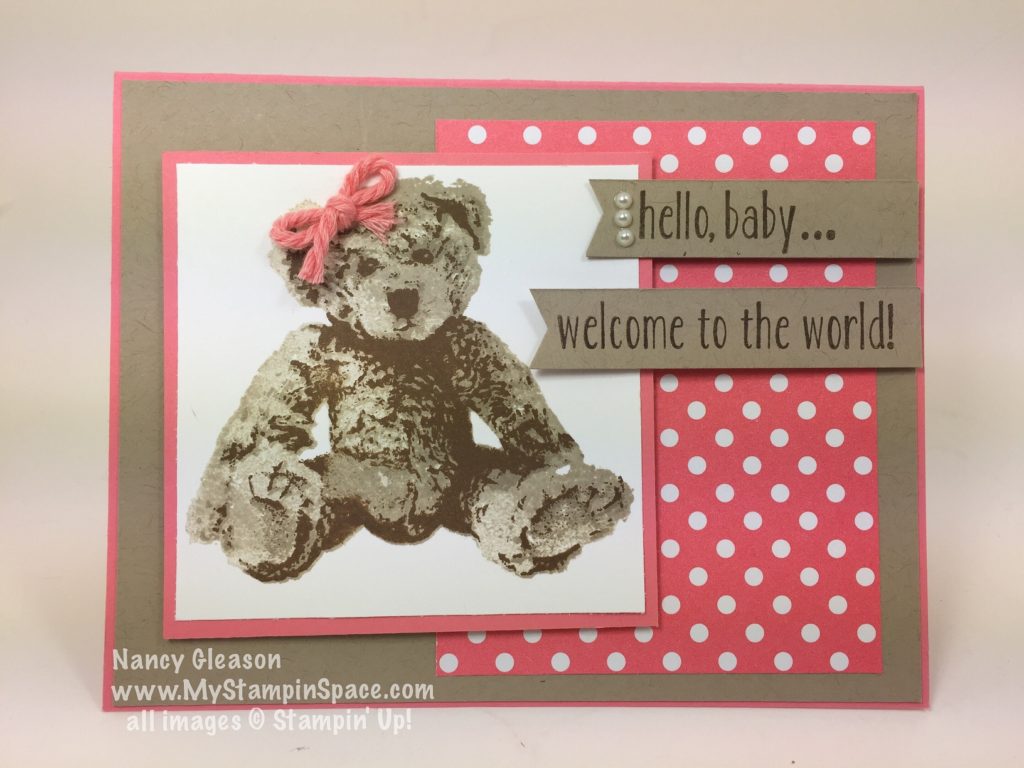
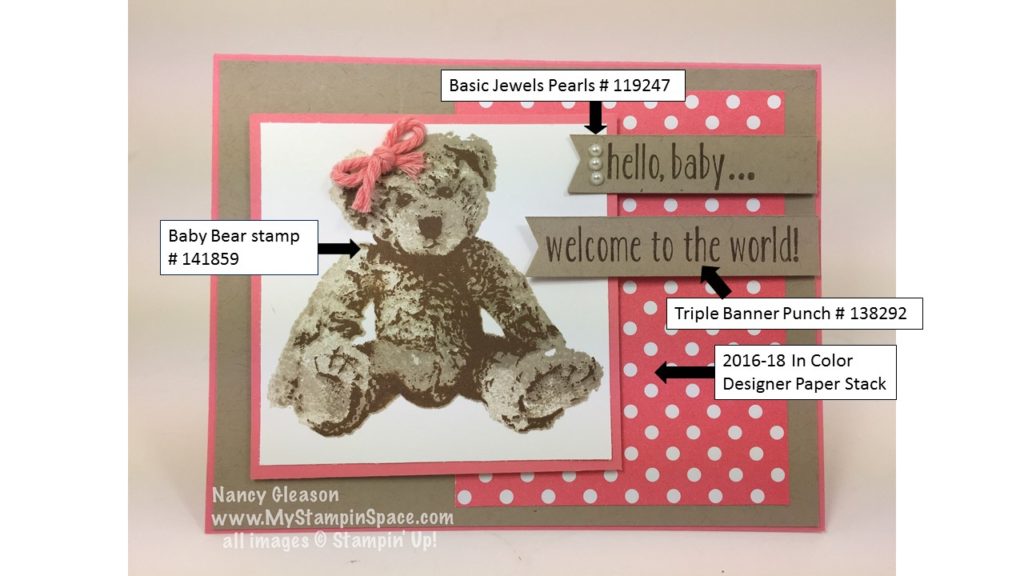
I’ve been anxiously waiting to post this project!  I’ve been on pins & needles ever since a friend told me that he was expecting a baby girl that was due in a few weeks!  Well the day finally came, and a sweet little baby girl was born today!  I made this card the day he told me it was a girl.  Now I can finally give it to him, and show you.

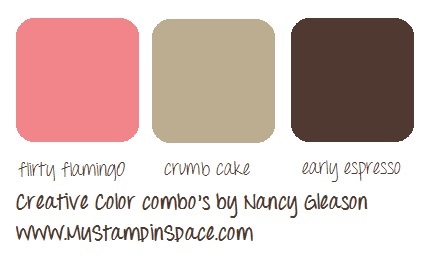
Baby Bear is the stamp set that I used to make this realistic, life-like stuffed animal bear.  A triple stamp, I used Sahara Sand, Crumb Cake and Early Espresso ink for each layer of the bear to create that realistic effect.  My paper is Flirty Flamingo card stock for the card base, with a Crumb Cake layer.  Flirty Flamingo DSP and another layer of Flirty Flamingo cardstock with a Whisper White image panel.  The sentiments were stamped in Early Espresso ink on Crumb cake banners.  A row of pearls and a bakers twine bow adorn this card.

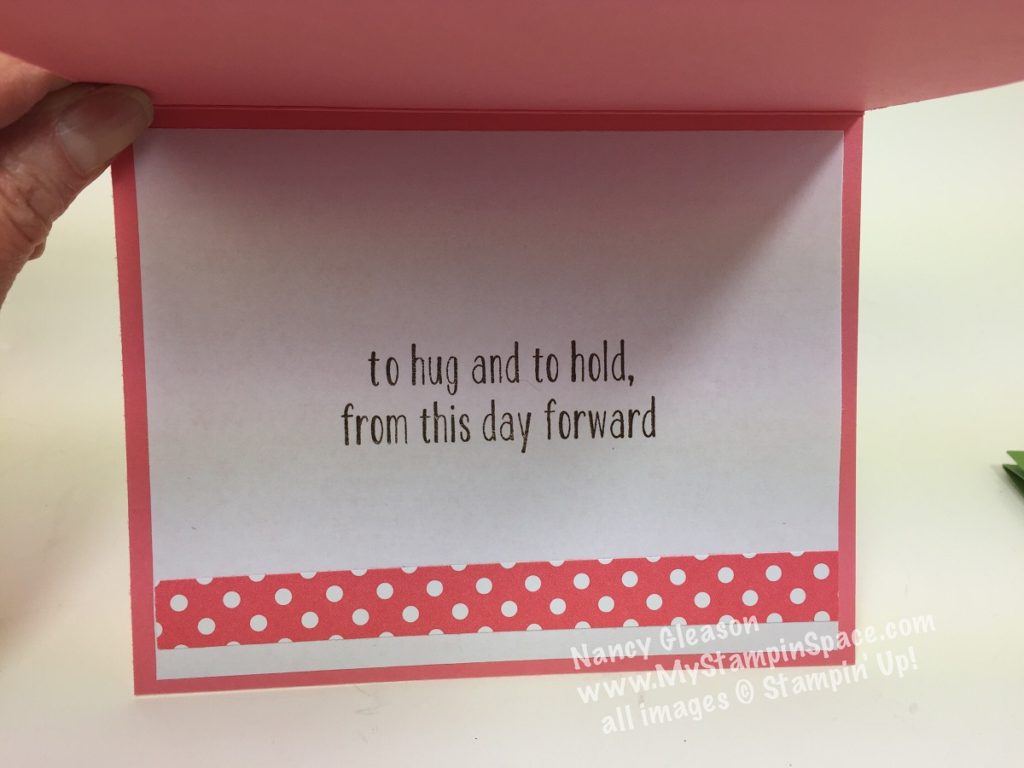
Any time I used a card base other than Whisper White or Very Vanilla, I like to make an inside panel to write on.  My inside also contains another sentiment, with just enough white space to include a handwritten note.

I used another strip of DSP so the inside and the outside coordinate.  And I just LOVE this sentiment!

Here’s a map of the products I  used to create this card:

I’m so glad that my friend is a Dad with a precious little babe to love and to hold.

If you love this creative color combo, please save this pic for your reference:

Baby Bear is such a versatile stamp set too!  If you’d like to order any of the products I used, click here to shop my store.  You can also click on any of the hi-lighted items in the description above.

Sale-A-Bration

Please use January Host Code 2BUYMMWN when placing an order that is less thaln $150.   When shopping, you’ll earn 1 Free Sale-A-Bration item for every $50 you spend (before shipping and sales tax).  Want to learn more about Sale-A-Bration?  Click here.

Thanks for stopping by My Stampin Space.  I hope I inspired you to use Baby Bear when you have a little one to welcome into the world!  Share a pic to my Facebook page of any projects you made using Baby Bear.  While you’re there, please like my Facebook page too so we can stay in touch there.

I’m also on Pinterest and Instagram so follow me there as well!  See you soon.

Nancy


Save

Save

Save

Save

Save

Save

Taking Layering to a New Level

Today is the long-awaited for day!  And I’m not just talking about a day off of work!  But today is the day that the Stitched Shapes Framelits dies are back in stock!

145372 Stitched Shapes Framelits
Stitched Shapes Framelits dies – # 145372

The Stitched Shapes Framelit dies were introduced back in November as a teaser of what would be coming in the 2017/2018 Annual catalog to be released in June.  They were so hugely popular that they sold out faster than expected, put on backorder, and then put into a ‘non-orderable’ status  until today.

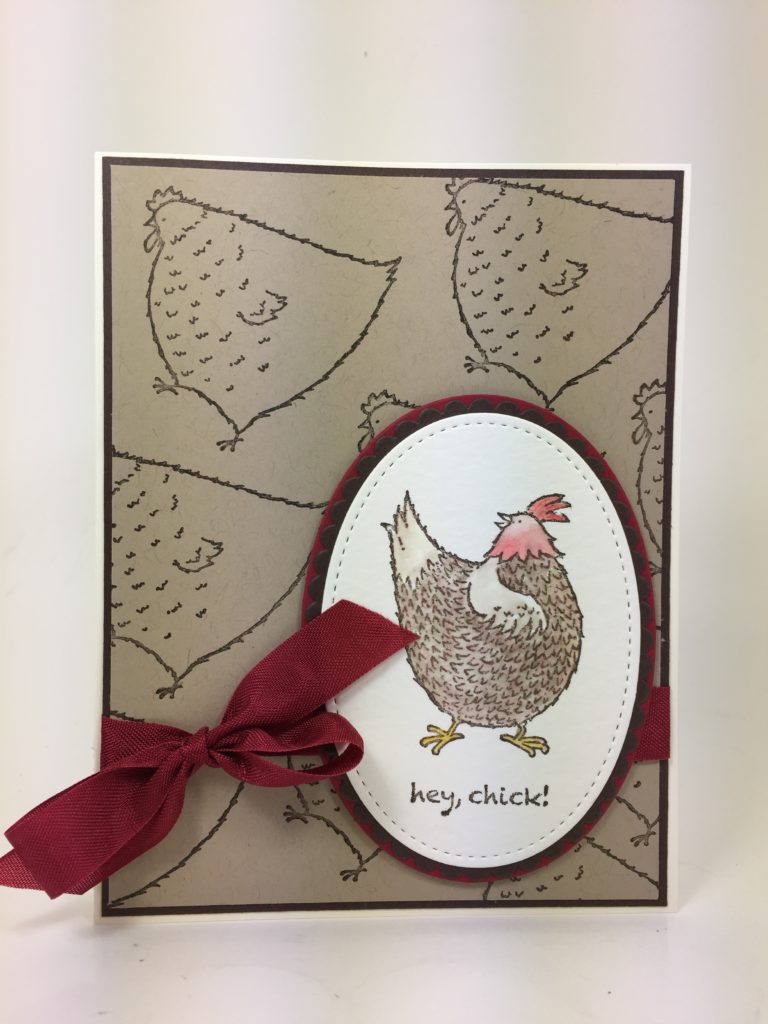
Why are they so popular, you ask?  What’s the big deal?  Well, I’ll tell you.  This set of 12 (4 each of square, oval and circles) basic geometric shapes have tiny stitching around the edges.  And they pair perfectly with our Layering Framelits in Squares, Ovals & Circles to create perfect layers with just the right amount of detail.    Let’s have a look:  IMG_8339[1]

IMG_8411[1]

Hey Chick

See how the tiny stitches makes the shaped so much more ‘finished’ and adds just the perfect finishing touch to the basic shape?  And how the straight and scallop edges of the layering framelits dies coordinate so perfectly?  The Stitched Shapes Framelits and layering framelits are going to take your layers to a whole new dimension.  And the sizes of the shapes coordinate with so many stamp sets; both images & sentiments.

Now, what if you don’t own any of these basic shape framelit dies.  Can you still get the Stitched Shaped Framelit dies?  YES!!  Having both the layering framelit dies in all the shapes, AND the Stitched Shaped Framelits, will be an investment in tools for your paper crafing that you will have for years & years.  The best way to get all of these?  Ultimate Bundle SAB

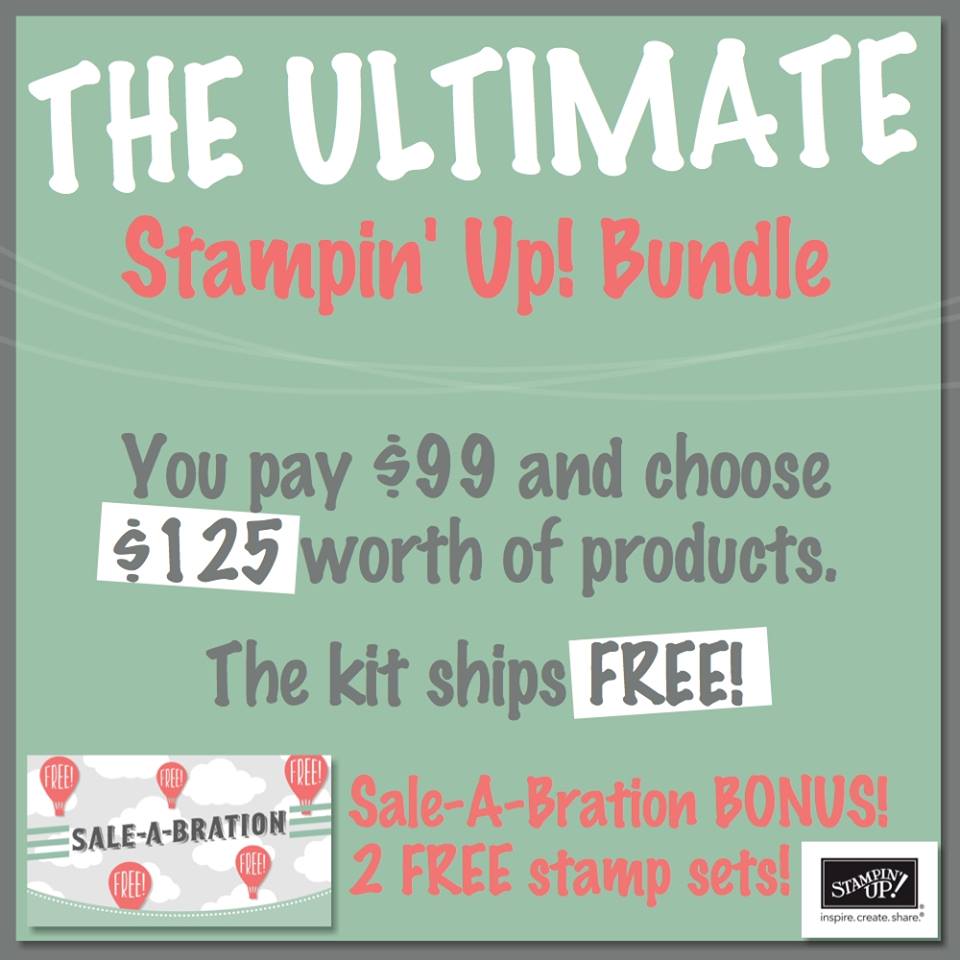
When you purchase the Ultimate Starter Kit!  You can choose $125 worth of product for only $99 and not pay any extra for shipping!  But during Sale-A-Bration, you’ll get to choose 2 FREE stamps on top of that!  If you purchase this now, you’ll get a 20% discount on all of your purchases until the end of July 2017!  And you don’t ever have to host a workshop or sell anything if you don’t want to.  Get all the benefits of belonging to the Stampin’ UP! family by being a wholesale customer.  Purchase your Ultimate Starter Kit here.

If you choose not the order the Ultimate Starter Kit!  you can still earn FREE merchandise during Sale-A-Bration.  Just place your order here, and for every $50 you can choose one Sale-A-Bration item for FREE.  Please remember to use Host Code 2BUYMMWN when placing an order under $150.

Thanks for stopping by today.  See you soon!

Nancy


Save

Save

Save

Save

Save

A new set of Framelits to ‘die’ for!

At first glance, you just might pass over the “Special Reason Bundle” as another floral stamp set and framelit die set.  But, once you look closer, you’ll see that this die set is like no other.  Stampin’ UP! has just taken their framelit dies to a whole new level.

occ17_p42d

The die is in 2 pieces; one to cut out the detail and the other to cut out the shape.  By using them separately, you can create really cool effects that you can’t do with other standard framelit and thinlit dies.  Watch this video below to see how this works:

See what I mean?  Don’t you just think these are to die for?  I know that you are anxiously awaiting the arrival of the new catalogs so you can get your hands on them!   As a demo, you can get them now!

I welcome “Wholesale Customers” into my group.  You can join Stampin’ UP! by purchasing the Starter Kit for $99 and choose $125 of products you’ll save $26 right off the bat!)  Then continue to save 20% off all future orders.  Click here for more information or click here to purchase the Starter Kit.     You’ll get all the perks, including early ordering, as a demo, with no pressure to sell anything.  Just keep the discount for yourself!

I can’t wait to share more exciting products and projects with you!

Nancy


Save

Save