Meet Lenny!

My husband and I just returned from a vacation in Maine. It was absolutely wonderful! Maine was everything I had hoped for and more! I’ve never been there but I’m sure I will go back. It was so beautiful. And I ate so much good food – yes I had my first lobster roll, delicious! And blueberry pie and blueberry pancakes. I even brought home wild Maine blueberries and made a pie. I shared my pie (and the recipes for both my homemade pie crust and my blueberry pie filling) on my Facebook page.

And wildlife – we went on a Whale Watching Tour! Such magnificent creatures and it’s hard to fathom the sheer size of those whales! The famous Maine wildlife that we didn’t see were moose. But I did meet Lenny! And I want to introduce him to you now too!
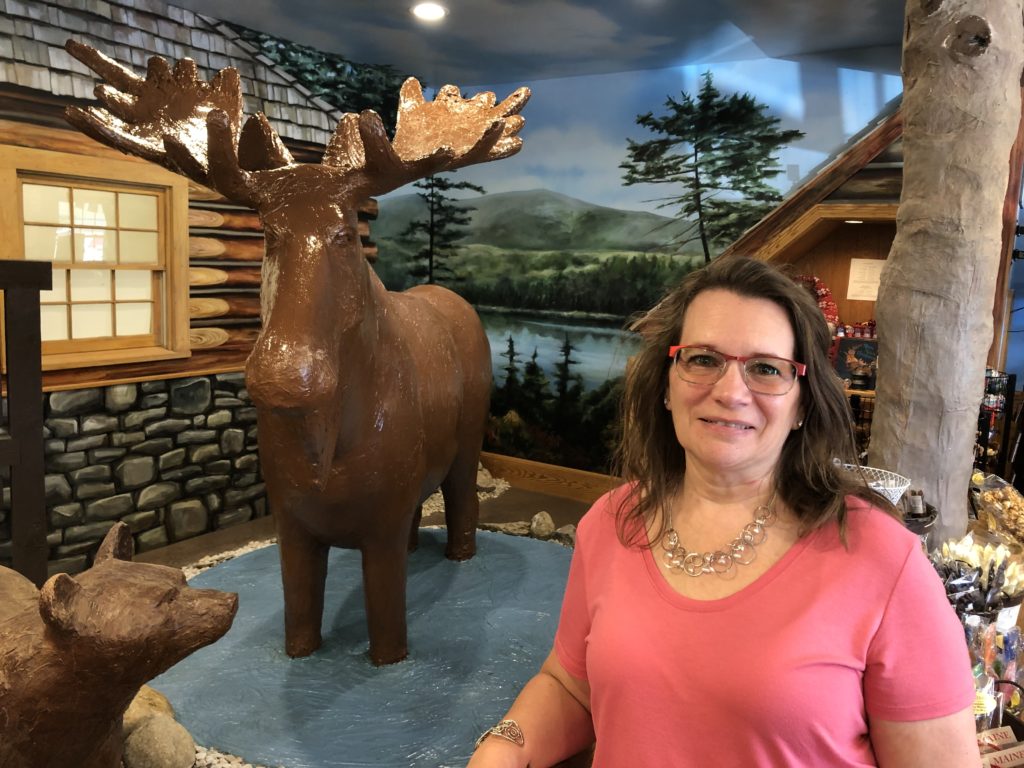
Lenny the Chocolate Moose

Lenny is a 1700 lb. Chocolate Moose! Yes, he is solid milk chocolate! Now that’s my kind of wild life! But I wasn’t allowed to take a nibble of him 🙁 Isn’t he adorable?

Freshly Made Sketches Challenge

Lenny was the inspiration for my card. When I saw the sketch from the folks at Freshly Made Sketches, I just knew that sketch was made for the Moose from the new Merry Moose stamp set.

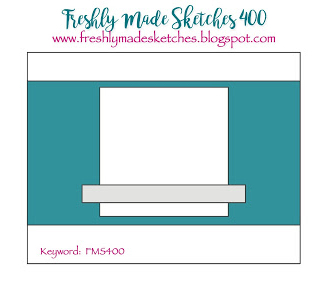
Here is the sketch:

And here is my card:
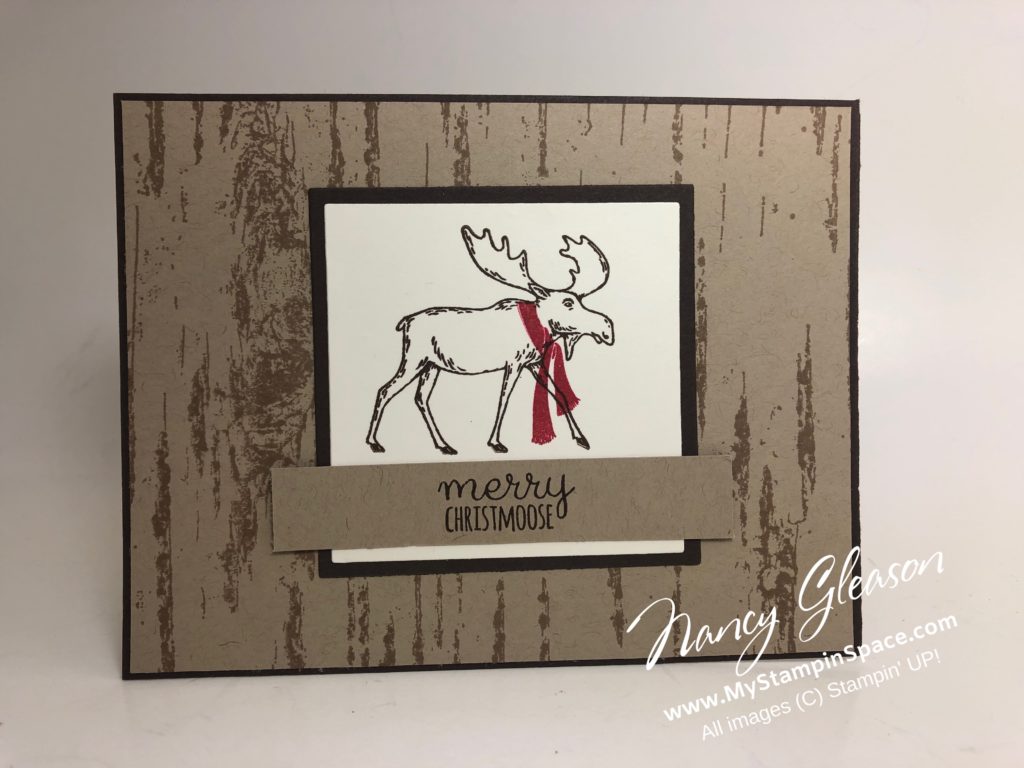
I also broke out my new Birch Background stamp and just used a neutral combination of Early Espresso and Crumb Cake for my layers and just a pop of red for the scarf. An easy card to make and the sketch was perfect. But after sleeping on it, I woke up with an idea to step up the card a bit so here is my second card:
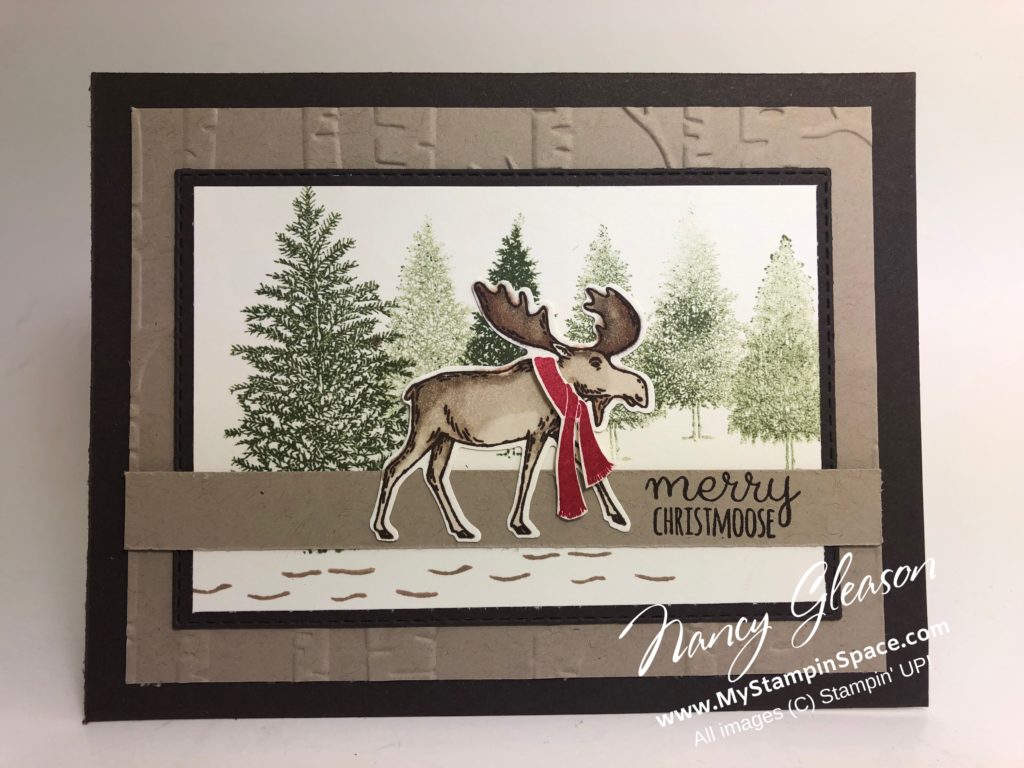
Merry Moose for FMS400

For this card I used the Woodlands Embossing Folder for the background instead of the Birch Background stamp and I made the image panel larger. I stamped a few trees in Mossy Meadow ink and this time I stamped the moose and colored him using the Stampin’ Blends markers and cropped him out with the coordinating Moose Punch. The scarf was stamped in Real Red and fussy cut with my paper snips.

So which one do you like better? The simple card or the stepped up version? Please leave me a comment and tell me what you think.

If you like the Merry Moose stamp set and Moose punch, you’ll be able to purchase them as a bundle when the Holiday Catalog goes live on Sept. 5th!

2019 Holiday Catalog
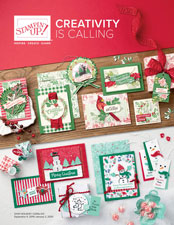
2019 Stampin' UP! Holiday Catalog

You’ll be able to view the catalog online right here on Sept 5th. If you are one of my customers then your catalog is in the mail to you. If you don’t currently work with a Stampin’ Up! demonstrator, and want a catalog, email me and I’ll get one to you!

You can read more about my Maine vacation on my Facebook page so please head over there and Like my page while you’re there. And if you haven’t already done so, sign up for my mailing list here. My 12 Weeks of Christmas newsletter campaign is going to start in several weeks and you won’t want to miss that!

Thanks for stopping my by My Stampin Space today! Stop back again on the 5th to view the catalog online.

Nancy Gleason. Stampin' UP! demonstrator, teacher, and blogger

I’m Incredibly Proud of my Husband

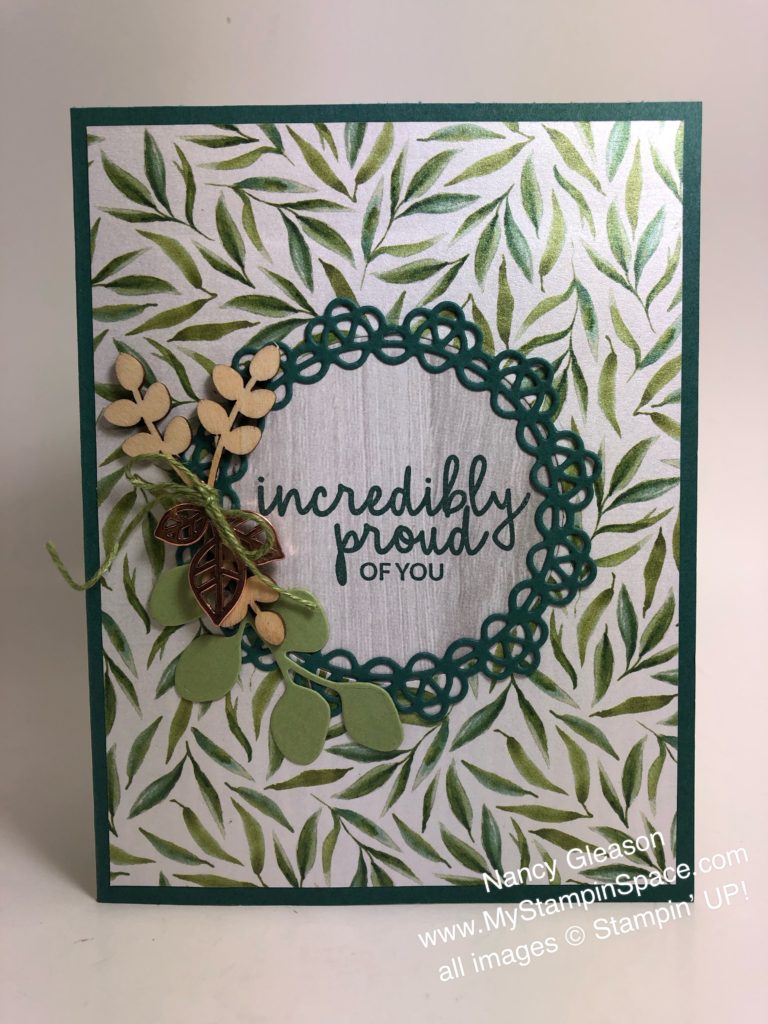
Last week my husband started a new job, which is a total career change for him. I’m incredibly proud of my husband, I’m sure this isn’t easy! I made this card for him, using the Incredible Like You stamp set. The sentiment, “Incredibly Proud of You” was perfect to convey my feelings. Of course I had a little gift for him too, something for his new office.

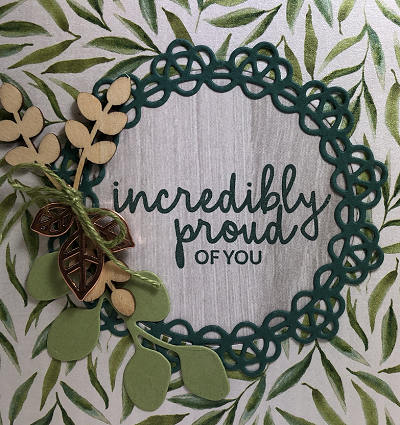
The earthy elements and color scheme lend to the masculine feel. I choose a piece of DSP from the now retired Frosted Floral DSP pack and cropped a circle using the Layering Circles Framelit dies. A piece of woodgrain paper from the Wood Textures DSP was slipped behind this and adhered everything to a Tranquil Tide card base. Then I cropped a detailed circle from Tranquil Tide using the Doily Builder framelit dies. (Heads up: this item is projected to be sold out quite soon and will not be available again before the end of the catalog so grab yours now!) Tranquil Tide ink was used to stamp the sentiment that expressed my feelings exactly!

Next up I decorated around the framed circle. I cropped a leaf from the Winter Woods framelits dies in Old Olive cardstock and added a few wooden elements from the Butterfly Elements (this is already sold out – I’m glad I grabbed them as soon as they came out) and some metal Leaf Trinkets with Old Olive line thread.

And here he is….

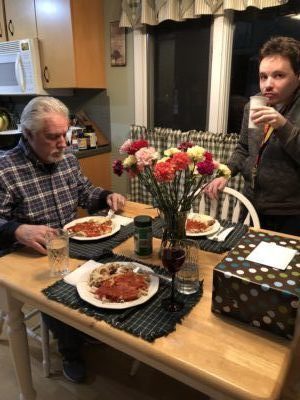
Here’s a photo of the dinner I made to celebrate. Note the flowers (they were given to him by the guests at the Mission as a way of saying goodbye) and the gift I had for him.

See the look of joy on his face as he is reading my card:

I made another card for him that I tucked into his briefcase on the first day of work. I’ll share that in another post. But for now, if you’d like to order any thing from Stampin’ UP!, you can go to my online store here. I’d suggest you grab the ultra versatile Doily Builder Framelits dies before they’re gone and the Incredible Like You stamp set.

Incredible LIke You stamp set

If you like this card, please Pin it for future reference. And leave me a comment please. Leaving comments will help my ranking in Google so more folks can find my blog. Thanks!

Nancy

PS – April classes were just added to my class schedule. Check it out here.

A Snappy Color Combination!

Whenever my husband goes out of town without me, I always make a card or two to tuck into his suitcase for him to find after he arrives at his destination.    I like to let him know that I’m thinking of him, and missing him when he’s gone.  I like to think that he enjoys these little surprises too!

So I needed to make a card today for him for just such an occasion.  I had so much fun playing with the Paper Players last week; they are such a nice bunch of folks and they always leave comments on my blog posts when I participate in their challenges.  I love when people leave me comments on my blog posts.  It’s almost like getting a little love note in your suitcase when you’re away from home!   Comments make me feel like all the time and effort I put into writing a blog post is worth it.  So, if you are reading this today, please leave me a little love note, I mean comment, at the end of this post.  Thanks!  🙂

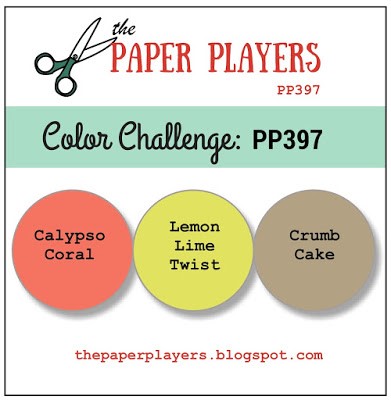
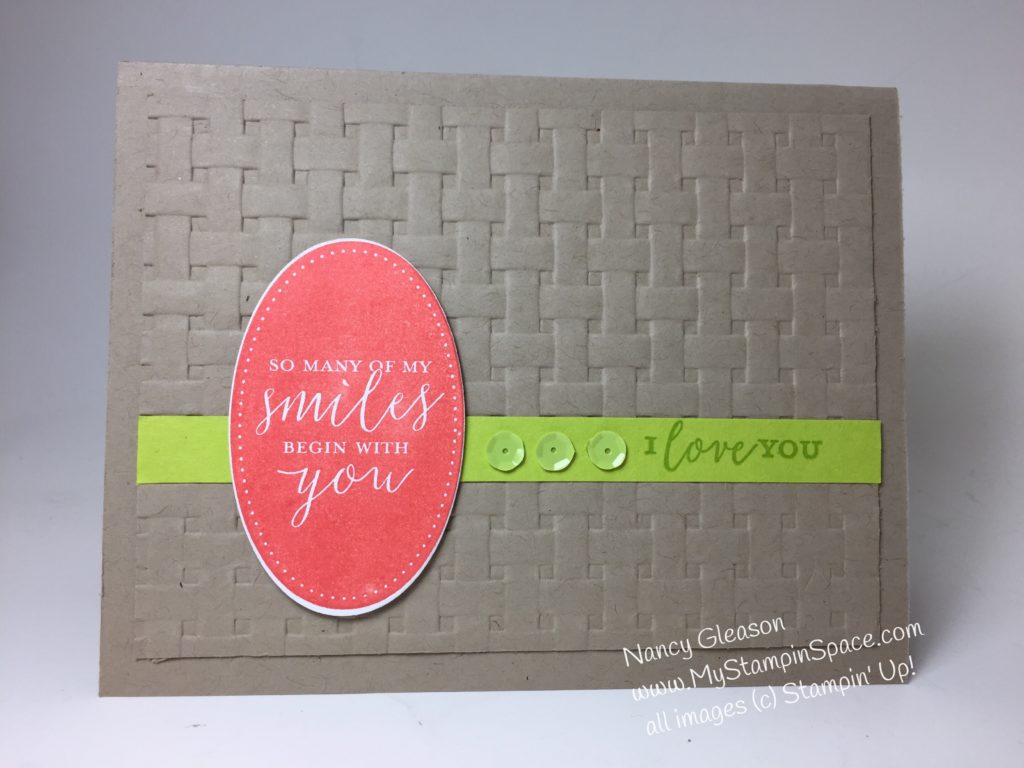
Anyway, just as I was heading into My Stampin’ Space to make said card, I got an email from the Paper Players with a color challenge for this week.  Since I had absolutely no idea what I was going to do,  I jumped on the chance to use this snappy color combination as a starting point.  Here’s the color combination:  Paper Players PP397 Color ChallengeI figured if I used Crumb Cake as my main color, with just splashes of Calypso Coral and Lemon Lime Twist, it would pass as more masculine than feminine.  And with the bright colors of Calypso Coral and Lemon Lime Twist, it would need a lot of Crumb Cake to keep it toned down.  Here’s my card:

All of my Smiles for the Paper Players

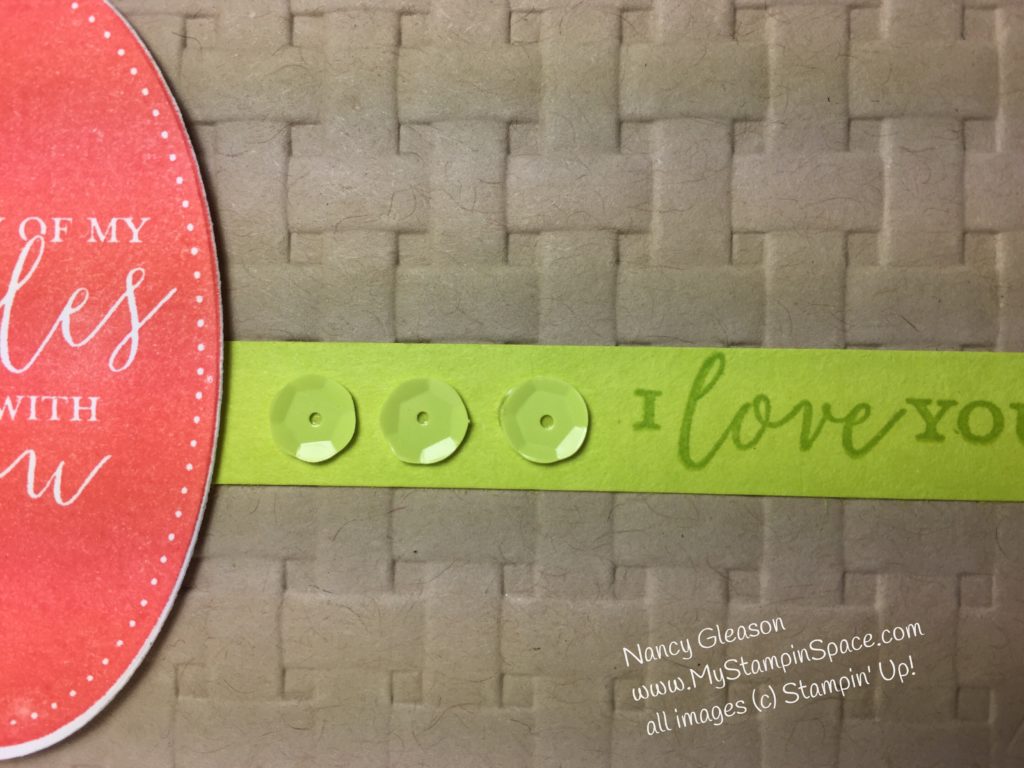
I used the new “Detailed With Love” stamp set.  I just love the sentiment that says “So many of my Smiles begin with You“.  Perfect!  🙂  I stamped that onto Whisper White cardstock using Calypso Coral ink and cropped it out with an oval framelit from the Layering Oval framelits.  A tiny strip of Lemon Lime Twist cardstock provided just enough ‘pop’ behind it without overtaking center stage.  I was just wide enough to stamp the “I Love You” sentiment in Lemon Lime Twist ink.  A trio of Lemon Lime Twist sequins grab your eye and bring it from the main focal point to the smaller sentiment.  Boy, am I glad I stocked up on those Tutti Frutti self-adhesive sequins!

My background was a piece of 5″ x 3-3/4″ Crumb Cake Cardstock that I ran thru the Big Shot and the Basket Weave TIEF.  This was adhered onto a Crumb Cake cardbase.  That much Crumb Cake might be too much neutral but with these strong colors, it really needs that much to keep the card toned down.

Here’s a close up of all of the colors and elements.

A Snappy Color Combo for the PP397

It would be easy for the strong colors to steal the show.  But the heavily textured background creates enough visual interest to hold its own again the bold colors and the card balances out nicely. I hope you agree.  Here’s another look at the overall card: All of my Smiles for the Paper Players

Click on any of the product names above to go right to my online store if you want to buy any of the products used in today’s card.  Of course, you can click here to go to my online store and buy anything you want!

When you’re done shopping, don’t forget to hop over the Paper Players blog to see all the other projects made with this color challenge.    And finally, please leave me a comment!

Don’t forget to Like Me on Facebook either, and to Sign Up For My Mailing List.

Thanks for stopping into My Stampin’ Space to check out this snappy color combination!  See you soon,

Nancy Gleason. Stampin' UP! demonstrator, teacher, and blogger

Bubble Over with Happiness During the last few days of Sale-A-Bration!

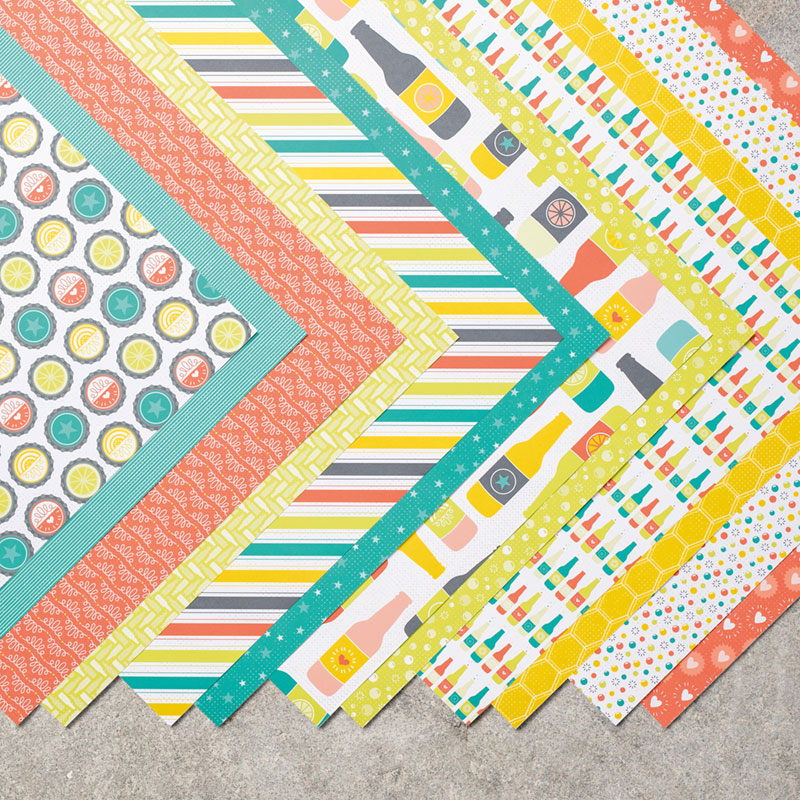
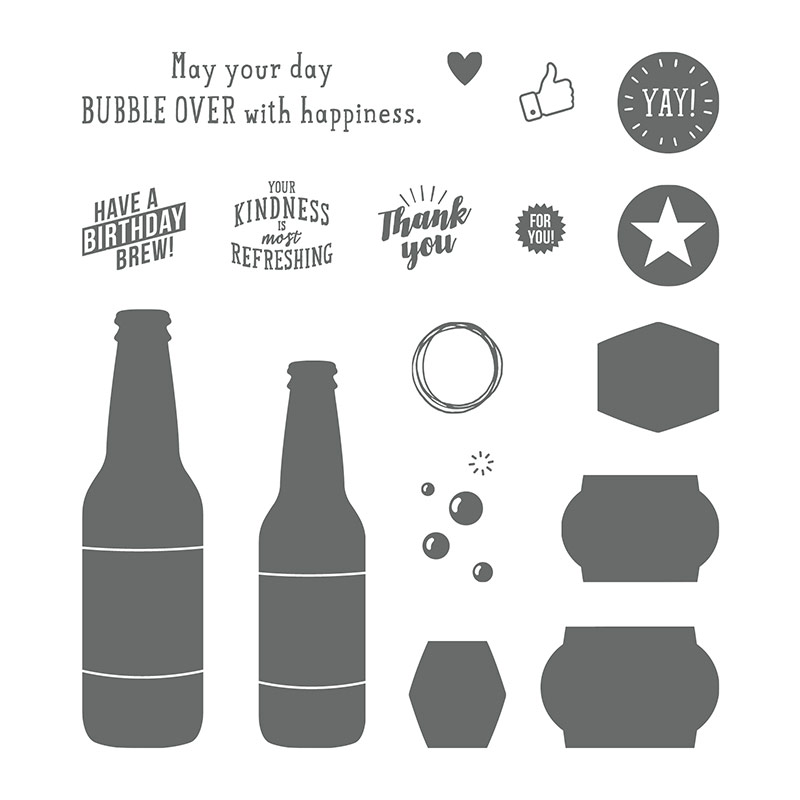
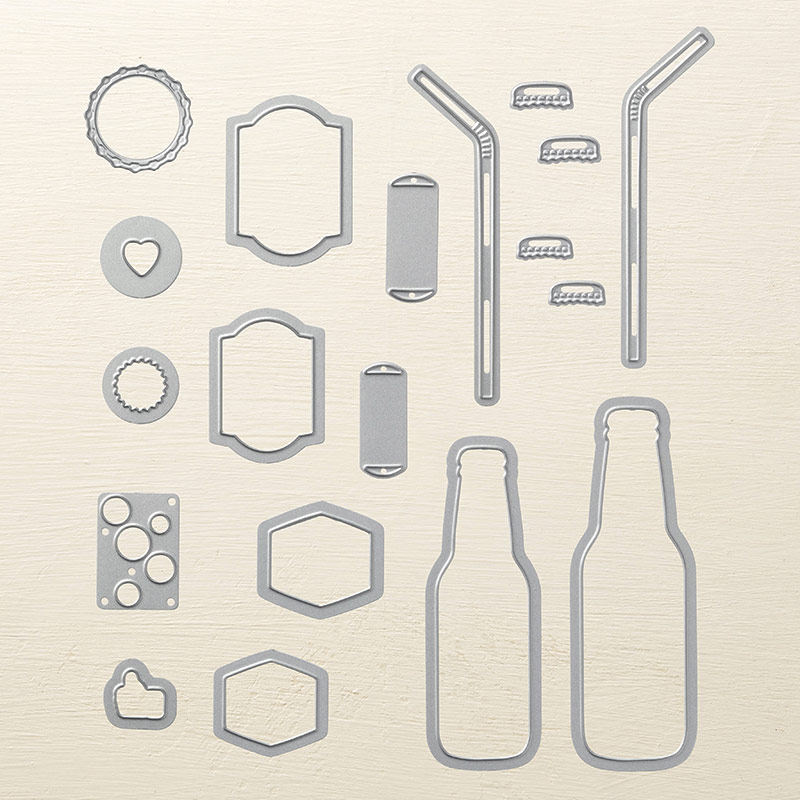
Today I want to share with you a delightful pattern of Designer Series Paper that will just make you just bubble over with happiness! It is the Bubbles & Fizz Designer Series Paper (147244). Bubbles & Fizz DSPThis paper coordinates perfectly with the Bubble Over Stamp Set and Bottles & Bubbles Framelits dies (Bundle & Save! – 146082). The Glitter & Clear Epoxy Shapes are the perfect embellishment to add a bubbly finishing touch to this product suite!

 Watch & See:

And it’s FREE! What’s better than cute AND free?   Cute, free and perfect coordination! Look at the Bubble Over Stamp set:  And the Bottles & Bubbles Framelits Dies:Bottles & Bubbles Framelits DiesAnd with the Bubble Over Bundle and Bubbles & Fizz DSP, you get it all.  So get it all right now!Shop Online Now with Nancy Gleason at MyStampinSpaceSale-A-Bration ends March 31st and the Bubble Fizz DSP will be gone.  You’ll still be able to get the Bubble Over Bundle until May 31st, but you won’t be able to get the coordinating paper after March 31st.

Want to see my other Sale-A-Bration picks?  Click Here, Here and Here.  Which Sale-A-Bration items is YOUR favorite?  Click to leave a comment.  So order the Bubble Over Bundle  and get the FREE Bubbles & Fizz Designer Series Paper now and I know you will bubble over with happiness with all the cute cards, gift tags and scrapbook pages you’ll make!

Decisions, Decisions!

My friend Steve recently asked me to make a card for him to give to someone who would celebrating their 70th birthday.  Of course, I was delighted and took this request very seriously.  Decisions, Decisions… which stamp set to use?  Well, it is for a 70th birthday so of course the “Number of Years” stamp set was a given.

Making masculine cards is very easy, in theory.  Certain color combinations lend themselves to being masculine, especially if you add a neutral such as grey, black or brown, and avoid pinks and purples.  Simple geometric patterns (stripes, squares, circles, etc.) and avoid florals, lace and ribbons.  Easy so far, right?

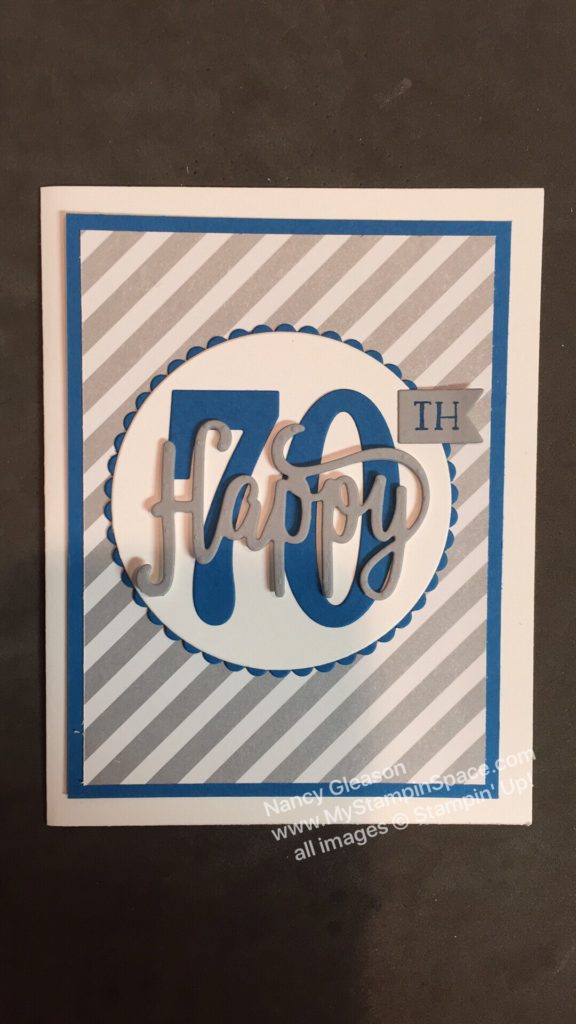
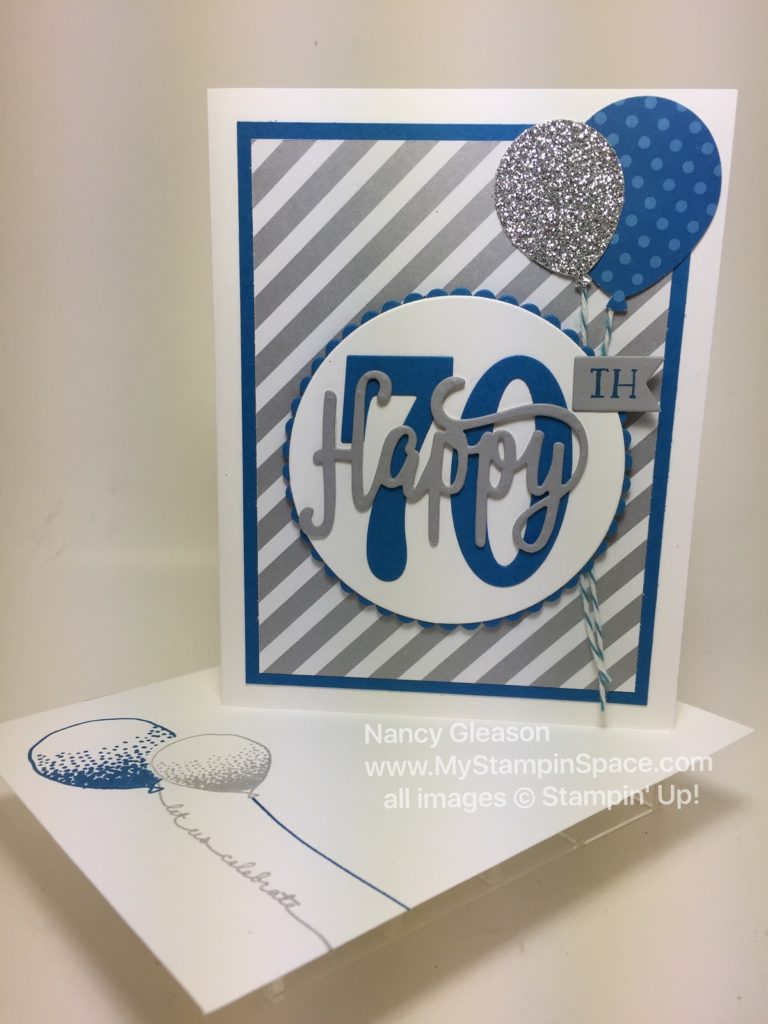
This is the card I created:  Happy 70th birthday

Ok, so this follows all my masculine rules, but… I felt like it just needed something more since it is such a milestone birthday.  Decisions, Decisions.  I decided on balloons, simple, gender neutral and very festive.  My color combination is gray, blue and white.  I wanted to use these colors but also add something with a little more pop.  I thought about adding green, or orange, or red, but….decisions, decisions!

I ultimately added some silver glimmer paper.  It added some pop, but without adding another color to my simple, masculine color combination.

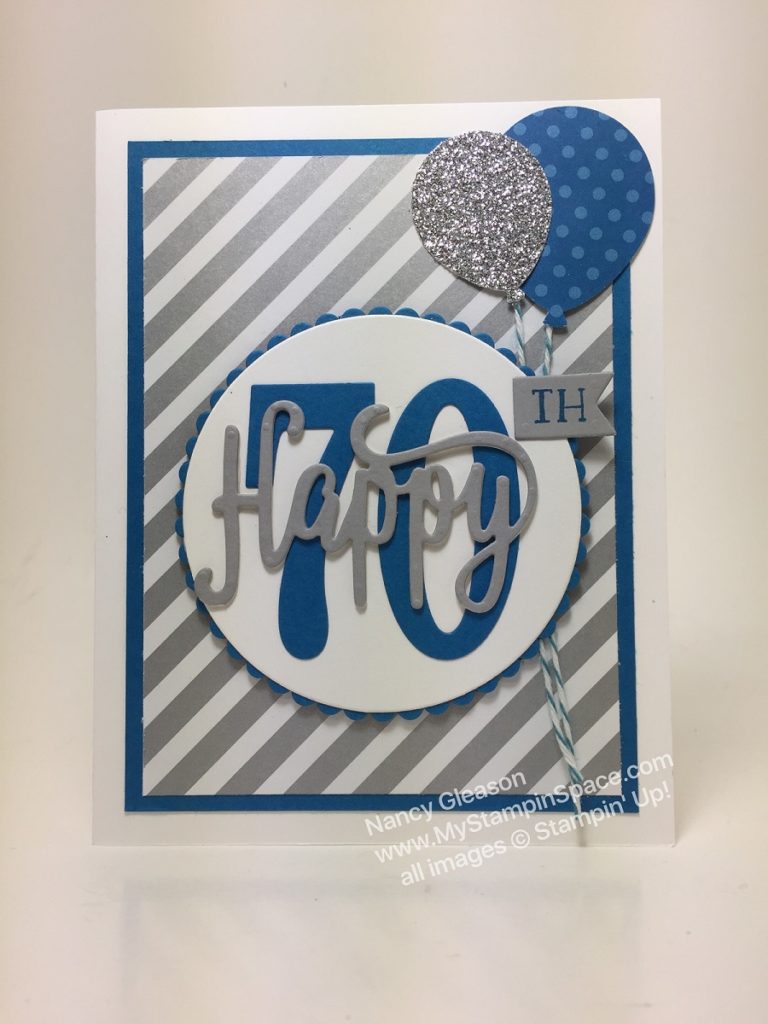
Happy 70th Birthday with Balloons

What do you think?  Do you like the addition of the balloons?  I like the plain card, but I like the stepped up version even more.  Now leave me a comment and tell me which one you like best.

I’m really pleased with the way  ‘happy’ layered over the 70 turned out.  Do you like that too?

Let me share how I created this card:

A card base of Whisper White, then a layer of Pacific Point cardstock.  A piece of Neutrals DSP in silver & white diagonal stripes.  2 layers of circles in Pacific Point and Whisper White again, and the numbers die cut in Pacific Point using the Large Numbers Framelits dies.  The little flag banner is part of the Large Numbers Framelits dies and the ‘th’ is part of the “Number of Years” stamp set .

The Happy is from the Happy Birthday Thinlits.  I used my Paper Snips to cut the Happy apart from Birthday.  I cut another “Happy” from Thick Whisper White cardstock  and then glued both of those together.  This raised up the word so when I layered it over the numbers it appears to be floating over it.

The balloons were punched out using the Balloon Bouquet punch using Pacific Point DSP and Silver Glimmer Paper.  A simple piece of Bakers Twine was used for the balloon strings.

Here is the card with the coordinating envelope.Happy 70th Birthday card with envelope

Let me tell what my friend Steve said when he got home and saw the card that I left for him.  “Nancy thank you for the card.  It is perfect 🙂  No doubt in my mind he will love it.  You have a gift Nancy, thank you for sharing it”

I am very flattered by his compliment!  I hope that you like this card as well.  Please leave me a comment; I’d love to hear what you have to say!

If you would like to make a card like this and need to order any of the supplies I used, please use my link to shop my online store.  Please use Host Code FBGK6C6F if your order is less than $150 (before shipping and tax).  If your order is $150 or more, do NOT use the host, but redeem the Stampin’ Rewards yourself.

Year End Sales EventWhile you’re shopping, don’t forget about the Year End Sales Event going on now.
This is your last chance to grab those Holiday Catalogs items you’ve been wanting before the retire on Jan. 2, 2018.  Some of those items are on sale, but all of them are only available while supplies last so don’t wait.  To see a list of what’s on sale, download the PDF file here, or just go to my online store. 

Stamparatus!

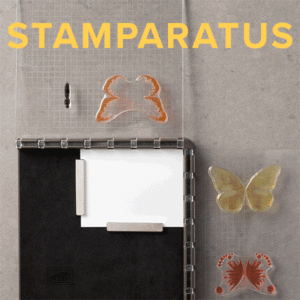
Stamparatus

Before you go, have you seen the latest & greatest?  Stampin’ UP! is introducing a new stamp positioning tool that is set to take the stamping world by storm!  Because demand for this item is huge, Stampin’ Up! is offering a reservation system based on first in, first out.  (the first reservation window  of 27,000 units sold out in just 15 minutes!)  To find out more about the Stamparatus and  how you can get yours, click here.

Thanks for stopping by My Stampin Space and hanging out with me.  Don’t forget to leave me a comment.  And sign up for my mailing list if you haven’t already.  You’ll receive updates and announcements on all new products and promotions (like the new catalogs and Sale-A-Bration promotion coming on January 3, 2018!), in addition to exclusive projects and inspiration.

Nancy Gleason

Today we Celebrate!

Today we celebrate our Wedding Anniversary!  29 years ago today we said “I do” and I’ve been doing it ever since!  Loving my husband, that is.  Through good times and hard times, the one thing I can always count on is my husband.  He is my rock, my support, my voice of reason when I need advice, the one I laugh with, cry with and do life with.

I wanted to make a card that conveyed that, but yet keep it simple and masculine.  I think I nailed it because when he opened up the envelope, he exclaimed “I like this!”

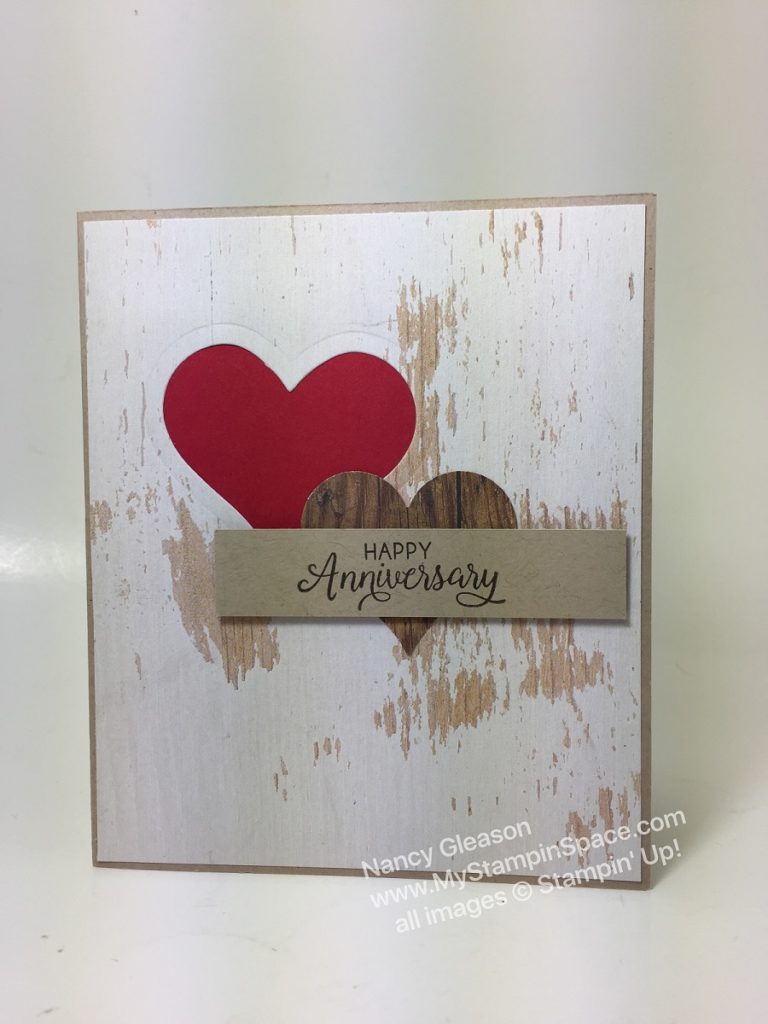
So here it is:29th Anniversary


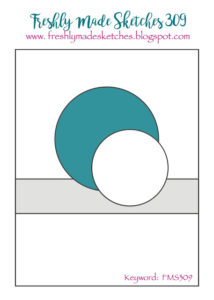
My basic layout was inspired by Freshly Made Sketches #309.   Freshly Made Sketches #309A Crumb Cake  card base layered with a sheet of whitewashed oak from the Wood Textures Designer Series Paper that was punched with the heart framelit from the Mini Treat Bag Thinlit dies.  A piece of Real Red Cardstock was glued in behind that opening.   Another heart was punched using the Sweetheart punch and a different  sheet of woodgrain paper.  A piece of Crumb Cake was stamped in Early Espresso ink with the Happy Anniversary sentiment from Beautiful Bouquet stamp set.
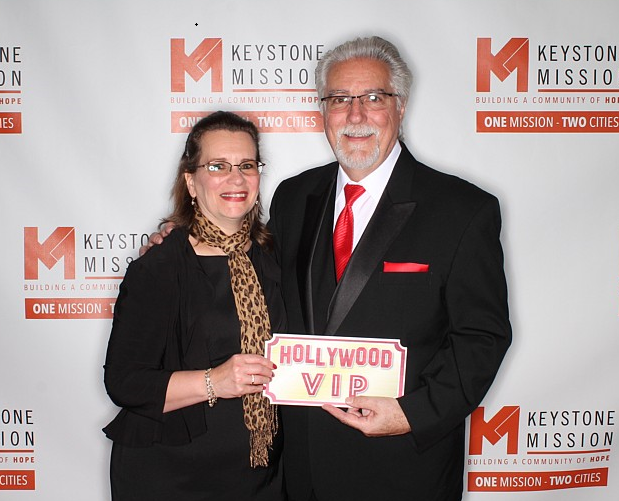
Easy, quick and masculine enough.  My husband has been a cabinet maker his whole life so I knew he would appreciate the woodgrain paper.  Now he is the Executive Director at the Keystone Mission which serves the area’s homeless and needy population.  The other night, the Keystone Mission (and many Rescue Missions across the country) held a Red Carpet Event for the movie “Same Kind of Different As Me”  which tells the true story of a millionaire art dealer and his friendship with a homeless man. Here is a picture of us as we walked the red carpet: On The Red Carpet for Same Kind Of Different as Me

Now you can see why he’s so easy to love!  He’s easy on the eyes! On a more serious  tone, I would highly recommend going to see that movie “Same Kind of Different As Me”, and bring some tissues.

Well, I hope you like my card, and the sketch that inspired it!  Go along to Freshly Made Sketches blog to see all the projects made with that sketch.

If you want to buy any of the supplies I used to make this card, please visit my online store where you can shop securely 24/7.  Don’t forget that the Woodgrain DSP is part of the Buy 3 Get 1 Free  Designer Series Paper Sale going on now. 

Happy Stampin!

Nancy Gleason


Tabs For Everything, Even Birthdays!

One of my favorite perks of being a Stampin’ Up! demonstrator is getting sneak peeks of new catalogs and products before everyone else and attending events, like OnStage in April in Richmond, VA, and getting FREE products just for attending!   One of the stamp sets I got is a set called Tabs For Everything, and it has a coordinating punch (which I didn’t get, but it’s on its way to  me now!)  You can save 10% when you purchase this as a Bundle.

This set has so much potential for making tabs when used with the coordinating punch, and I think it will be a match made in heaven paired with the new “Love Today” Planner Kit!  You can see how awesome the Planner is by watching the video here.

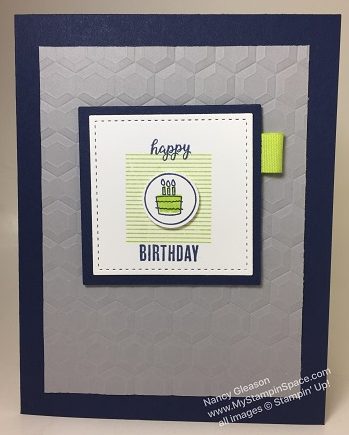
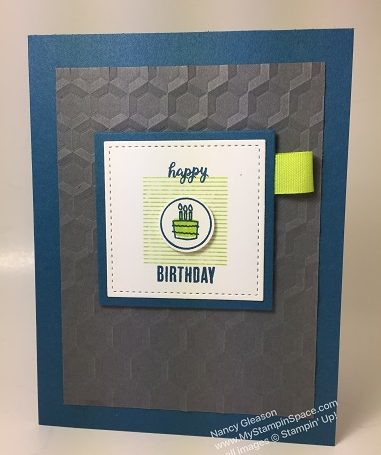
It also has great potential for making fabulous cards!  Like this one:Tabs For Everything - Even Birthdays!

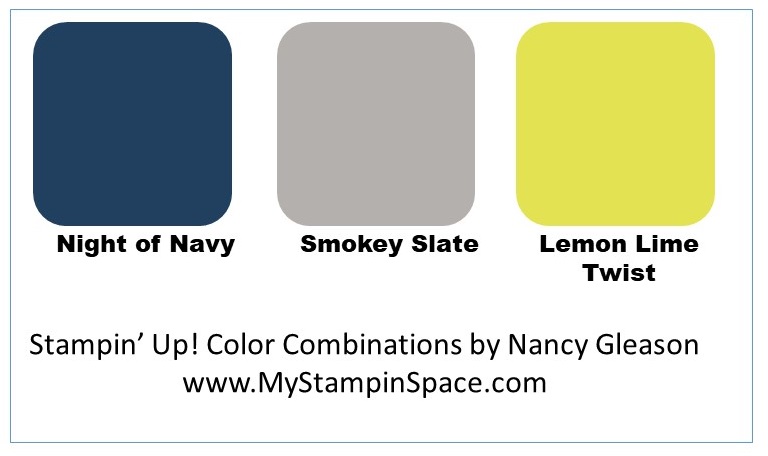
I was inspired for the color combination of Night of Navy, Smokey Slate, and LemonLime Twist by the jacket a fellow was wearing the other day.  (I see Stampin’ Up! colors everywhere!)  I mentioned to a fellow stamper that I could make a card with those colors, and she said she couldn’t wait to see what I came up with!

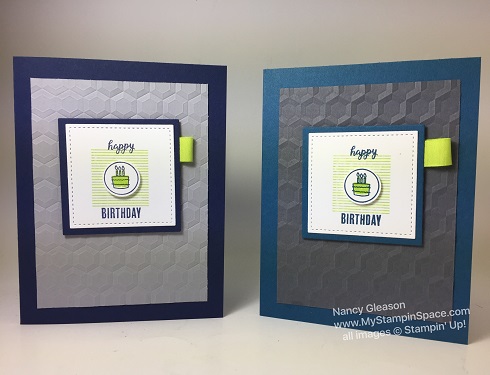
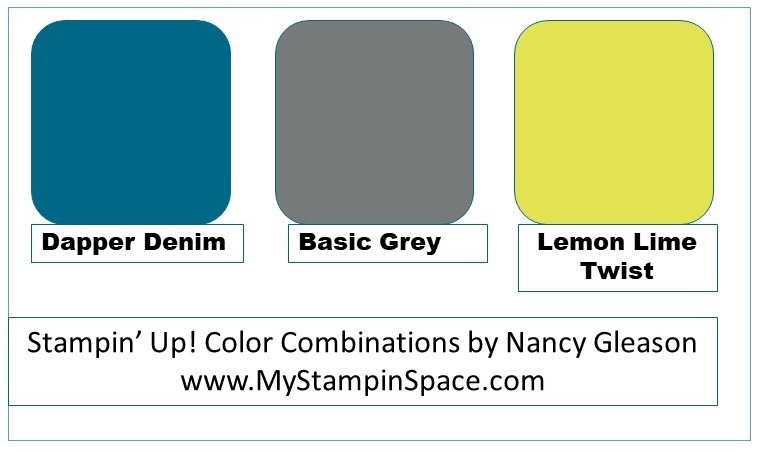
I liked this card, and color combination so much that I decided to make another card in a similar color combination of Dapper Denim, Basic Grey and Lemon Lime Twist.  What do you think?

Tabs for Everything - Even Birthdays!

Here are the two colors side by side:

Tabs for everything - even birthdays!

So which color combination do you like best?  Leave me a comment with your choice.

Here are the color combinations for your reference:

Dapper Denim, Basic Gray and Lemon Lime Twist

Because this is a birthday card, I decided to enter this into The Paper Players challenge.  The Paper Players Challenge 347

See how well this fits into the challenge?  Simple, right?  You can click here or on the picture above to head over to the The Paper Players challenge and be inspired by all the other entries featuring Birthday themed projects.

I hope you’ll seriously add the new “Love Today” Planner Kit! and the Tabs For Everything Bundle to your next order.  You can click here to shop my online store.  Please use the Host Code shown on the top of this page.

Thanks for visiting me in My Stampin Space today.  Come again, the door is always open and the Keurig is always on, ready to brew you a fresh cup!

Happy Stampin,

Nancy

Tabs For Everything stamp set

Tabs For Everything


Save

Save

Save

Save

Save

Baby Bear Baby Boy Card

A friend and fellow stamper just had a baby boy, so I needed to make a Baby Card to send to her, and I knew the Baby Bear Baby Boy card was just the ticket! (Phew, that’s a mouthful!)   A few weeks back, I made a baby card for another friend who had  a baby girl.  You can see the Baby Girl card here.

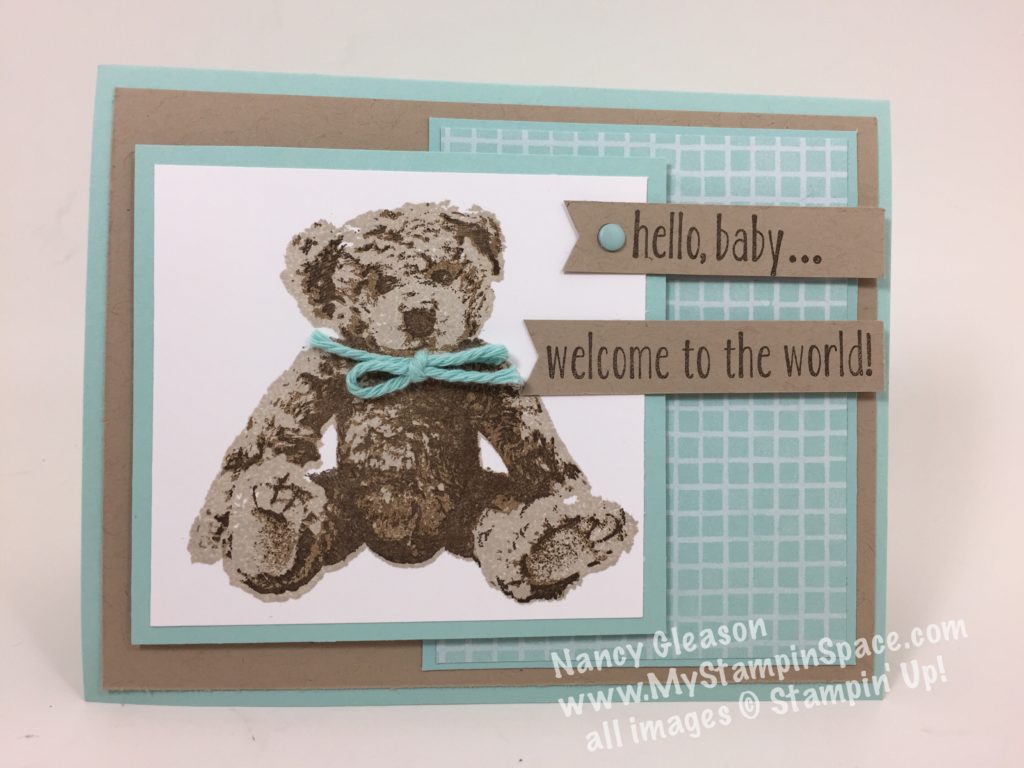
Well, one of the sayings I’m fond of saying is “when you find something that works, stick with it”!  So I decided to make the same card, substituting Pool Party Blue for the Flirty Flamingo pink in my original card.  Here it is:Baby Bear Baby Boy Card

I used the same layout, and the Crumb Cake and white but changed the color from Flirty Flamingo that I used on the baby girl card to Pool Party for today’s Baby Bear baby boy card.

The Pool Party patterned paper  is from the Tasty Treats Designer Series Paper.  I love how the Pool Party grid design is cheerful with a nod to masculine, compared to the Flirty Flamingo polka dot paper that has touch of whimsy and a feminine feel.  Here are the two side by side:

I love this baby card layout that works well for both a baby boy or a baby girl!

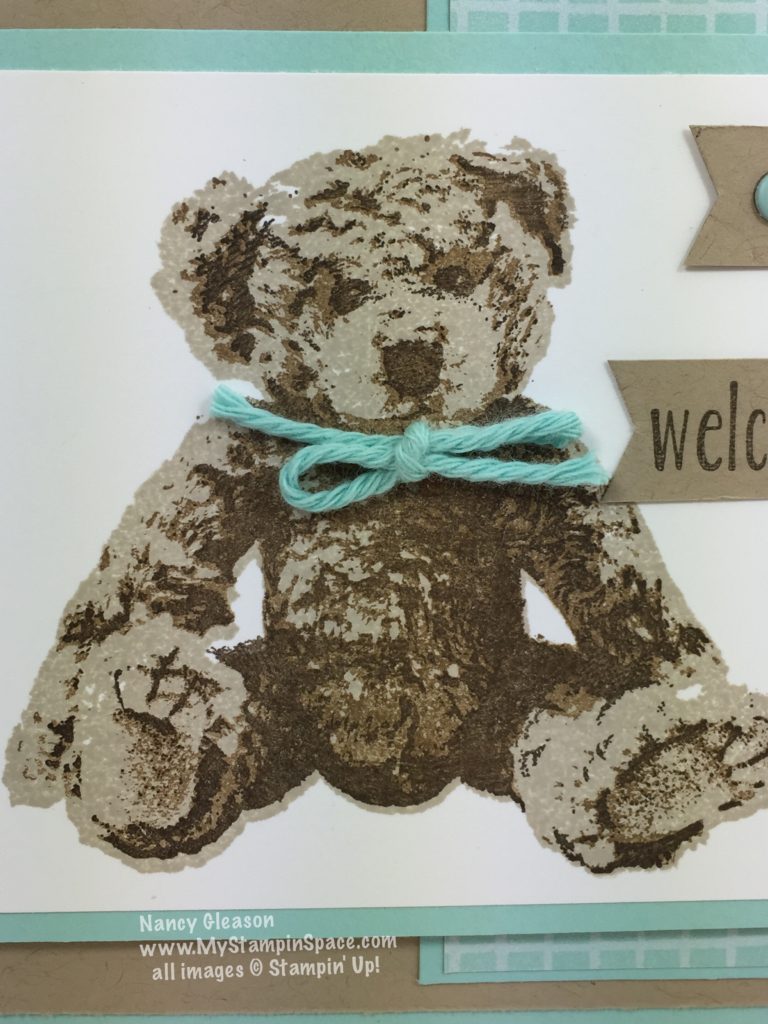
It’s easy to make a baby card using the Baby Bear stamp set.  The triple stamp creates the life-like fuzzy texture of the bear, and the photopolymer stamps allow for perfect placement of the 3 images.  The crumb cake and white is a great neutral color combo that works well with so many colors, and the Flirty Flamingo and Pool Party are no exceptions.  While I used a piece of thick Baker’s Twine in a matching color, I placed the bow under the Baby Boy Baby Bear‘s chin, and on the Baby Girl Baby Bear’s head.  For the girl card, I used 3 pearls as an embellishment, while on the boy card, I used a candy dot.

I love the realistic furry detail of the Baby Bear Stamp set

If you need to make a baby card anytime soon, I suggest you get this Baby Bear stamp set.  Remember Sale-A-Bration is in full swing which means that you will get a Free Sale-A-Bration item for every $50 worth of product you order.  Find out all about Sale-A-Bration here.  To place an online order, click here.

Please leave me a comment below and let me know how you like this card.  And please sign up for my mailing list using the sign up box on the right.  Thanks,

See you soon!

Nancy

Save

Save

Save

Save

Save

Save

Save

Save

It’s back!!!!

It’s back!!!

And I couldn’t be happier!  My blog has been knocked out service since Oct. 19th!!!  I’ve been (patiently) waiting for it to be restored.  And while I was able to have my blog restored, I did lose all of my October blog posts.  A small price to pay, as I was prepared with the possibility of losing everything and having to start all over.

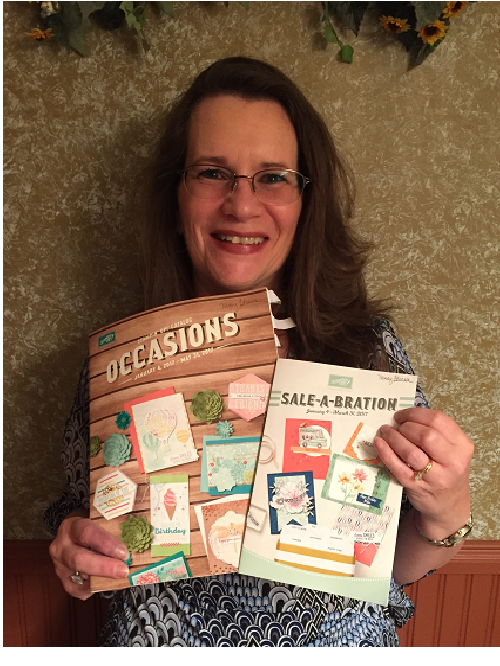
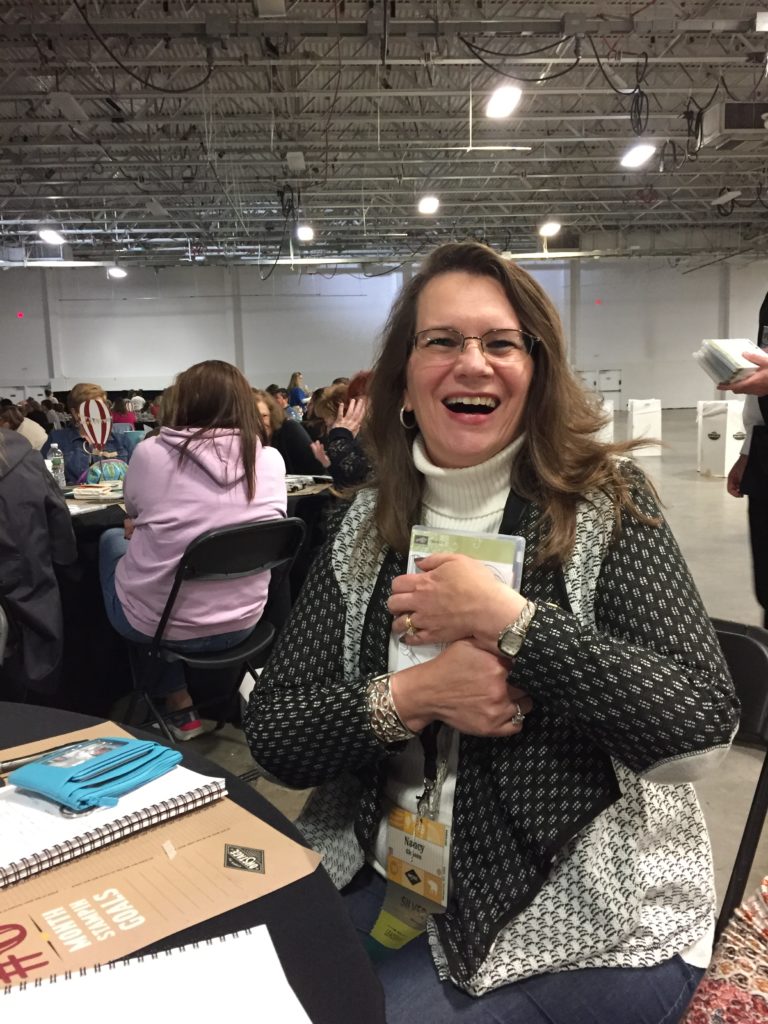
It’s been a long time, and boy, do I have a lot to share with you!  For starters, look at this!nancy-with-catalogsI had a fabulous time at the OnStage Event in Secaucus, NJ last weekend where I got to get the new 2017 catalogs.  It was a fun-filled time spent with my downline, and other demo’s from the Northeast, gathered at the Meadowlands Convention Center.  I’ll share more about my trip to OnStage in a blog post later this week.
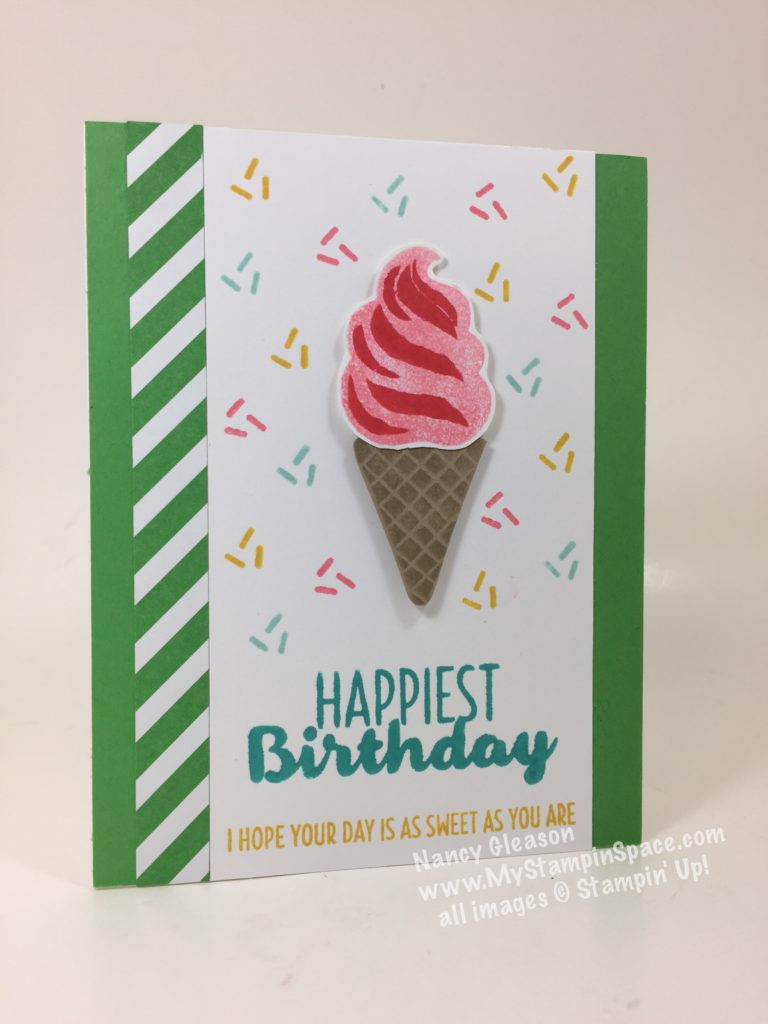
The highlight was the catalog reveal of the 2017 Occasions catalog (January 4 through May 31) and the 2017 Sale-A-Bration catalog (January 4 – March 31).  This is my favorite perk of being a Stampin’ Up! DemonstratorI get to see the catalogs BEFORE they are revealed, and order product from those catalogs!  If you want to enjoy this perk yourself, then join me in this incredible Stampin’ Up! journey!  For the cost of the starter kit, $99, you get all this and more!   Talk to me about getting your starter kit today.  You can join just for the perks, and stay for the discount, or drop without any obligation.

I’ve had the chance to play with one of the soon to be released stamp sets called   Cool Treats.   This is going to be one of my favorite stamp sets.  It’s so fun and playful.  I’ve made my November birthday cards from this set, and it’s so much cheery; I can’t wait until the coordinating product suite gets delivered to me tomorrow.  (Why didn’t I choose Express Shipping?  The wait is so long!)pitk62081

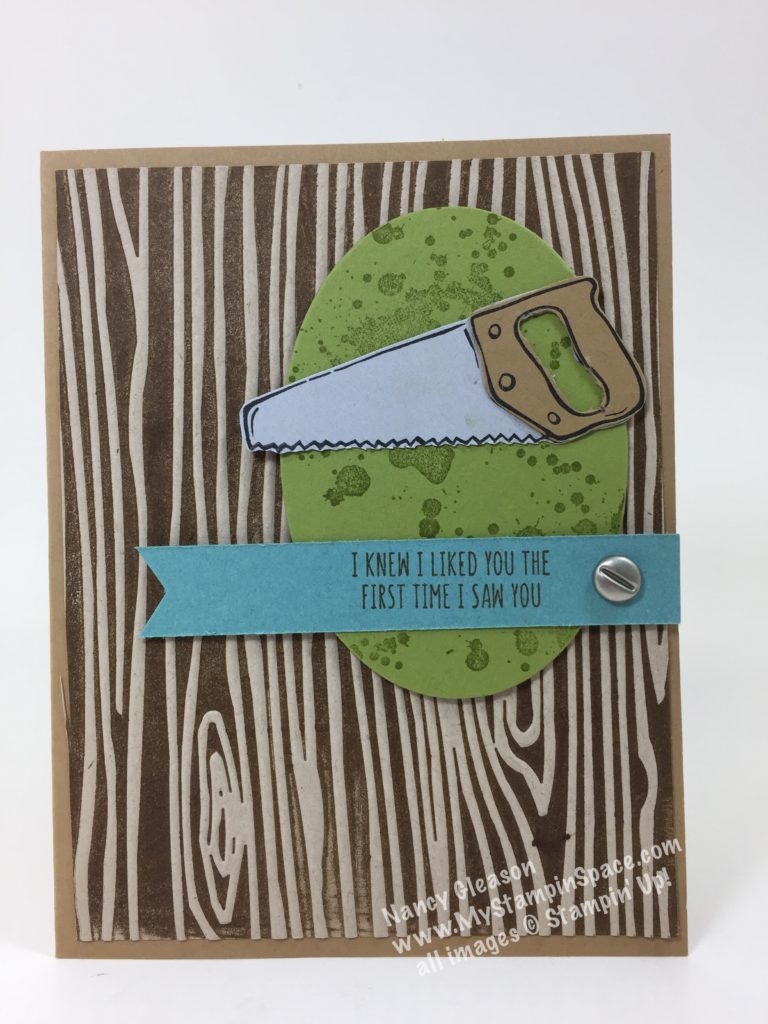
Another stamp set is called “Nailed It”.  I won this stamp set during Prize Patrol, and I am so happy I did.  I made this card for my hubby as soon as I got home.  The sentiment was perfect, and since he’s a woodworker, the tools are perfect for him. saw you

Here’s me so happy I won this at Prize Patrol:

winning Nailed It

You can see how happy I am.  I know you are sharing in my happiness, thank you.  So now I want to share something else that will make you happy too!

You can order your Stitched Shapes Framelits Stitched Shapes Framelits Dies (item 145372) NOW!   This set of 12 (4 sizes each of Circles, Ovals & Squares) are destined to become your go-to shapes because the faux stitching around the edge of each shape will transform your ordinary shapes into extraordinary works of art!  saleCOMING SOON!  The Stampin’ Up! On-Line Extravaganza Sale with up to 40% off on select items begins November 21.  This online super sale will run from November 21 to November 28.  It’s the perfect time to stock up on holiday gifts for family and friends as well as boost and freshen your personal paper crafting stash!  This year’s Online Extravaganza will include 24-hour sales on the first and last day of the promotion with special product discounts only available that day!  Mark your calendars;  I’ll have more details for you soon 🙂

Thank you so much for sticking by me while I had this long spell of being ‘off the air’.   I appreciate your loyalty and friendship so much.    I hope something like this will never happen again.  Please like me on facebook so we can still keep in touch.

Happy Stampin’

Nancy


Save

Save

Save

Save

Save

Save

Let’s Go Blog Hopping!

Pals Blog Hop 2016 badgeWelcome to the Pals Blog Hop for April 2016.  We are thankful you stopped by to take a look at our new 2016 Blog Hop monthly themes.  This month we are featuring projects that are all about our families. This is a great time of year to think about what to make for Mother’s Day, Father’s Day, or upcoming graduations. And, family vacations are just around the corner… how would you want to remember those special family moments? We hope to provide you with lots of ideas and that you enjoy our creations.

You may just be starting the Blog Hop or may have come from the previous link from the Line-up on the Pals Blog Hop listing shown below.  The full lineup will help you move along from blog to blog so you may see all the projects.

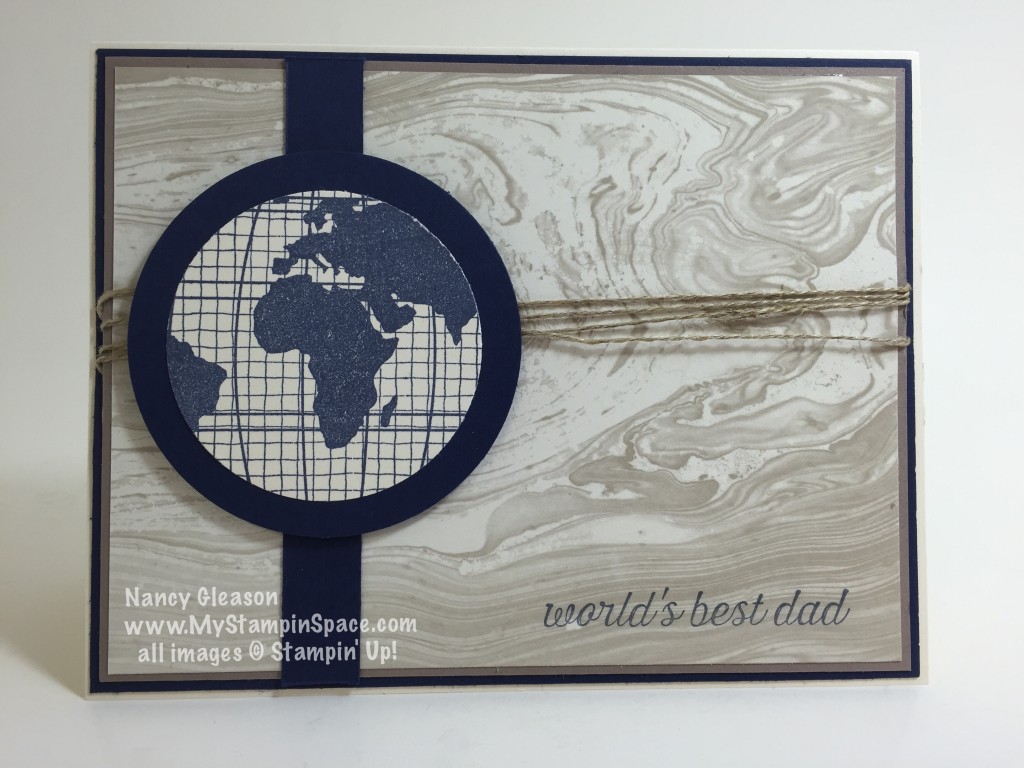
Well, I intended to make a card to welcome a new baby for today’s blog hop.  The idea I had in mind just didn’t pan out the way I envisioned it.  So, I fell back on my trusty old “Going Global” product suite.  I knew the ‘world’s best dad’ sentiment wouldn’t fail me!  After all, isn’t Dad always there to bail us out when we get into a jam?

Worlds Best Dad

When making a masculine card, I think it is important to keep things simple, without lots of embellishments or bling.  This beautiful patterned paper, from the Going Places DSP stack is all the design that’s needed to add lots of interest but not be too overbearing.  Layered on Sahara Sand and Night of Navy Cardstock, it has a nice pop of color, but in masculine tones.  The world image from the Going Global stamp set was stamped in Night of Navy and layered on a Night of Navy circle.  A thin strip of Night of Navy cardstock repeats this color 3x’s on the card (a good rule of thumb is to repeat a color or an element 3x’s for good balance!).  A few strands of Linen Thread repeat that neutral color while adding a rough, masculine touch.

If you would like to order any of the products I used here, just click on the item name in the description above, click here to go to my online store.

Thanks for visiting. To continue with the hop, please refer to the Blog Hop Line-up below. We hope to see you on next month’s Pals Blog Hop! 

  1. Mary Fish at Stampin’ Pretty
  2. Jackie Diediker at Stampin’ Jackie
  3. Michelle Gleeson at StampinMojo
  4. Katy McGloin at Just Fun Stamping
  5. Sherrie Gross at Stampin’ Sunshine
  6. Peggy Noe at Prettypapercards
  7. Brian King at Stamp with Brian
  8. Debra Simonis at Deb’s Stampin’ Grounds
  9. Wendy Klein at Doggone Delightful Stampin
  10. Jennifer Michalski at Stamping Serenity
  11. Kalyn Shubnell at The Stamping Chronicles
  12. Becky Volpp at InkBlossomwithBecky
  13. Patti MacLeith at Papercrafts by Patti
  14. Nancy Gleason at My Stampin Space  — YOU ARE HERE!!! —
  15. Pam Dotts at Clearly Southern Stampin’
  16. Beth Beard at My Little Craft Blog
  17. Lisa Ann Bernard at Queen B Creations
  18. Tricia Chuba at ButterDish Designs
  19. Beth McCullough at Stamping Mom
  20. Debbie Mageed at Secret Stamper
  21. Denise Hoepfner at The Mountain Magpie
  22. Maggie Mata at Maggie Made Cards
  23. Natalie Bradley at NatalieBradley.com
  24. Pamela Sadler at Stampin Pink Rose
  25. Karen Zaring Browning at Karen Zaring Browning
  26. Susan Itell at Simple Stampin’
  27. Debbie Crowley at Expressivley Deb


My Lucky Stars

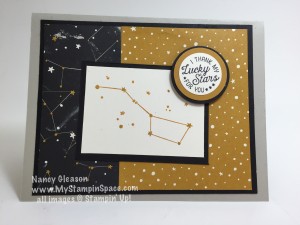
When I saw this sketch by the Freshly Made Sketch challenge, I knew exactly what stamp set I wanted to use.  What I didn’t know was that Cindy Hall, the sketch designer, used the same paper and same stamp set, until just now, when I went to upload my project to their site, and took the time to admire all of the other entries.  I guess great minds think alike!

I thank my Lucky Stars

While Cindy designed the sketch to be used as a joy-fold card, mine is a standard size 5-1/2″ x 4-1/4″ card.

You can see all of the other entries at the Freshly Made Sketch challenge here.

The GOING PLACES product suite zoomed to the top of my ‘Must Have’ list when the Occasions catalog came out.  I’ve always had a love of maps; I got that from my Dad who always drove with a map folded on the steering wheel when we would go on long road trips and family vacations. In fact my office has a wall paper border of world maps.  Even in this day of GPS and google maps, I still love a good paper map, with all its folds, and legends, and…, well I digress!

The suite includes the “Going Global” stamp set, the  “World Traveler TIEF”, an “Going Places” Designer Series paper stack.    A great product suite for projects that lend to a masculine feel, but also for memory keeping for trips and journeys, as well as astronomers and star-gazers.

This card is headed straight to my son Matt.  Even though he still lives at home, I feel I don’t always tell him how much he means to me.  I hope this card, that he’ll find tucked in an unsuspecting place, will let him know I’m so thankful for him, and the joy he brings me!

Thanks for stopping by My Stampin Space.  Come back again soon.  I’ll be sharing another card using this product suite later in the week.

Thanks,
Nancy

shop on lineClick here to start shopping!

Sale-A-Bration What is Sale-A-Bration? CLICK HERE to learn all about Sale-A-Bration and why you don’t want to miss out!

Weekly Deals headerWeekly Deals.  Stampin’ Up! releases new Weekly Deals every Tuesday – some of your favorite products at a discount for one week only (or while supplies last).  To check out this week’s deals, click here.

Not just for Rednecks!

I have to admit when I first saw the Wonderland stamp set in the 2015 Stampin’ Up! Holiday catalog, I did like the trees and especially the sentiments, but I wasn’t really digging the antlers.  Well, I finally caved, and ordered the set, because I thought that my son, who is a big Duck Dynasty fan, and self-proclaimed redneck, might like it.

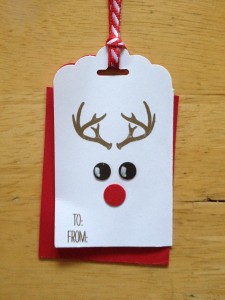
Well, I found the cutest way to use the antlers!  I’m sure you’ll agree, these antlers are not for rednecks, but for Rudolph the Red-Nosed Reindeer!

IMG_5789Adorable, right?  I made this in my last class and the girls LOVED it!  It is so quick and simple to make too.  And the folks over at Merry Monday Christmas Challenge decided this week to include a deer in your card, so I’ll be submitting this to their challenge too.

Whisper White paper cut to 2″ wide and 4-1/4″ long was shaped in the Scallop Tag Topper Punch.  The Antlers from Wonderland are stamped with Soft Suede ink, as well as the To/From from Festival of Trees stamp set.  The eyes are punched from Early Espresso cardstock using the Owl Builder Punch.  The nose in this sample was punched with Real Red cardstock, but in my class, we used the larger dot from the Home For Christmas Enamel Dots.  A little white hi-light on the eyes using the Signo White marker and your done!  We added a 2-1/4″ x 4-1/4″ strip of Real Red cardstock and tied them together with the 1/8″ Real Red Ribbon.  Easy Peasy!

I know you are going to want to make this yourself, but you’ll have to hurry.  Stampin’ Up! just released a Retiring Products List from the Holiday catalog and this stamp will be retiring 🙁

No worries, you can still get it now, but pretty soon it will be too late, and then you’ll just be sad that you missed out.  Now would be the time to snag this stamp set and stock up on the Enamel Dots and ribbon too!

So, shop the RETIRING PRODUCTS LIST, while you’re there, check out the WEEKLY DEALS and the CLEARANCE RACK for some great deals, too!

Check out my facebook page;  I’ve created a photo album of projects using the Wonderland Stamp set.  This set is so versatile and so much fun, that I’m having a hard time putting it down!  You’ll be inspired by the many projects you can make with this set.

Thanks for stopping by My Stampin Space!

Stamp On,
Nancy

Built for Free Using: My Stampin Blog

Three Cheers for the Pals Paper Arts!

The Pals are a great group of talented Stampin’ Up! demos under the guidance and leadership of Mary Fish, of Stampin’ Pretty.  Pals Paper Arts is a public forum to showcase & challenge your papercrafting skills.  With sketch & color challenges, you can play along with the Pals as often as you wish.  This week, the Pals Paper Arts features a sketch challenge:

PPA252kwb

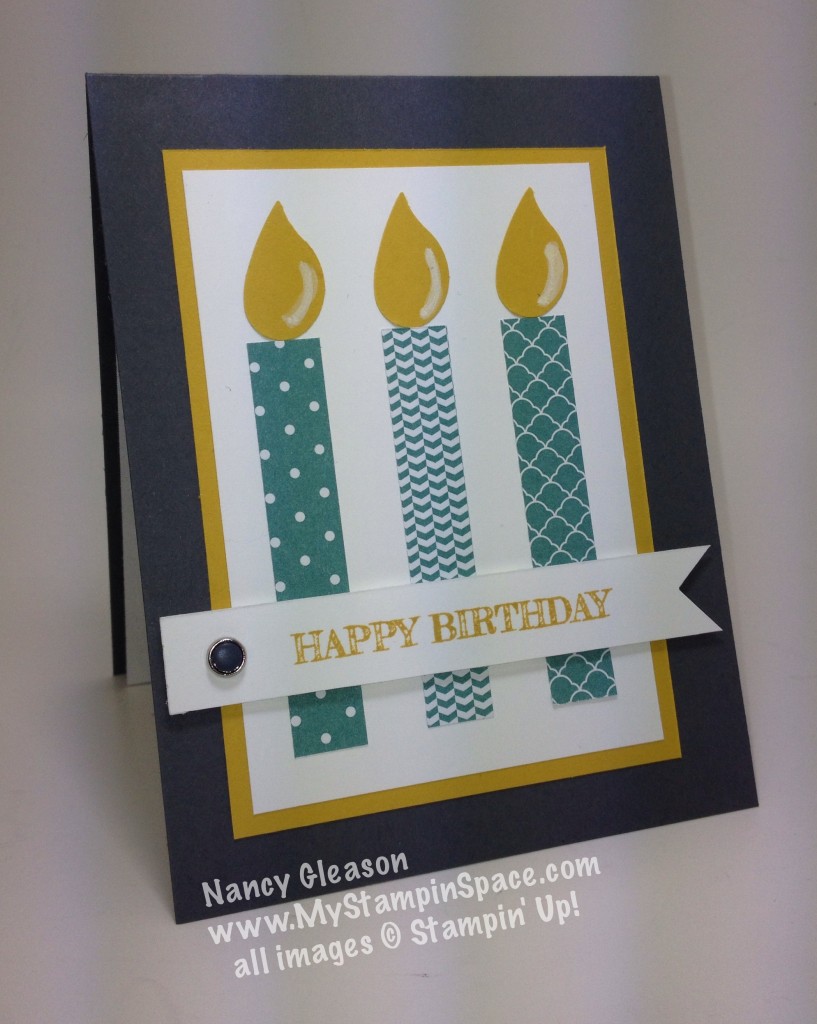
I immediately thought of a card I taught to a class last month showing a good way to use up scraps of DSP.  If you are like me, you just can’t throw away your scraps of DSP, not matter how small!  Hoarder!  Yes, you are – but you don’t have to be any longer!  You can turn those little strips of DSP into something beautiful.  Let me show you how:candlesThis idea was one I actually learned from our fearless leader, Mary.  She showcased this card on her blog quite a while ago, and I immediately tucked away the idea for using my scraps.

3/4″ wide strips of DSP, and a flame which is actually the wing from the Bird Builder Punch and you’ve got a quick & easy birthday card.  I used my white chalk marker to add a little hi-light the flame and layers for my card base.  A little banner cropped from another scrap strip of whisper white punched with the flag banner punch is just right for the sentiment.

And I found it is actually LIBERATING to use those scraps, not just collect them.  It helps to de-clutter my stash area, and I’m sure those scraps would rather be turned into something beautiful to bring delight to a special someone on their birthday, than to just sit in a scrap pile.  So pull out those scraps, and your build-a-bird builder punch and make candles.

Your scraps will thank you.  Your friends will thank you when they receive your beautiful card.  Your clean & organized craft area will thank you.

If you want to see what the other talented Pals did with this sketch, head over the Pals Paper Arts gallery.

Remember, if you’d like to order any Stampin’ Up! products from me, you can access my online store here.    If you place an order with me before May 30th, and it is less than $150 before shipping & tax, please use host code 4HCRZHHC.  Any order of $50 or more will qualify for a FREE embellishment from me from the new catalog!  (If your order is over $150, don’t use the code but rather redeem your own rewards.)  The items on the RETIRED LIST are only available for a few more days so don’t delay.

I hope you found this tip useful for using your scraps of DSP.  If you did, please leave me a comment and let me know.  I love to hear your feedback to my projects.  Thanks.

Happy Stampin’,

Nancy

The Blooper Reel….

I love watching the bloopers, the outtakes.  You know what I mean, the parts of a film that get edited out when the actors/actresses flub their lines, make a mistake, or just can’t keep a straight face during a funny scene.   Well, I made a real-life blooper the other night  and it happened WHILE I WAS TEACHING A CLASS!

It was funny, (and admittedly a little embarrassing!) but I was able to redeem myself by turning it into a teachable moment.  Let me share:

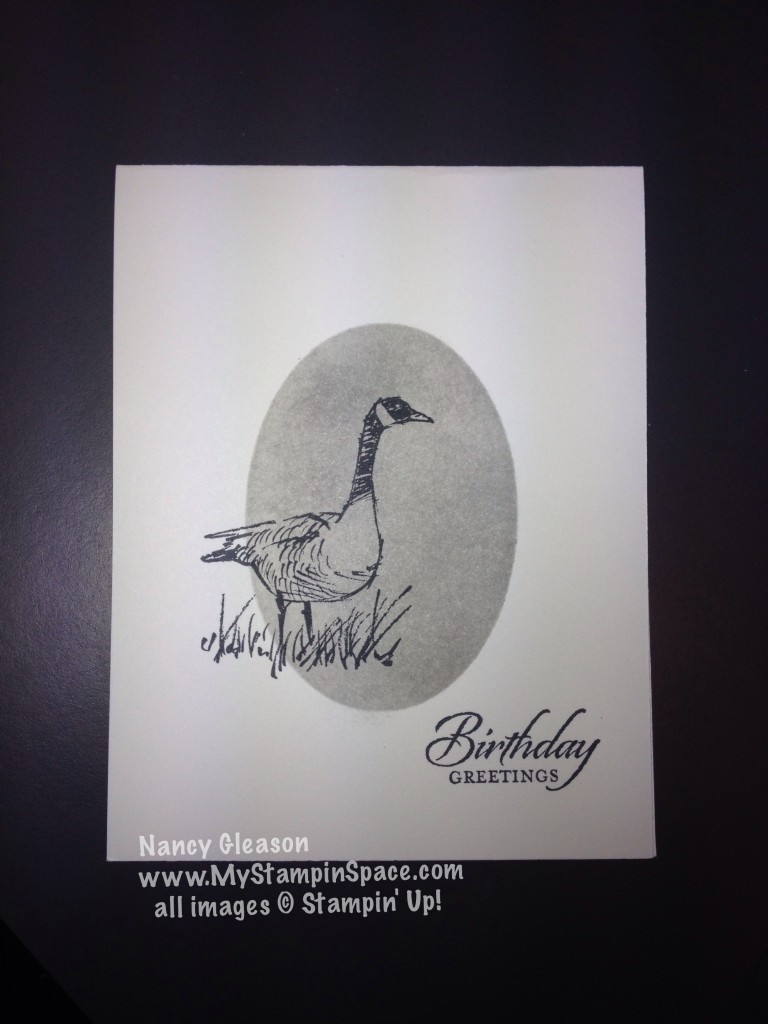
I was teaching a class featuring Masculine Projects.  I also had my first male student in a class!   The project was a simple, single layer card (I almost never make a single layer card) and I was teaching the masking technique to create an interesting background element.  This is the sample card I had made.  Wetlands Goose single layer cardSo I sponged on my background oval, then I showed the students how to place the main image, in the case a goose, so that the entire image was NOT inside the oval, but rather half in, half out.  Like this:

close up wetlands goose

Beautiful so far, right?  And then I picked my card up and realized that I stamped my goose UPSIDE DOWN!  That’s right; the fold was at the bottom rather than the top!  YIKES!   This was a “Don’t try this at home” moment.  I quickly told my class they should always check where the fold of the card is before stamping and adhering any layers so they don’t end up like I just did!  I’m sure it will be a memorable lesson as we all got a big laugh out of my mistake!

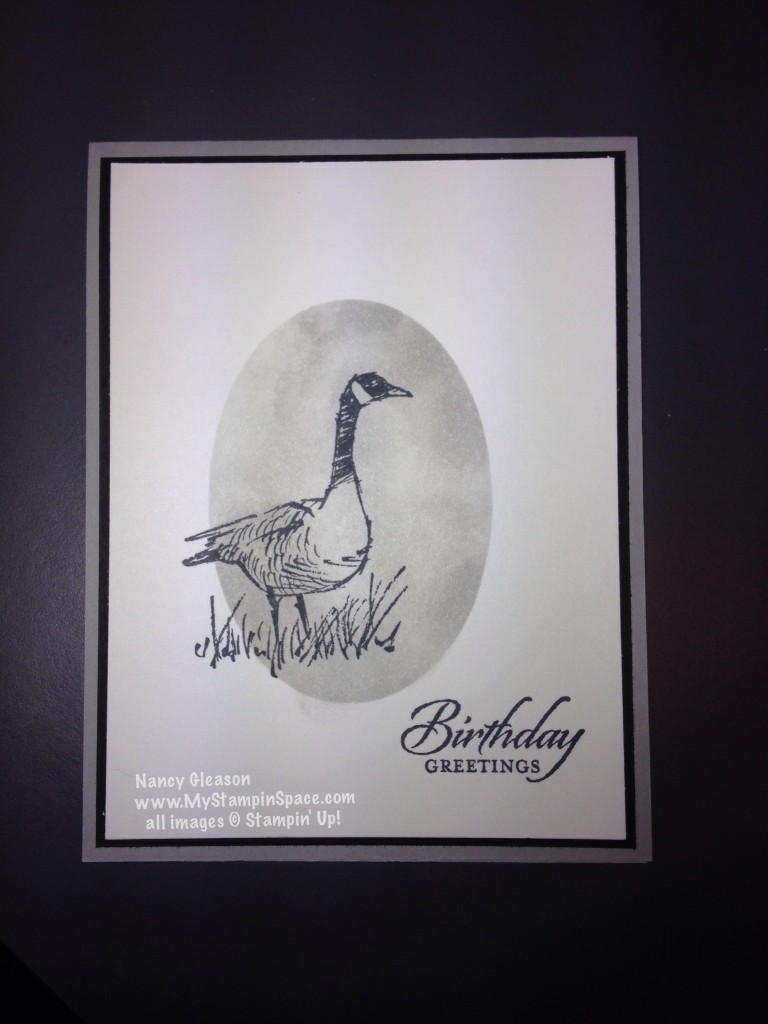
I redeemed my mistake by turning it into something that is more elegant than the original.  I simply cut the paper in half, then cropped that piece slightly, added a layer, and popped it onto a new card base.  See?

Wetlands Goose multiple layer card

We all make mistakes from time to time, and one of my favorite sayings is “There is no mistake that a well placed embellishment can’t hide.”  Most of the time.  For those others times; layers.  Either cut your paper and layer it over a contrasting or coordinating piece of cardstock,  like I did here.  Or place a layer over it (like a banner or sentiment strip).  In the extreme case where none of these remedies can fix it, well, my second favorite saying is:  “It’s only a piece of paper.  Nothing that a new piece of paper can’t fix!”  Yup, sometimes just throw it in the trash and start anew, empowered with the knowledge you gained from making the mistake the first go-around.

So, when you are creating and something doesn’t go as planned, no worries.  You can redeem it.  And if you made your blooper in a room full of people, use it to your advantage, for a lesson everyone will remember.

If you have a blooper moment while crafting, I’d love to hear it.  Please leave me a comment and tell me all about it.  Thanks!

Happy Stampin’,

Nancy

If you want to order any of the supplies I used to make these cards, just click on either of the images below.

Cool School Tools – August Pals Blog Hop


Welcome to My Stampin Space and to the Pals Blog Hop for August. This month we are showing off our favorite crafting tools – those Stampin’ Up! tools that we just can’t live without. We hope you enjoy our projects!

You may just be starting the blog hop or may have come from Lynn Kolcun at Stamping with Avery’s Owlery #22 on the Pals Hop. If you get off track at any time, the full lineup below will help you move along from blog to blog so you see all of the amazing creations.

I need to thank the Pals for planning the Blog Hop on my son’s birthday so the immediate world can see the cards I’ve made for his birthday.  My  ‘little boy’ turns 22 today.  He’s grown up to be such a fine young man.     I’ve always loved back to school time; I still love school shopping.  Note books, folders, paper, pencils, markers, crayons, calendars & organizational stuff.  Have you seen all the cool locker accessories?  I never had magnetic pencil cups or mirrors for my locker when I was in school.   But I won’t be doing any school shopping anymore so I have to content myself with buying cardstock, ink, Blendabilities and cool school tools from Stampin’ Up!  Come to think of it, I like that much better!

I had fun playing with the Moustache Framelit die and have made 2 cards for my son using this die.  Tell me which one you like best.

IMG_3676[1]This card uses the Moustache framelits die, and the Word Bubble framelit dies, and the Word Window punch (cut in half) for the eyes.  A simple square card from Crumb Cake cardstock and Basic Black cardstock.  The sentiment is from the stamp set “Just Saying” & is stamped with Tangelo Twist ink onto Whisper White cardstock.  Did you notice how the stamp image and framelit die coordinate so perfectly?IMG_3678[1]For this card, I used a Pumpkin Pie cardstock base, with a layer of Soft Suede cardstock for the background.  This time I cut out 3 moustaches, one each from Pacific Point, Pumpkin Pie & Old Olive DSP.  A strip of Very Vanilla cardstock was stamped with Early Espresso ink and uses the sentiment from “Peace, Love & Cupcakes”.  A button and piece of bakers’ twine secure the banner to the cardstock.  Candy dots add just a little bit of whimsy to the moustaches.

Now for my favorite tool – but I can’t narrow it down to just one! The most basic tool that any paper crafter has to have, and usually a first purchase, would be the Stampin’ Trimmer.  Every project starts with paper that needs to be cut, and of all the many brands & models of paper cutters out there, none offer the features & engineering that the Stampin’ Up! trimmer have.  Watch the video and you’ll see why!

I can remember my early days of paper crafting and thinking I would never get a Big Shot; I could never justify spending a hundred bucks on a tool and then needing to spend more money on the embossing folders & dies.  But I hosted a $400 workshop and decided the best way to use my half price was on a Big Shot and my hosting rewards for dies.  My papercrafting was taken to a whole new level and I’ve never looked back!  Now I couldn’t image papercrafting without it!  So the Big Shot, and the Magnetic Platform are my top choices for Cool School Tools!

With the Big Shot & Bundles Promotion going on right now, there’s never been a better time to step up your papercrafting and take the plunge.  Order a Big Shot, get a free Stamp set & Framelit die bundle.  I promise you’ll wonder why you waited so long!  Click here or on the graphic below to see all the stamp & framelit bundles you can get with this promotion!

Buy a Big Shot and get a free bundle. 15% discounts for everyone else! Get your free bundle.

The next stop is #24 Sherrie Gross at Stampin’ Sunshine on the Pals Blog Hop! Thanks for visiting and I hope to see you next month.
2014aughop_back

2014aughop_next

  1. Sue Becker at RnR Stamping
  2. Beth Beard at My Little Craft Blog
  3. Susan Lankford at Stamp and Create With Susan
  4. Brian King at Stamp with Brian
  5. Rae Harper-Burnet at WildWestPaperArts.com
  6. Debbie Mageed at Secret Stamper
  7. Diane Roberts at Score at Four and a Quarter
  8. Jackie Diediker at Stampin’ Jackie
  9. Kelly DeTommaso at Kelly’s Creative Corner
  10. Amanda Merrill at Inkflair
  11. Shannon Hokanson at Paper Works by Shannon
  12. Amy Williams at Stamp and Spice
  13. Kerry Willard Bray at Peonies and Paper Chains
  14. Michelle Gleeson at Stampin’ Mojo
  15. Nicole Watt at Pixel Maven’s Retreat
  16. Peggy Noe at Pretty Paper Cards
  17. September Gray at SeptemberGray.com
  18. Shannon Jaramillo at EZPeasy Cards
  19. Natalie Bradley at Natalie Bradley Events
  20. Susan Itell at Simple Stampin
  21. Wendy Klein at Doggone Delightful Stampin’
  22. Lynn Kolcun at Stamping with Avery’s Owlery
  23. Nancy Gleason at My Stampin Space—YOU ARE HERE—
  24. Sherrie Gross at Stampin’ Sunshine
  25. Becky Gifford at The Social Stamper
  26. Kalyn Shubnell at The Stamping Chronicles
  27. Lisa Ann Bernard at Queen B Creatons
  28. Martie Pollard at The Crafty Bandit
  29. Amy Hoptay at Inking of You!
  30. Kim Jolley at Stampin’ Artfully
  31. Donna Kopenski at craftycardmaker.wordpress.com
  32. Katy McGloin at Just Fun Stamping
  33. Maggie Mata at Maggie Made Cards
  34. Jane Knudsen at www.seejanestamp.com
  35. Candy Ford at Candy’s Blog
  36. Dawn Tidd at Tiddbits from Dawn
  37. Katie Ferguson at Cottage Paper
  38. Liz Gautreaux at Kind Deeds Stampin
  39. Mary Fish at Stampin’ Pretty