Are you a DSP Hoarder?

The Designer Series Paper by Stampin UP! is so pretty, it’s easy to want to hoard it rather than cut it, but…it’s so much better to cut this beautiful paper, make a card and mail it than it is to keep it in a package on the shelf. So, that’s exactly what I did! #LoveItChopIt I’ve actually challenged myself to stop being a DSP Hoarder, so I’ve come up with a brilliant compromise: I buy 2 packages of DSP and I keep one on the shelf and cut and use the other one. Then I don’t feel bad about cutting it and using. I actually feel better because I love the cards I make more than the package sitting on a shelf. And I’m pretty sure the people who receive the cards I make like that too!

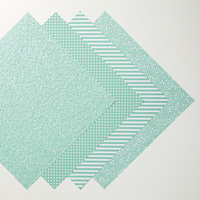
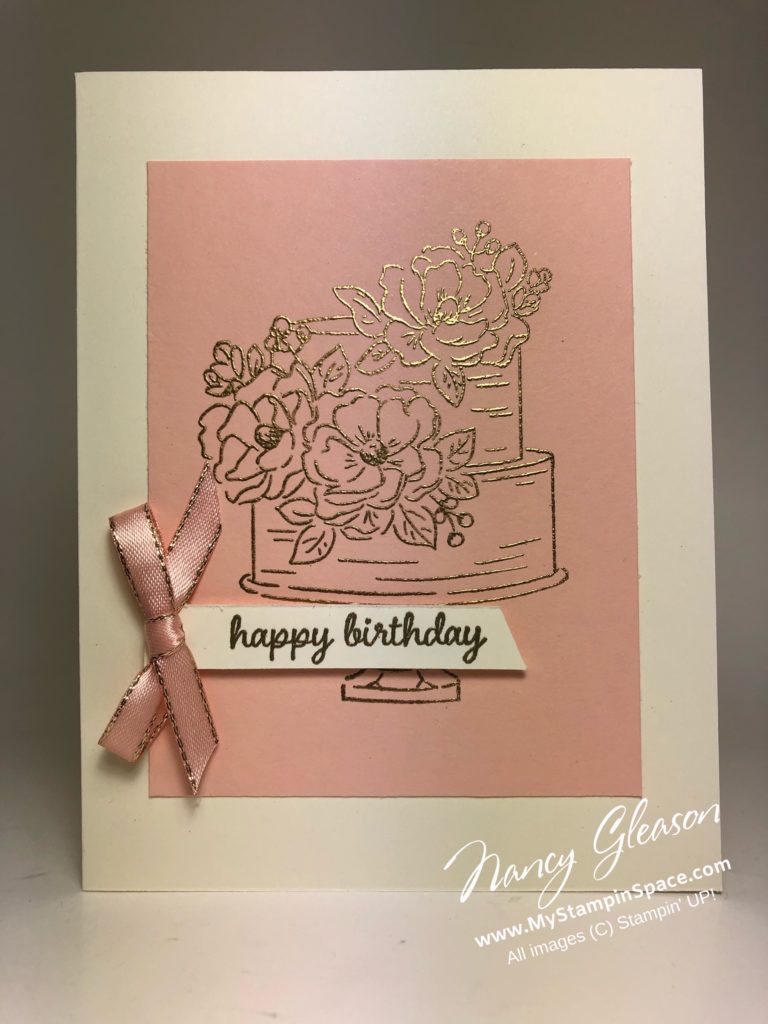
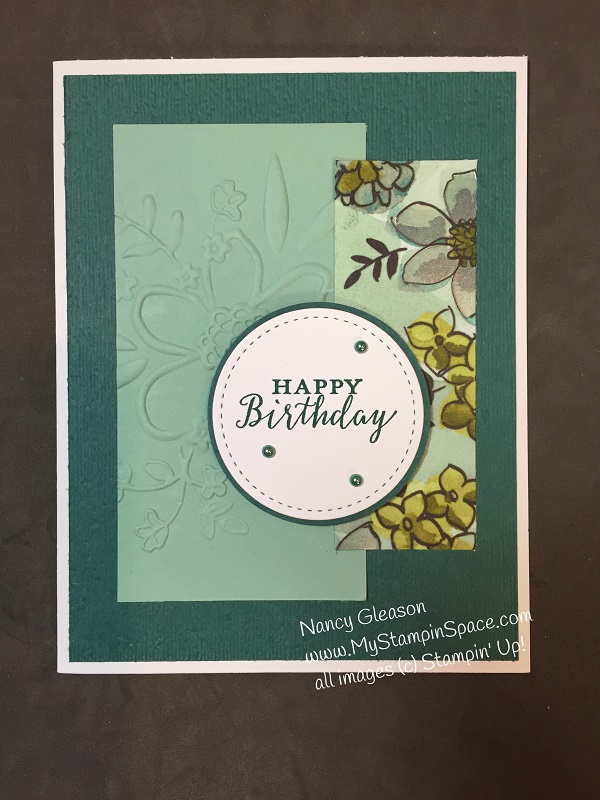
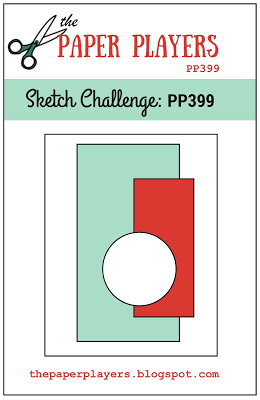
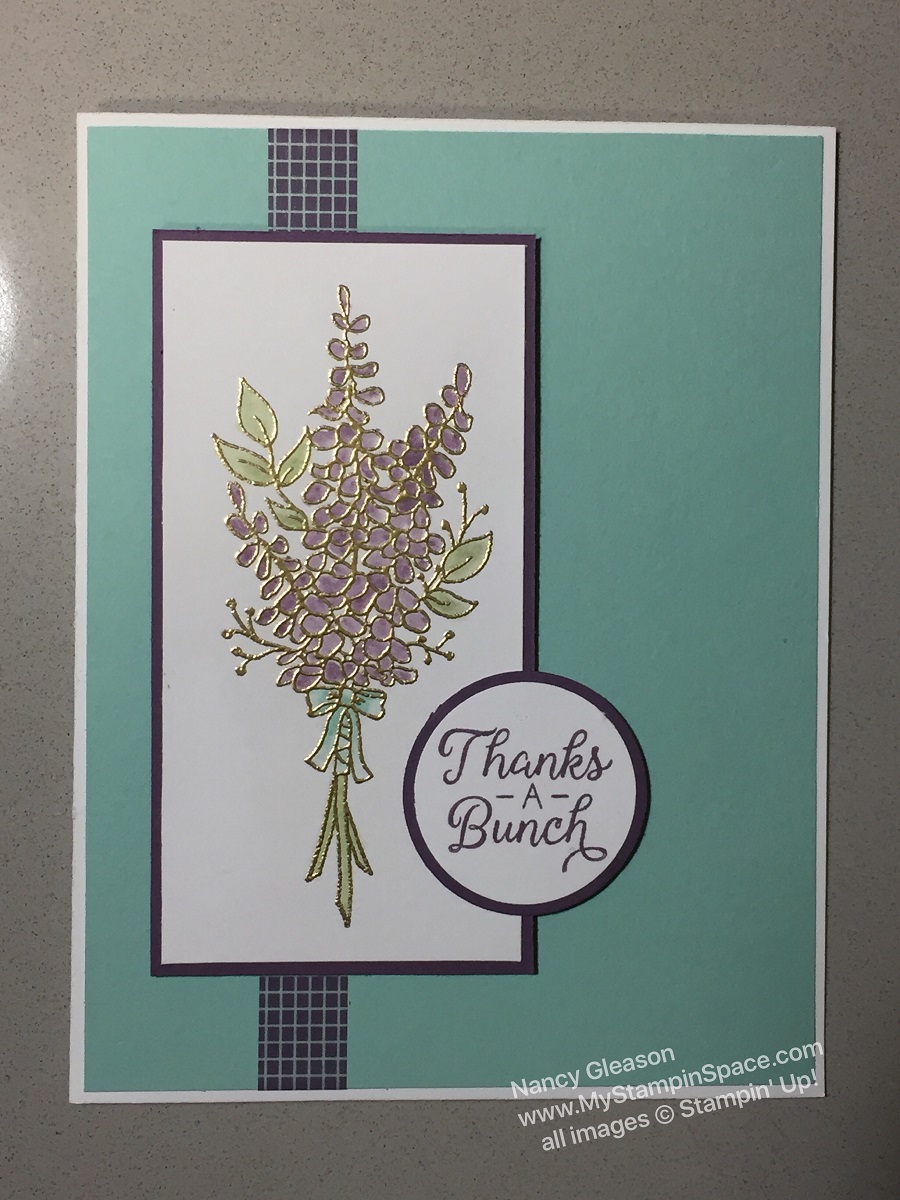
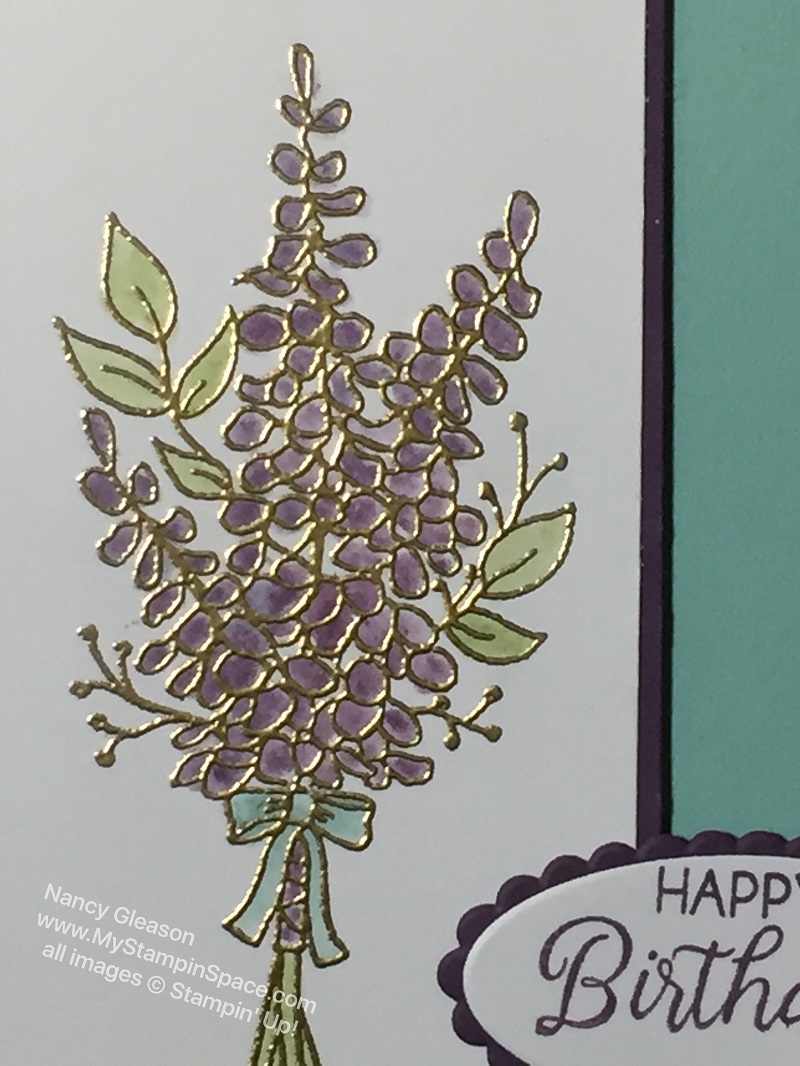
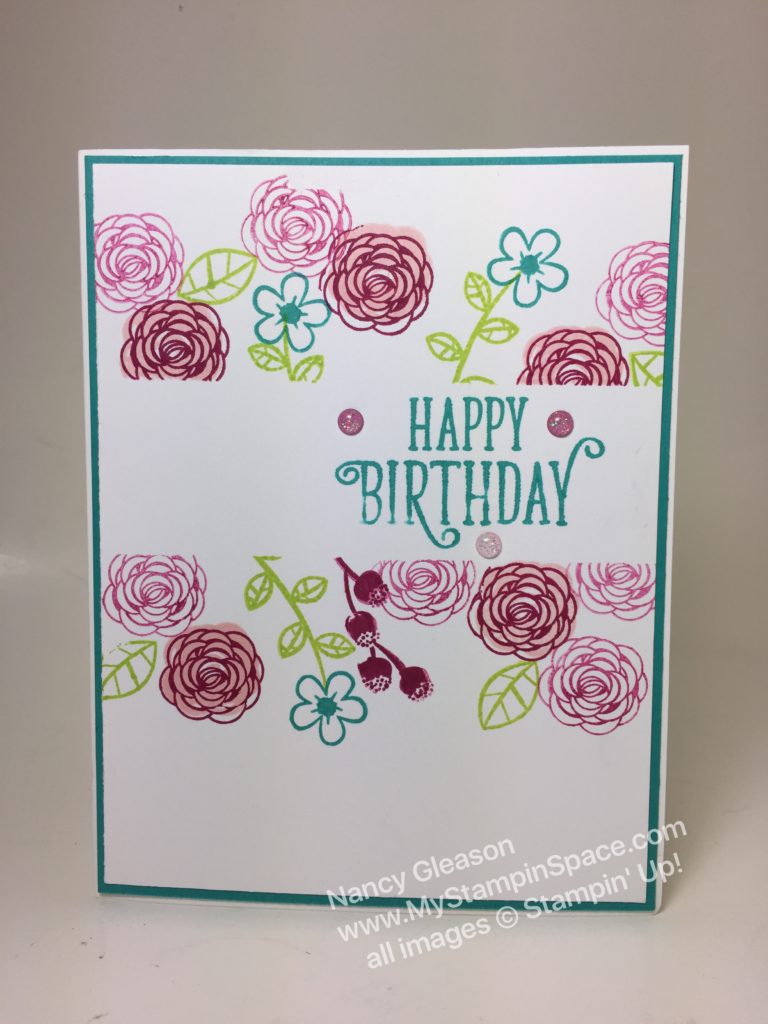
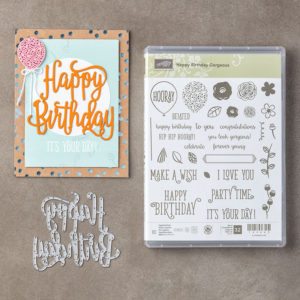
The Best Dressed Designer Series Paper has such beautiful designs – florals, stripes and yes shoes, purses, lipstick and parfum bottles! Each sheet is as pretty as the next. When I saw the challenge from the Paper Players “Spring Flowers” I knew I had to break out my Best Dressed DSP and play along! I also just received the new “Label Me Lovely” punch and “Label Me Fancy” punch that were just yearning to be played with! So put them all together and this is what I made:

Best Dressed DSP for the Paper Players PP482

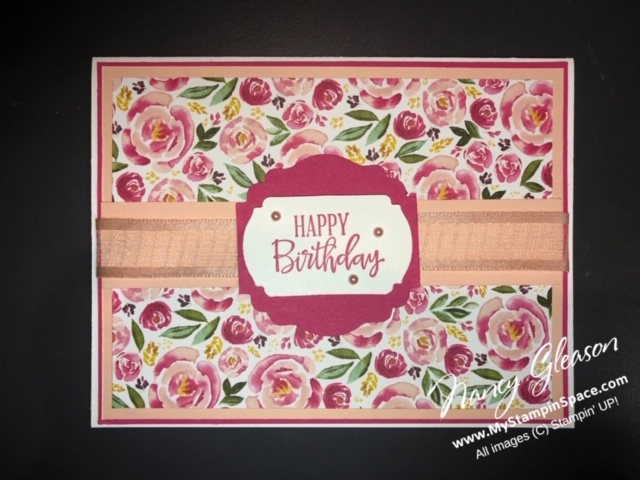
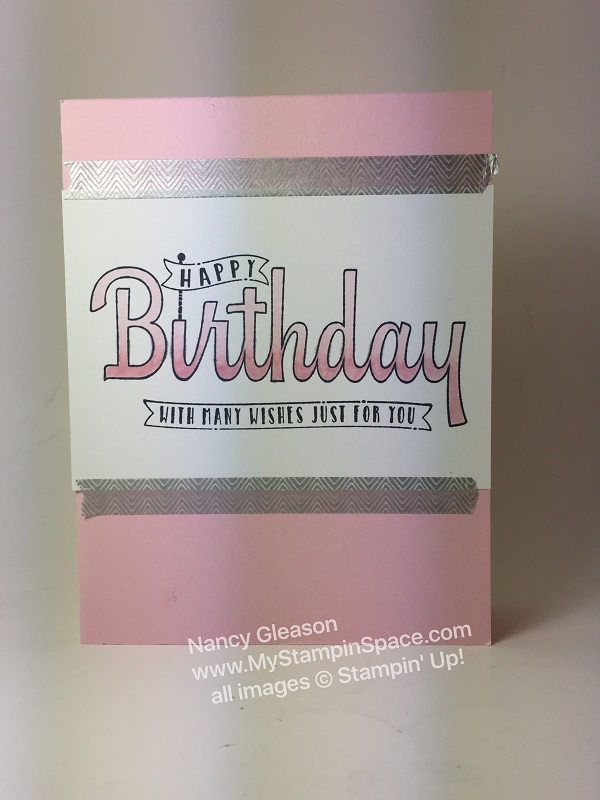
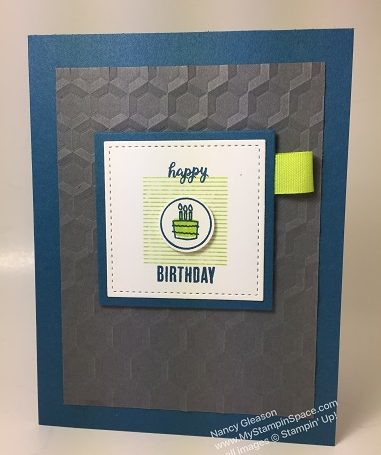
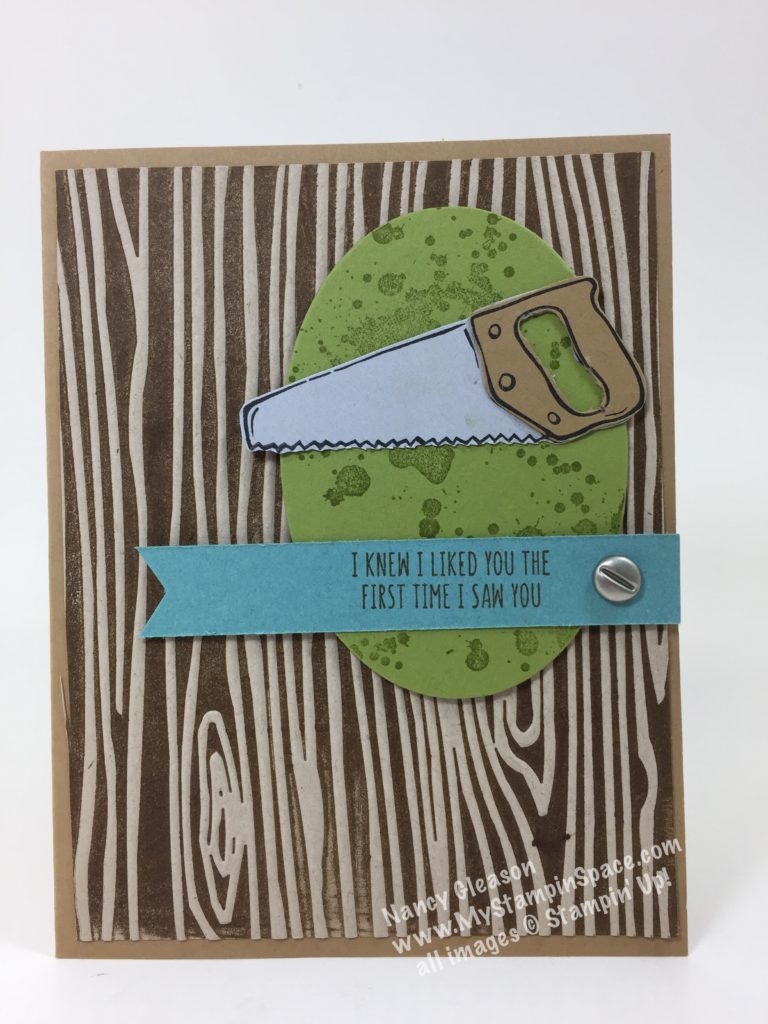
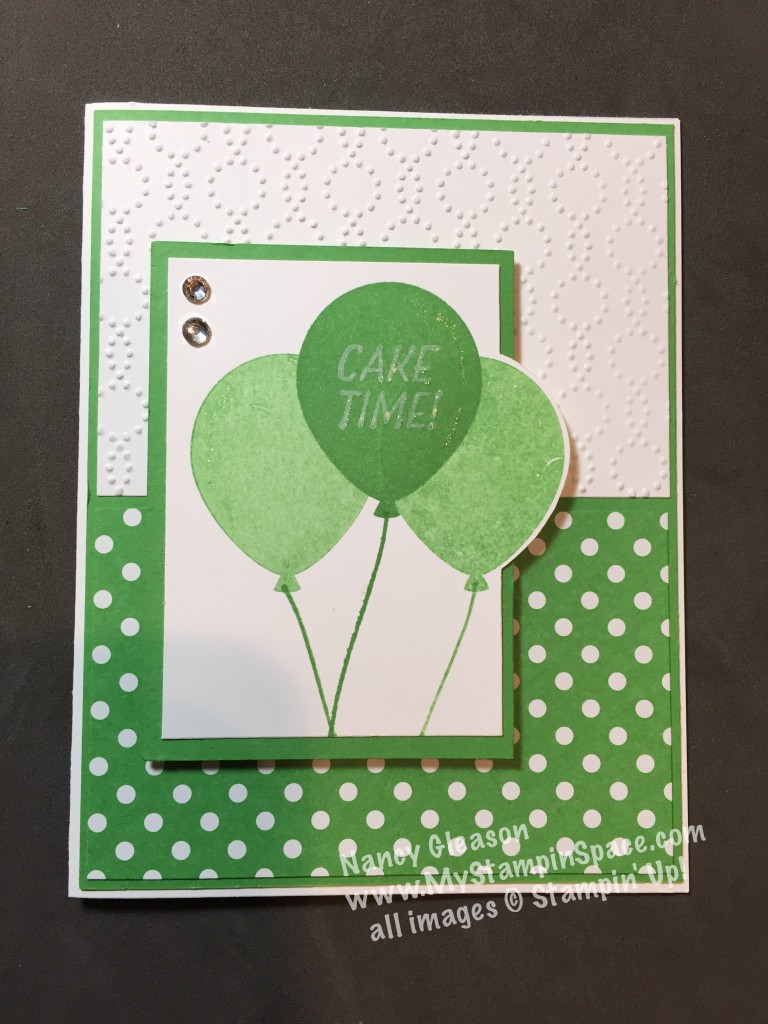
So, what do you think? Better than leaving this beautiful DSP in the package on a shelf, right? I’m glad that the Paper Players Challenge got me cutting my paper and making a pretty birthday card. Be sure to head over to the Paper Players page to see the Design Team cards that inspired me.

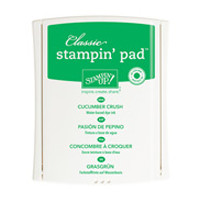
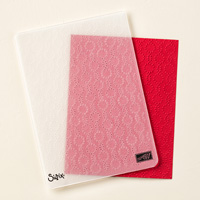
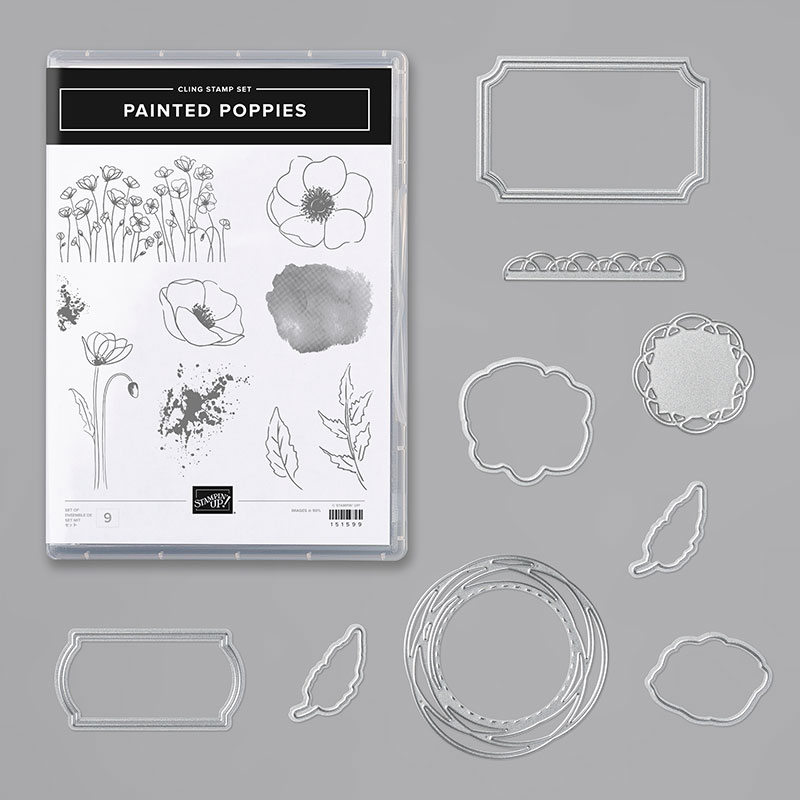
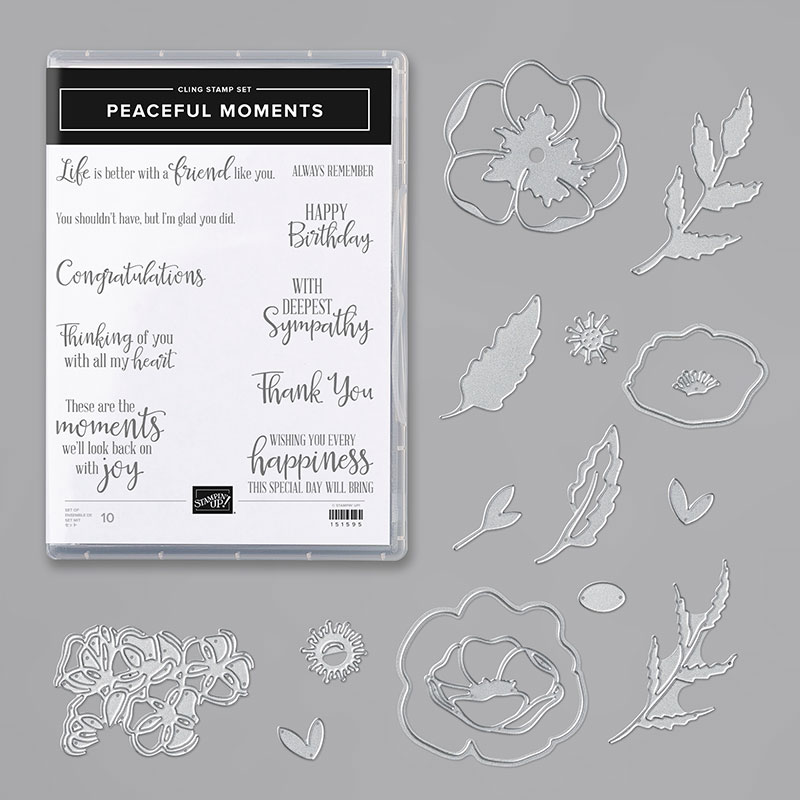
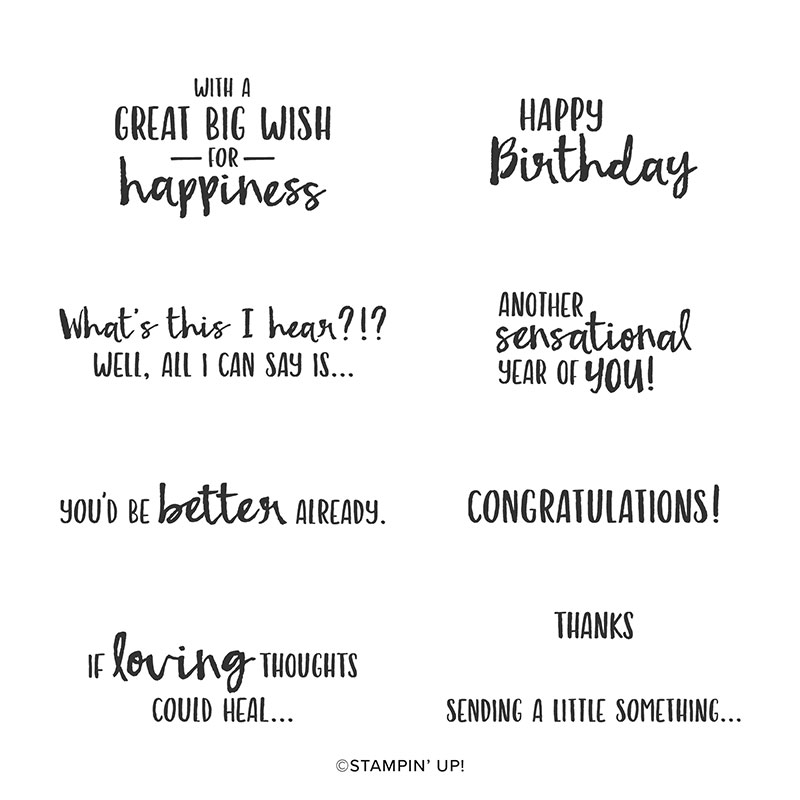
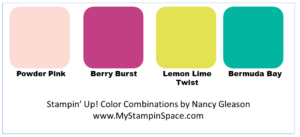
So simple and easy: I just layered Petal Pink and Melon Mambo cardstock underneath my DSP. A 1″ strip of Petal Pink cardstock served as a background for the 5/8″ Organdy Striped Ribbon. A layer of punched shapes showcase a simple sentiment from Peaceful Moments stamp set.

Sale-A-Bration Perks

So if you are like me, I challenge YOU to use your beautiful Designer Series Paper; don’t just hoard it! But if you must hoard it, buy 2 packages. One to use and one to keep! Now is great time to stock up too because you can earn FREE Sale-A-Bration items with every $50 you purchase in product. Click here to shop my online store. SaleABration ends on March 31st.

$99 Ultimate Stater Kit with SaleABration special

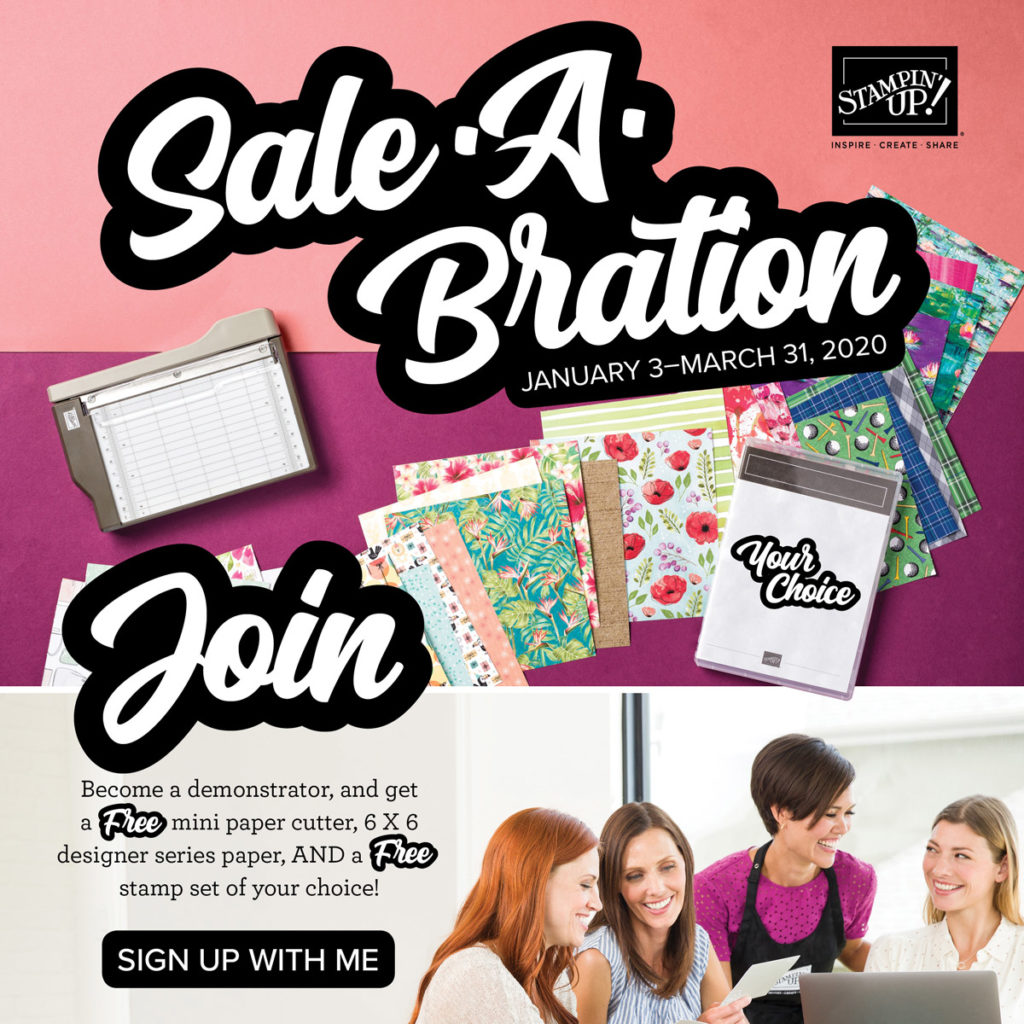
And if you really love DSP and want to get some for free, and a mini paper cutter to help you #LoveItChopIt, then you’ll want to check out the $99 Starter Kit Special. You’ll get to choose $125 worth of products, AND get a Free Mini Paper Cutter, a 6×6 DSP paper stack, and a Stamp Set of your choice, along with $50 of business supplies and free shipping! Sweet right? Buy the $99 Starter Kit here. Sale-A-Bration ends March 31st and so does this offer so buy the starter kit today.

I know the struggle is real, but I challenge you to stop being a DSP Hoarder! Maybe my “buy 2 compromise” will help you to #LoveItChopIt . To your continued success! – Nancy

Simple or Stepped Up? You Decide! – Part 1

Simple Happy Birthday to you

Sometimes Simple is best.

I love the classic look of pale pink and gold – it’s so rich looking. Todays Simple Birthday card was inspired by this gorgeous 1/4″ Petal Pink Metallic Edge Ribbon. This ribbon is so satiny and just flows so nicely. So I designed a simple card just to show off the petal pink and gold.

My card base is Whisper White with a Petal Pink layer. I stamped the layer cake from Happy Birthday to You (free during SaleABration with a $50 order) in Versamark ink and heat embossed with gold embossing powder. The outline image of this stamp set is so pretty it works well on its own (although the outline image also works well with all sorts of coloring techniques. I’ll be featuring the same image colored with the Stampin’ Blends tomorrow so stop back then.) A quick little sentiment from the Timeless Tulip stamp set was added and it was topped with the bow.

Quick and easy! Elegant and rich looking.

Tomorrow, I’ll be featuring the same image but stepped up for a totally different look. Please tell me what you think of this card, but then stop back tomorrow and let me know what you think of the stepped up card and then let me know if you prefer Simple or Stepped Up. Either way, you should make an effort to grab this Happy Birthday To You stamp set during Sale-A-Bration. It is FREE with a level 1 qualifying order.

Sale-A-Bration

I love Sale-A-Bration! Did you know that you can earn free products with every qualifying purchase, you can earn more when you Host during Sale-A-Bration, and you really score big when you Join during Sale-A-Bration! Click here to see the Sale-A-Bration catalog. Which way(s) are you going to save during Sale-A-Bration?

SPOILER ALERT: A Sale-A-Bration Product Coordination will be released on Feb 4th and coordinating dies for the Happy Birthday to You stamp set will be available!

My class schedule has just been updated too. Click here to see upcoming classes and register for a class today.

It only took me 10 minutes

I held my monthly team meeting yesterday and about 1/2 hour before the meeting began, I decided I wanted to provide a quick make & take card for everyone to make using the Peaceful Poppies Suite from the 2020 Mini Catalog. I sat down and made this card and it only took me 10 minutes to make from start to finish!

This is truly the kind of card that you can whip up just 1 or 2, or mass produce a large quantity. Furthermore, you can easily swap out the sentiment for any occasion; birthday, get well, thank you, thinking of you, etc. Heck, you could even make the card and not add a sentiment panel until you need a card to send and then just stamp a sentiment.

You could always stamp the inside too, as I did here:

Card Recipe

Want to know how to make this card? Of course you do! So I will tell you. This card features products from the new Peaceful Poppies product suite (pages 24-27 of the 2020 Mini Catalog). I started with a piece Whisper White Cardstock cut to 5-1/2″ x 8-1/2″, scored and folded in half for the card base.

I used scraps of Whisper White to stamp the large poppy, the smaller poppy and 4 leaves from the Painted Poppies stamp set using Tuxedo Black Momento ink. I stamped the watercolor image over the flowers using Poppy Parade ink to color in the flowers.

Then I cropped the flowers and leaves out using the coordinating Painted Labels dies. The swirly circle was cut from Basic Black cardstock. The Happy Birthday sentiment was stamped on a scrap of Whisper White Cardstock using the companion stamp set Peaceful Moments. A 1″ x 5″ strip of B&W DSP adds some visual interest and a few Rhinestone Jewels add some bling.

And did I mention that it only took me 10 minutes to make this card from start to finish! Pretty sweet, right? With all the layers and elements, it looks like this card would have taken a pretty long to create, but the coordinating stamps and dies make it so easy. When you combine the use of black & white with just 1 color it makes a pretty dramatic statement.

You can purchase all the supplies to make this card right here from my online store, or just click the product name above. And when you purchase the stamp set and dies as a bundle you save 10%. Both the Painted Poppies Bundle and the Peaceful Moments bundle are $52 which qualify for a FREE Sale-A-Bration item! Buy both bundles and get 2 FREE Sale-A-Bration items.

For the Get Well card above, I used the sentiment from the Sending You Thoughts stamp set which is a FREE Sale-A-Bration stamp set.

So which card do you like better? The Happy Birthday card on the left or the “If Loving Thoughts could heal…” card on the right? Please leave me a comment and let me know. (Shh, don’t tell anyone but the card on the right is slightly different. Can you tell that the smaller flower on top is popped up on stampin’ dimensionals? At my team meeting, one of my members asked where the dimensionals were because I always add them. She lifted up the little flowers and the leaves, and when I got home, I made 2 get well cards for the 2 gals who weren’t there because they were sick, and I popped them up on dimensionals too! Thanks Brienne!)

SUBSCRIBE to my FREE monthly newsletter & exclusive offers.

Birthday Bash will be gone in a Flash!

This is a Birthday Bash that will be gone in a flash!  It’s a 24-Hour Flash sale to celebrate Stampin’ UP!’s 30th birthday and it starts now!  24 hour birthday stamp saleSelect stamp sets on sale 15% off. 

Check out the full list here.

See the stamp sets in this video:


Order your stamp sets here

Birthday Bash will be gone in a flash Birthday Bash will be gone in a Flash

Remember, this is a 24-hour Flash Sale! Offer ends Oct. 23, 2018 at 11:50 PM ((MT).  Place your order now because this birthday bash will be gone in a flash!

When placing your order, please use Host Code 9ZGDUJ4M if your order is less than $150.  If your order is $150 or greater, do not use the host code but rather claim the 15% reward dollars for your own use.

Nancy

It took less than 10 minutes to complete this!

Sometimes things just fall together so perfectly and this was one of those times.  I made this card is less than 10 minutes!  Share What You Love for the Paper Players 399

Not so shabby for a quick card, huh?  Want to know my secret?  I thought you did.  I’ll tell you in one word.  Inspiration!

I got my inspiration from the Paper Players sketch challenge this week.  I saw their sketch and immediately thought that this sketch would be a great way to show off the beautiful paper from the Share What You Love Specialty DSP.  Tranquil Tide and Mint Macaron pair together so beautifully (I’m so glad that Stampin’ Up! brought Mint Macaron back!) and I knew I wanted to use that color combination.  The more I thought about it, I knew I wanted to use the new “Subtle” Textured Impression Embossing Folder and of course, the Lovely Floral TIEF which is in the same product suite as the DSP.  The Share What You Love DSP is so striking with the pearlized finish that a little strip is enough to create some ‘wow’!

Let’s take a look at the sketch: The Paper Players sketch challenge PP399
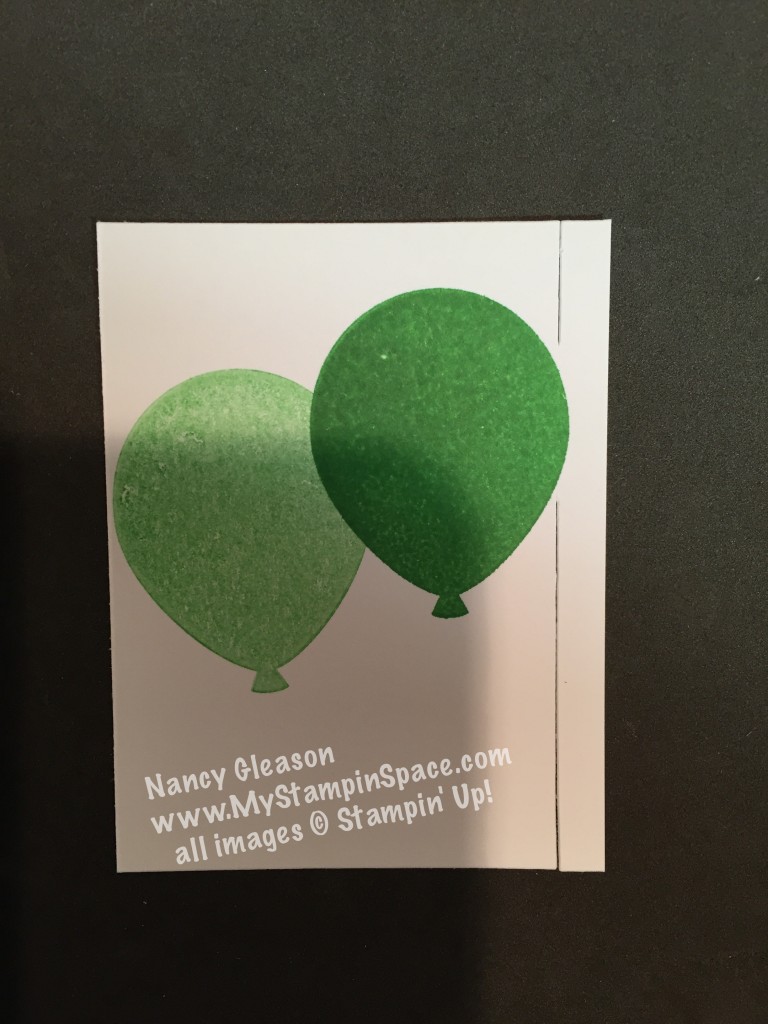
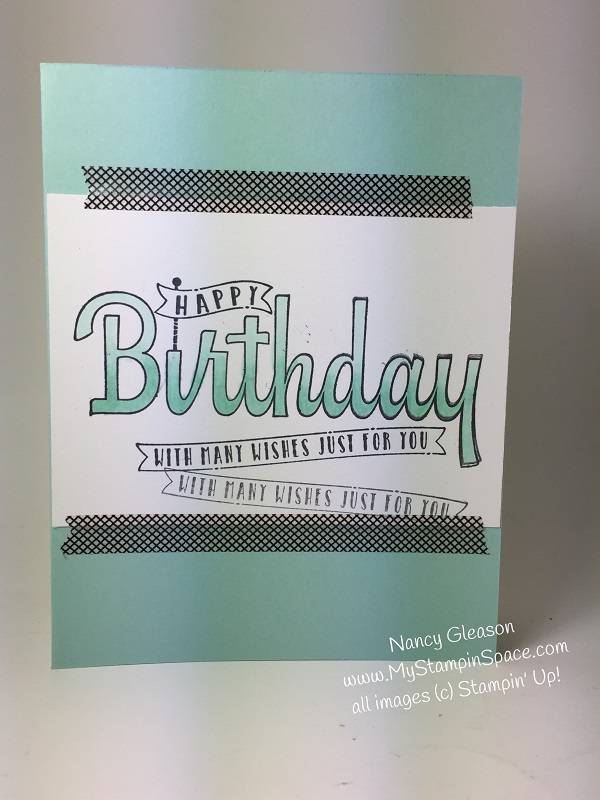
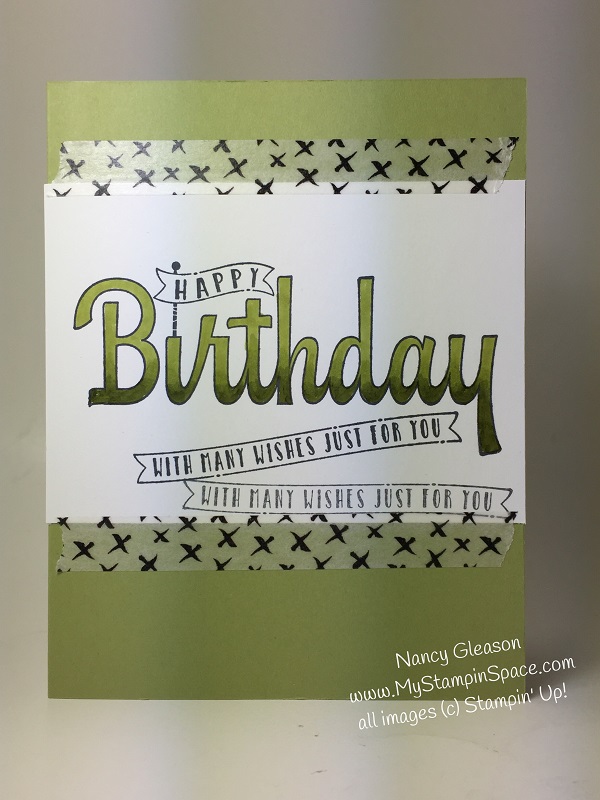
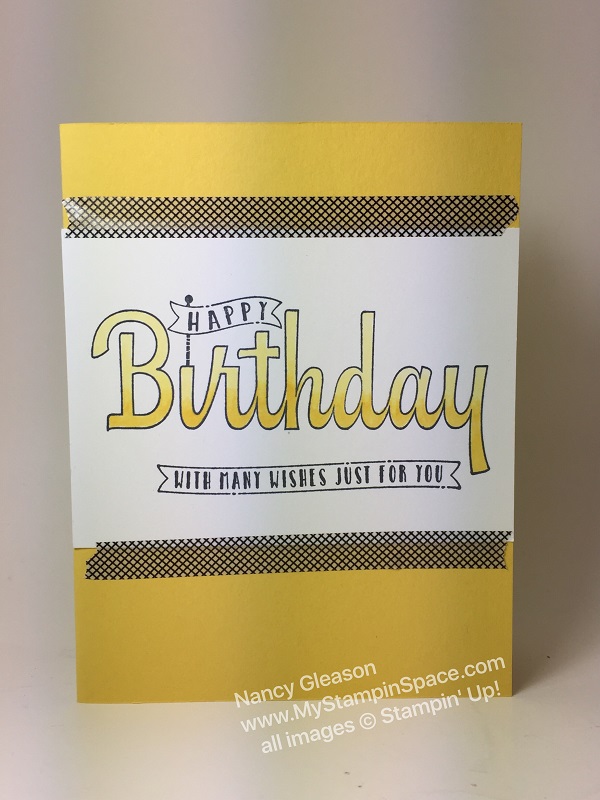
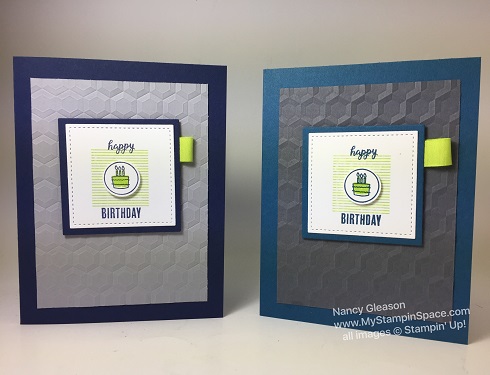
And here’s another look at my card:

Because I immediately ‘saw’ what I wanted to make with this sketch, and knew what colors to use, I was able to get right down to business and cut cardstock to size, emboss, glue, and stamp the sentiment and finish off the card with a couple of coordinating Tranquil Tide pearls from the Share What You Love Artisan  Pearls.  This literally took less than 10 minutes from start to finish!

Can you see the subtle texture in the Tranquil Tide layer?  That is from the new Subtle TIEF.  It looks very much the same as the ‘textured’ cardstock that Stampin’ UP! used to sell, probably about 10 years ago.  As the name implies, it’s a very subtle finish, but enough to give more interest than a plain piece of cardstock.  I think this will be showing up in many more of my projects!

If you want to buy this embossing folder, or any thing else, please feel free to shop my online store, open 24/7 for your shopping pleasure!

Have you ever been inspired by something you’ve seen to create something?  Have you ever just ‘seen’ something that you can go right to your craft room and just make it?  Feel free to leave a comment about a time when this happened to you.

Now before you run off, please make sure to sign up for my mailing list, and I’ll send you my Free Report “The 8 Essential Tools Every Paper Crafter Must Have to Be Successful”.

Happy Stampin,

Nancy

How to Use the Stampin’ Blends and How to Get them on Sale!

Today’ I am going to show you how to use the Stampin’ Blends markers to achieve a soft, gradated or ombre look. I recently taught a class on how to use the Stampin’ Blends and I want to share that project with you.  This example uses Pool Party Stampin’ Blend markers.

How to Use Stampin' Blends with the Birthday Wishes for You Stamp Set
See how the color is darker at the bottom of each letter and lighter towards the top? That’s the beauty of the Stampin’ Blends markers!

I used the Birthday Wishes For You, #145742 stamp for the Happy Birthday, and used the light and dark of each shade of color to get my results.

There are a couple of tips you should know about to get good results with the Stampin’ Blends.  First, use the Memento Tuxedo Black Ink,  #132708 to stamp the outline stamp.  There are several stamp sets in our Annual Catalog, as well as the Occasions catalog that will work wonderfully with the Stampin’ Blends.  Secondly, you need the light and dark version of each color.  You will always want to color with a scrap piece of paper under the piece you are working on.  The markers do bleed thru the cardstock and you don’t want to ruin your work surface.  

Here are other versions of the same card – This one uses Old Olive Stampin’ Blends and Old Olive cardstock:

How to Use Stampin' Blends with the Birthday Wishes for You Stamp Set

Here we go with Pink Pirouette Stampin’ Blends and Pink Pirouette cardstock:How to Use Stampin' Blends with the Birthday Wishes for You Stamp Set

And lastly, below is Daffodil Delight Stampin’ Blends and Daffodil Delight cardstock:How to Use Stampin' Blends with the Birthday Wishes for You Stamp Set

Do you have a favorite?  I have to say that whatever color I was coloring at the time was my favorite; I love them all!

This is a great stamp set to practice with the Stampin’ Blends as it very forgiving.  I started with the dark shade at the bottom of each letter, working 2-3 letters at a time, then I went in with the lighter shade working from the top down.  I overlapped the light shade over the ‘line’ where the light and dark met.  This coloring back and forth across that line allowed the colors to blend so that the colors blended together, rather than having a hard line.

I recently taught the ladies at my Wine Down Wednesday stamp class how to make this card.  Everyone walked away with a card they were proud to show off, and loved the Stampin’ Blends!

I’ll be showing a more detailed image colored with the Stampin’ Blends later this week so make sure you come back to see that. In the meantime I wanted to share with you how you can get Stampin’ Blends for yourself.

what’s the best way to get stampin’ blends?

You can buy the markers individually for $4.50 each or $9.00 for the set of Light and Dark shades of each color.  There are 12 Colors plus a Bronze, and Ivory, and a Color Lifter pen for a total of 27 markers.  You can purchase the Stampin’ Blends Marker Collection for $121.50 plus 10% shipping. Or you can purchase the Stampin’ Blends Collection for $99 and get free shipping.  Which option will you choose?  If you want to order the Stampin Blends Marker Collection for $121.50, or buy individual markers, CLICK HERE.

If you want to get the entire set of 27 Stampin’ Blends markers for only $99, you can purchase the $99 Starter Kit.  You get to choose $125 worth of products, and get free shipping.  With this option you can elect to become a ‘wholesale customer’ or ‘hobby demo’.  You can also choose to become a ‘business builder’.  Either way you get the same perks and benefits and you get to enjoy the discount, the early catalog reveal and more.  You’ll become part of my team, My Stampin’ Circle, too!

I hope that you’ll take advantage of the $99 Starter Kit deal to get the complete set of Stampin’Blends as this is the best bang for your buck!  Oh, and did I mention that you will also get to choose 2 FREE Stamp Sets (any value) when you purchase the $99 Starter Kit during Sale-A-Bration (thru March 31st)?  Which 2 stamp sets will YOU choose for Free with YOUR starter kit?

If you enjoyed the projects in today’s post please COMMENT HERE  I love hearing from you. If you have any questions, feel free to EMAIL ME.  And don’t forget to SUBSCRIBE to my FREE monthly newsletter & exclusive offers.

I hope you enjoyed learning How to Use the Stampin’ Blends Markers and how you can get them discounted by purchasing the $99 Starter Kit.

Happy Stampin’

Nancy Gleason. Stampin' UP! demonstrator, teacher, and blogger


Lots of Lavender

Lots of Lavender is a new stamp set that you can earn for FREE as a Level 1 Reward during Sale-A-Bration. What is Sale-A-Bration?  And How can YOU get this stamp set for free?  I’m glad you asked!  Click here to know everything you ever wanted to know about Sale-A-Bration.

Now that you know what Sale-A-Bration is, you’ll want to add Lots of Lavender to the top of your must have list.

I needed to make some Thank You cards and Birthday cards and thought this would be a good image to use for either.  I wanted to experiment using this 2-step stamp set so I started out by stamping on a scrap of Whisper White cardstock using the lavender image with Versamark ink and then heat embossing with Gold Embossing Powder.  I used my Blender Pen to fill in color from my ink pads using Pear Pizzaz, Perfect Plum and Pool Party.  I was so pleased with this, that I knew I had to make this focal point of a card!  I quickly layered this piece onto coordinating Perfect Plum cardstock.  Lightbulb moment!  I just knew the sketch from the Freshly Made Sketch challenge was JUST PERFECT for this image.  I quickly whipped out some Washi Tape in Perfect Plum (retired)  and I had a perfect sketch challenge entry.

Since I need to make some birthday cards and thank you cards so I decided to add a sentiment, and here is my final result:

Lots of Lavendar, Happy Birthday, Nancy Gleason, My Stampin Space, Rose Wonder, Sale-A-Bration 2018, floral, gold embossing, blender pen, washi tape

Here is the 2nd card I made.  There’s just a subtle difference with the sentiments, but which do you like better?

Lots of Lavendar, Happy Birthday, Nancy Gleason, My Stampin Space, Beautiful Bouquet, Sale-A-Bration 2018, floral, gold embossing, blender pen, washi tape

Take a look at the sketch that was my inspiration for this card:

Freshly Made Sketch Challenge

You can view the Freshly Made Sketches line up here.

Here’s an up-close of the water-coloring technique I did with the floral design.

So simple with the Blender Pens yet it has such a “WOW” factor!  I strongly encourage you to get Blender Pens if you haven’t tried them yet.  They are also a good stepping stone to using the Stampin’ Blends markers too.  If you love coloring, the Blender Pens and Stampin’ Blends will transport you to coloring heaven!  Both are so easy and fun to use but give different results.

You can earn the Lots of Lavender as a Level 1 Sale-A-Bration FREE item (with a qualifying $50 purchase before tax & shipping).  Be sure that you place your orders in $50 increments so can earn a FREE item.  You can shop on line here.

Follow me on Social Media: Like me on Facebook, Instagram and Pinterest.  I’m showcasing another card I made using the Lots of Lavender stamp set and the new Painted with Love Specialty Designer Series Paper (new in the Occasions catalog) on Instagram that you can see HERE.

Nancy Gleason

Let there be CAKE!

And cake without calories is the best kind! 

I’m excited today for two reasons;  first I got to break out one of my new stamp sets, Icing on the Cake!  Yeah, always fun, right?  Second, I get to play along with the Global Design Project this week!  And if the designers over there like my entry enough, I may even get the distinct honor of being their Guest Designer!  Let’s keep our fingers crossed that they like my entry as they are sorting through all of the entries this week!  I think that would be so cool!

So here’s the Color Challenge from GDP:

GLobal Design Challenge 093

I just love these colors together – so bright and playful!!!  Here is my entry:

Birthday cake

So many different techniques and textures came together to make this card.

The Recipe:

This card started like so many others; a 5-1/2″ x 4-1/4″ Whisper White card base with a few layers, in this case Lemon Lime Twist and Pool Party.  That was followed by another layer of Whisper White which is supporting panel for my focal point; the awesome layer cake!  The bottom layer of the cake features a scrap of the Berry Burst Fresh Floral Designer Series paper, the middle layer is a scrap of Whisper White cardstock embossed with our new Embossing Paste that was colored with Lemon Lime ink, and decorative masks.  The Top layer is a scrap of whisper white cardstock that was stamped in Pool Party ink with the polka dots from the retired Celebrate Today stamp set.  Each layer was topped with a line of frosting from the Icing on the Cake stamp set.  A sweet little In Color Bitty Bow in Berry Burst tops it all.

The sentiment was heat embossed in White Embossing Powder on a scrap of Berry Burst cardstock.  I think being chosen as a guest designer would be the icing on the cake!

If you like my cake, please leave a comment for me.  Then be sure to head over the Global Design Project to see all the other entries.  The judges sure will have their work cut out for them!

The Icing on the Cake stamp set is going to be so versatile and I’m sure I’ll be reaching for it quite a lot for upcoming birthdays.  If you want to order this stamp set, or any of the items on your wish list, then you’ll want to make sure you take advantage of our Bonus Days promotion going on now.

What are Bonus Days you ask?  For every $50 you spend in my online store between July 1-31, you will earn a $5 Bonus Days coupon that you can redeem in August!  Bonus!  To learn more, click here.

To start shopping and earning free stuff, Click here.

Shop NowThanks for stopping My Stampin Space, and for shopping with me!  I love to have here.  Have a safe and happy Independence Day!

Nancy

Tabs For Everything, Even Birthdays!

One of my favorite perks of being a Stampin’ Up! demonstrator is getting sneak peeks of new catalogs and products before everyone else and attending events, like OnStage in April in Richmond, VA, and getting FREE products just for attending!   One of the stamp sets I got is a set called Tabs For Everything, and it has a coordinating punch (which I didn’t get, but it’s on its way to  me now!)  You can save 10% when you purchase this as a Bundle.

This set has so much potential for making tabs when used with the coordinating punch, and I think it will be a match made in heaven paired with the new “Love Today” Planner Kit!  You can see how awesome the Planner is by watching the video here.

It also has great potential for making fabulous cards!  Like this one:Tabs For Everything - Even Birthdays!

I was inspired for the color combination of Night of Navy, Smokey Slate, and LemonLime Twist by the jacket a fellow was wearing the other day.  (I see Stampin’ Up! colors everywhere!)  I mentioned to a fellow stamper that I could make a card with those colors, and she said she couldn’t wait to see what I came up with!

I liked this card, and color combination so much that I decided to make another card in a similar color combination of Dapper Denim, Basic Grey and Lemon Lime Twist.  What do you think?

Tabs for Everything - Even Birthdays!

Here are the two colors side by side:

Tabs for everything - even birthdays!

So which color combination do you like best?  Leave me a comment with your choice.

Here are the color combinations for your reference:

Dapper Denim, Basic Gray and Lemon Lime Twist

Because this is a birthday card, I decided to enter this into The Paper Players challenge.  The Paper Players Challenge 347

See how well this fits into the challenge?  Simple, right?  You can click here or on the picture above to head over to the The Paper Players challenge and be inspired by all the other entries featuring Birthday themed projects.

I hope you’ll seriously add the new “Love Today” Planner Kit! and the Tabs For Everything Bundle to your next order.  You can click here to shop my online store.  Please use the Host Code shown on the top of this page.

Thanks for visiting me in My Stampin Space today.  Come again, the door is always open and the Keurig is always on, ready to brew you a fresh cup!

Happy Stampin,

Nancy

Tabs For Everything stamp set

Tabs For Everything


Save

Save

Save

Save

Save

Happy Birthday, Gorgeous

Happy Birthday, Gorgeous.  I have to admit I I ‘passed over’ this stamp set my first, and probably second, trip thru the catalog.  I did like the die that is bundled with it, and LOVED that Stampin’ Up! is now offering adhesive sheets for the intricate dies like the “Happy Birthday” die.  But the stamp set just wasn’t calling my name, truth be told.  But I earned this bundle for free, so  I started taking notice of the potential of this ‘sleeper’ stamp set and discovered how much I LOVE this bundle called Happy Birthday, Gorgeous!  The flowers works great with the 2-step stamping and just as well on their own.

I needed a project to do at a workshop.  I wanted something easy for any skill level, yet something that would have some ‘Wow!” factor.  These flowers are so easy to work with, and a simple masking technique creates the “Wow!” factor.

Happy Birthday Gorgeous

A few of the absolutely gorgeous Glitter Enamel Dots add the finishing touch!

You can easily recreate this card – just place a 1-1/4″ strip of scrap paper across the center; stamp your flowers then remove the scrap paper.  You’ll be left with a nice clean slate to stamp your sentiment. Easy Peasy!

You can purchase this stamp set by itself or bundle it with the HappyBirthday die  and save 10%.

This is one bundle that I would highly recommend make it to the top of your ‘must-have’ list.  It is so versatile and fun and everyone needs birthday cards so you’ll reach for this over and over again, and every project can have a totally different look!  From the flowers to the balloons to the banners and the great sentiments that can be paired together and the various font and sizes, it’s an all around winner!

The colors I used to create this card are Powder Pink, Berry Burst, Lemon Lime Twist and Bermuda Bay.  A great colorful color combination!  Feel free to save this color combination for your own use.  You can ‘pin’ this picture.

Stampin Up Color Combo

Thanks for visiting My Stampin Space today.  Be sure to visit my online store to grab your Happy Birthday Gorgeous bundle today!   Please leave me a comment and tell me what you like most about this card!

See you soon!

Nancy


Save

Save

Save

Save

Let’s Celebrate…50!

A big milestone birthday is always a reason to celebrate!  And a chance to play with new InColors that just arrived is also a reason to celebrate.  Combine the 2 together, and fun, fun, fun!

This card features the new color Berry Burst.  It’s a fun, bold and vibrant shade that’s not really pink but not purple either.  It’s a fun trendy color and it plays so well with Rich Razzleberry here for the balloons.  I used these colors as an accent against black and silver (after all it is a 50 birthday!).  Let's Celebrate 50!

You’ll notice that I’m using a number of retiring products along with the new In Color.  This time of year, I like to combine the old and the new.  After the new catalog makes its debut June 1st, I’ll stop showing the retiring product.  I like to only show you what you can buy so if you want to recreate my projects you can!

The Number of Years stamp set and Large Number Framelits are carrying over (I die cut the number 50 from Silver Foil sheets).  The Confetti TIEF and the Balloon Adventures stamp set and Balloon PopUp Thinlits dies are being retired.  If you want either of these items; you need to shop my store NOW!  They are only available while supplies last.

The recipient of this card was Sue, my husband’s admin assistant at work.  Her husband threw her a surprise party, and boy, was she surprised!  She was totally caught off guard.  After she regained her composure, she had a really good time.  And so did we!

Well, I have more InColors to show you, and more playing around with Daisy Delight and Color Theory.  Come back again soon.

Retiring Products

Click here to see the RETIRING LIST.

Click here to shop.

Don’t forget, you can Pre-Order new products and 3 of the new IN-COLORS with the Eastern Palace Suite.

Eastern Palace Suite,

Click here to see the Eastern Palace Pre-Order options.   By the way, the Eastern Palace Premier Bundle is the most popular option.  Trust me,  you are going to want the Eastern Medallion thinlit dies, and the Very Vanilla extra thick card stock comes FREE!

Click here to shop.

Please use HOST CODE CM4QQEWG  when placing an order thru my online store for the month of May!  Thanks!

Nancy

Save

It’s back!!!!

It’s back!!!

And I couldn’t be happier!  My blog has been knocked out service since Oct. 19th!!!  I’ve been (patiently) waiting for it to be restored.  And while I was able to have my blog restored, I did lose all of my October blog posts.  A small price to pay, as I was prepared with the possibility of losing everything and having to start all over.

It’s been a long time, and boy, do I have a lot to share with you!  For starters, look at this!nancy-with-catalogs
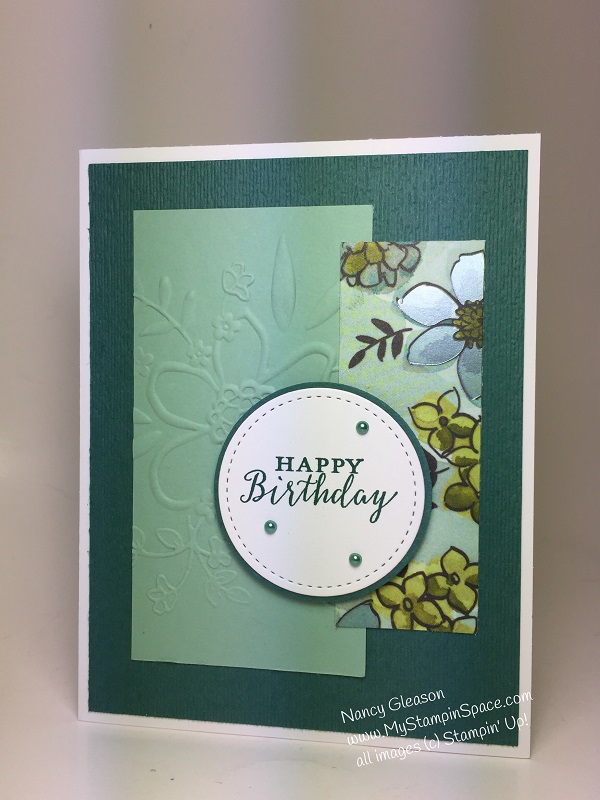
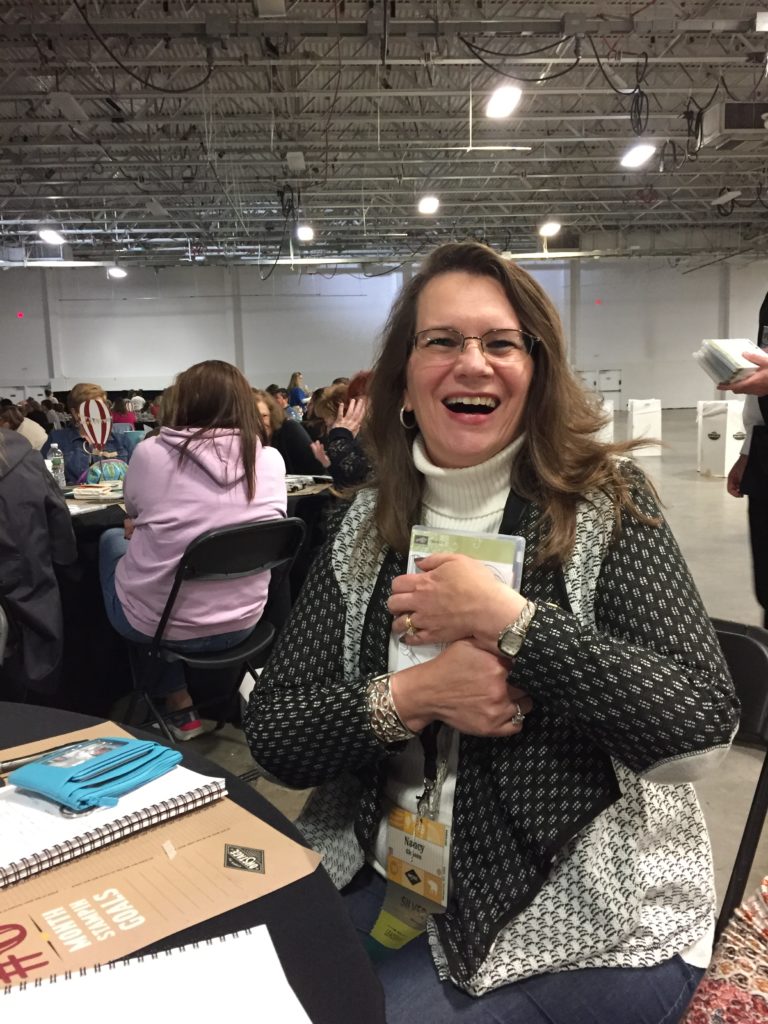
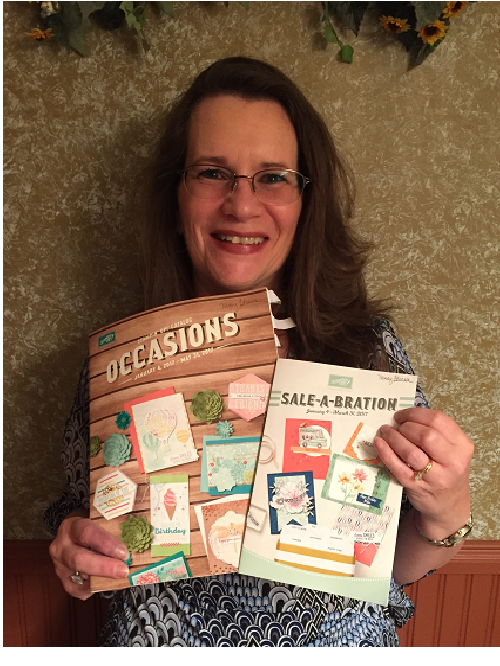
I had a fabulous time at the OnStage Event in Secaucus, NJ last weekend where I got to get the new 2017 catalogs.  It was a fun-filled time spent with my downline, and other demo’s from the Northeast, gathered at the Meadowlands Convention Center.  I’ll share more about my trip to OnStage in a blog post later this week.

The highlight was the catalog reveal of the 2017 Occasions catalog (January 4 through May 31) and the 2017 Sale-A-Bration catalog (January 4 – March 31).  This is my favorite perk of being a Stampin’ Up! DemonstratorI get to see the catalogs BEFORE they are revealed, and order product from those catalogs!  If you want to enjoy this perk yourself, then join me in this incredible Stampin’ Up! journey!  For the cost of the starter kit, $99, you get all this and more!   Talk to me about getting your starter kit today.  You can join just for the perks, and stay for the discount, or drop without any obligation.

I’ve had the chance to play with one of the soon to be released stamp sets called   Cool Treats.   This is going to be one of my favorite stamp sets.  It’s so fun and playful.  I’ve made my November birthday cards from this set, and it’s so much cheery; I can’t wait until the coordinating product suite gets delivered to me tomorrow.  (Why didn’t I choose Express Shipping?  The wait is so long!)pitk62081

Another stamp set is called “Nailed It”.  I won this stamp set during Prize Patrol, and I am so happy I did.  I made this card for my hubby as soon as I got home.  The sentiment was perfect, and since he’s a woodworker, the tools are perfect for him. saw you

Here’s me so happy I won this at Prize Patrol:

winning Nailed It

You can see how happy I am.  I know you are sharing in my happiness, thank you.  So now I want to share something else that will make you happy too!

You can order your Stitched Shapes Framelits Stitched Shapes Framelits Dies (item 145372) NOW!   This set of 12 (4 sizes each of Circles, Ovals & Squares) are destined to become your go-to shapes because the faux stitching around the edge of each shape will transform your ordinary shapes into extraordinary works of art!  saleCOMING SOON!  The Stampin’ Up! On-Line Extravaganza Sale with up to 40% off on select items begins November 21.  This online super sale will run from November 21 to November 28.  It’s the perfect time to stock up on holiday gifts for family and friends as well as boost and freshen your personal paper crafting stash!  This year’s Online Extravaganza will include 24-hour sales on the first and last day of the promotion with special product discounts only available that day!  Mark your calendars;  I’ll have more details for you soon 🙂

Thank you so much for sticking by me while I had this long spell of being ‘off the air’.   I appreciate your loyalty and friendship so much.    I hope something like this will never happen again.  Please like me on facebook so we can still keep in touch.

Happy Stampin’

Nancy


Save

Save

Save

Save

Save

Save

Birthday Fiesta!

The first time I laid eyes on the llama in the Birthday Fiesta set I knew I had to have him!   And I knew exactly what I wanted to do!    I wanted to make a Llama Pinata!  And I wanted the Pinata hanging above a bunch of people in party hats!  Don’t ask me why, or what prompted that thought, but that’s what I wanted to do.  And today, I did it.

Llama Pinata

My Fringe Scissors helped me make layers of fringed cardstock that I used to cover the llama which I had cropped out of coaster board (retired) using the Fiesta Time Framelits.  After I layered the fringe, I just snipped around the coaster board llama.  The Llama Pinata is dangling from a piece of Baker’s Twine.

The party hats were simply cropped from the end of the Tree Punch and topped off with a little scallop circle (Both punches are now retired as well).

The background has a festive, party mood thanks to the “Festive” TIEF.

Ok, so I know that the eyes make him look a little wonky.  Maybe I would have been better off leaving no eyes on him at all in retrospect.  But I still am glad for the chance to bring my vision of a Llama Pinata to life!

I have more cards that I made with this product suite that i will be sharing in the next few days.  If you feel that you need to have this Product Suite too, click here to start shopping!  This Product Suite has a stamp set, Framelit dies, Designer Serires Paper and TIEF.   And you can BUNDLE & SAVE on the stamp set and Framelit dies!  A Cardstock pack is also available.

But please remember a few things:Bonus DaysDid you get everything you want from the new annual catalog yet? Since it came out only a month ago, you probably still have some items on your wish list, and we have some great news for you! For every $50 USD  you spend in between July 7 and July 31, you’ll get a $5 USD Bonus Days coupon that you can use August 2-31. This is a great opportunity to shop from your wish list, whether you buy your favorite products now or later in August with your coupons!

Details
• Promotion period: July 7–31, 2016
• Redemption period: August 2–31, 2016
• An email address is required to participate in this promotion; Bonus Days coupon codes can only be delivered via email.
It is strongly recommended that participants both save emails containing their Bonus Days coupon codes AND write down the coupon codes in a safe place. Codes cannot be resent if the email is lost, and lost codes cannot be recovered.
• Bonus Days coupon codes can be redeemed for any product, excluding Starter Kits and Paper Pumpkin subscriptions. New prepaid Paper Pumpkin codes can be redeemed.

To celebrate my recent milestone achievement (you can read about that here) I am going to give EVERY CUSTOMER who places an on-line thru me of $50 or more, a package of my favorite new embellishment from the 2016 Annual Catalog.  Metallic Enamel ShapesThe Metallic Enamel Shapes are such a versatile addition to our Embellishment offering!  With hearts, stars and 2 different sizes of circles, there is something here for almost every project!

So click here to start shopping and get double the gifts when your order reaches $50 (before shipping and tax).   Hey, if you would use this Host Code when you place your order, I’d appreciate that:  B47BNP6.  Several folks have already placed an order with me and earned the free embellishments.  Will you be next?


Save

Save

Save

Save

Save

What’s a Girl to do when….

…her balloon punch is on backorder?   Well, in the words of Clint Eastwood, “Adapt, Improvise, and Overcome”. (Actually, I think Clint was quoting the Marines).  So I did just that!

Cucumber Crush Balloons

I finally had a chance to play with my new “Party Pants” stamp set but since my balloon punch is on backorder, I knew I’d only be stamping in one dimension.  But I think I created a pretty interesting element.  I’m almost glad my punch is on backorder because it forced me to get creative!

Take a close look at the balloons.  Do you see what I did there?  Here’s a close-up:balloons 
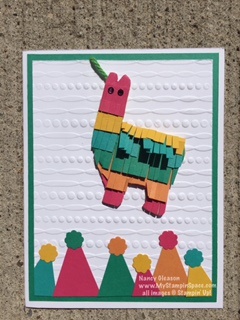
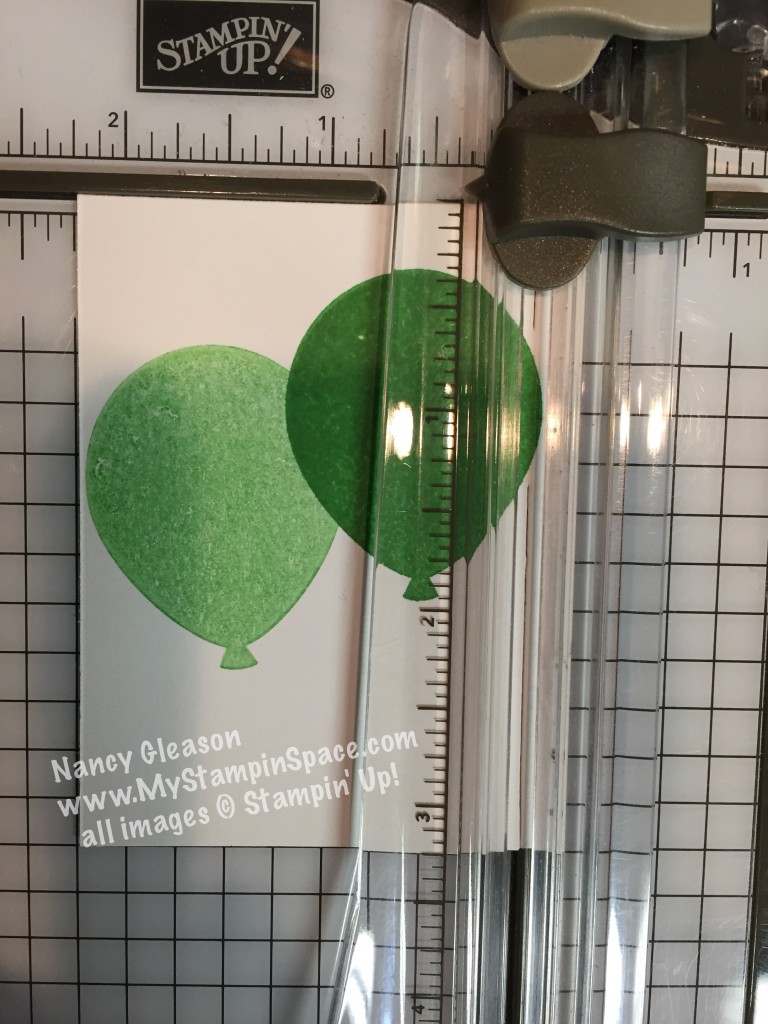
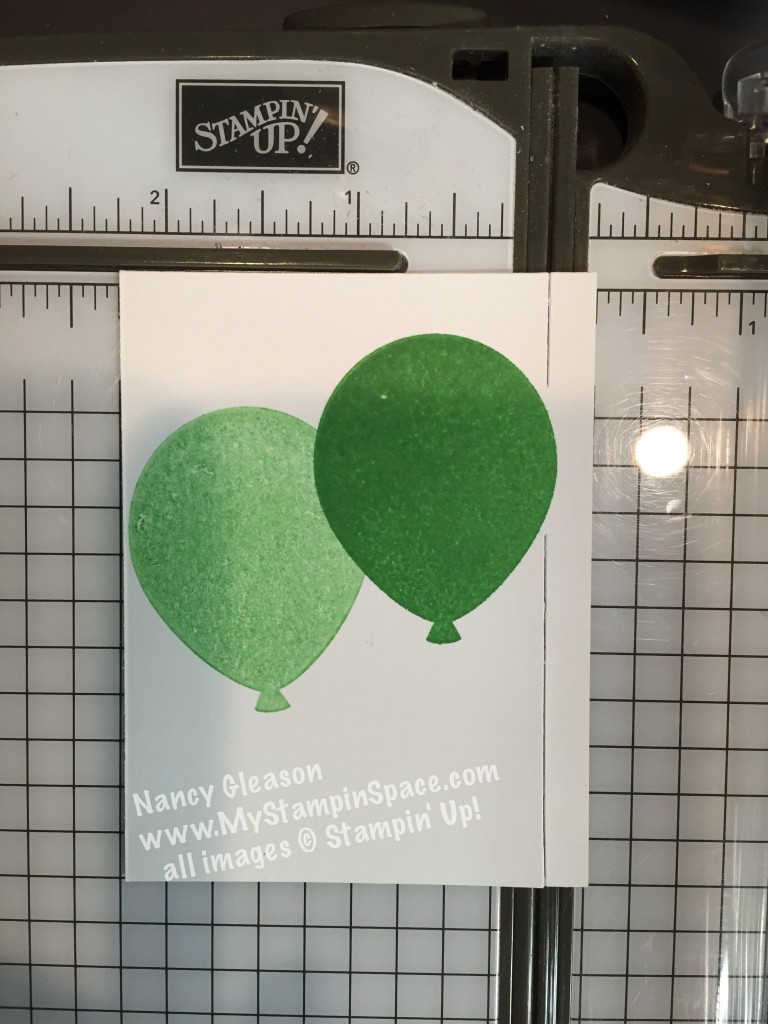
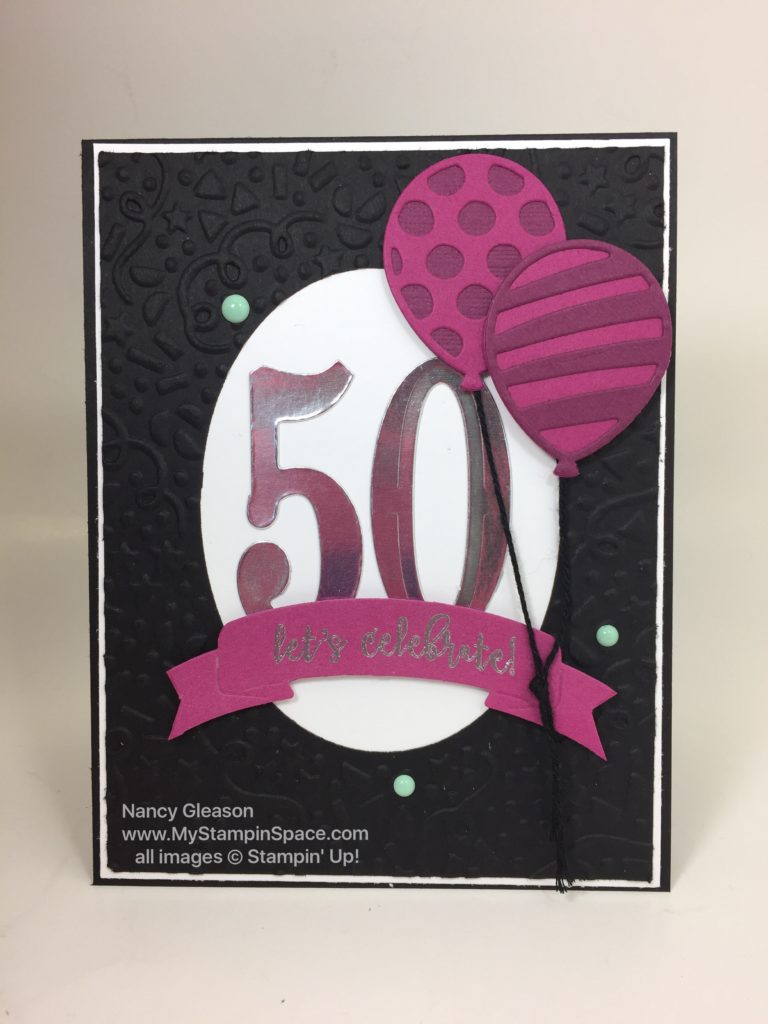
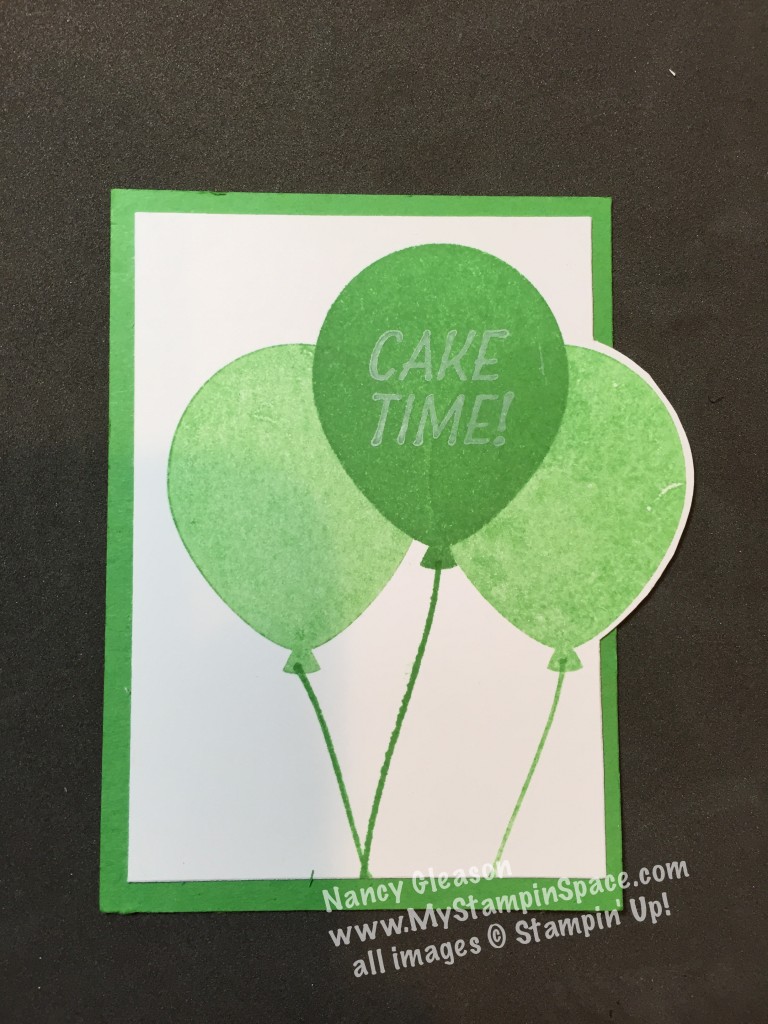
I trimmed the paper right up to the balloons, then used my paper snips to snip around the balloon.  I could not have achieved this effect with punch.  I’m really glad I discovered this technique.  Actually, I’ve never seen anyone else do this, so I may have even invented this technique!   That means I’ll have to name it.  Hmm, what to call it?  Well, I digress.  But,  I can’t wait to try it with another shape; perhaps flowers.

IMG_6513

Since I knew I wanted this panel to measure 2-1/4″ wide, I set it in my trimmer at that dimension.  I cut from the top down to the balloon,

IMG_6514

and then from the bottom up to the balloon.  Then I used my paper snips to finish it off!

IMG_6512

Easy peasy!  And here’s the final picture again.

Cucumber Crush Balloons

Thanks for stopping by My Stampin Space.  I hope you liked this and that you might try it yourself too.  If you do, send me a picture of your creation and I’ll feature it on my blog.  Leave me a comment and tell me what you think. – Nancy

If you want any of the  supplies I used to make this, shop my store safely & securely 24/7 from the comfort of your home.  Just click here or on any item listed below!  The Party Pants stamp set is FREE during Sale-A-Bration with a qualifying order, but only for a few short more days.  Sale-A-Bration ends March 31st so get yours now.  This is only available whiles supplies last and it is possible it will sell out before March 31st.

Come back on Wednesday, I”ll have a special treat in store for  you.  I’ll be participating in a blog hop featuring Easter & Passover projects and I think you’ll be amazed at the talent on this blog hop.

Some Things Just Get Better with Age!

Look Who’s Turning 3!   Paper Pumpkin!

BirthdaySlide

Well at the risk of sounding like a Virginia Slim ad, “You’ve come a long way, baby!”  Yes, I remember the very first Paper Pumpkin kit.  It was, well, ok.  It was cute, but nothing too spectacular.  And to be honest for the first year I didn’t subscribe.   But Stampin’ UP! has really stepped up the quality of the kits and the projects in each one.  I love my Paper Pumpkin kits and look forward to them and can’t wait to see what project each month’s kit contains.

This month, March 2016, Paper Pumpkin turns 3.  To celebrate, the kits will arrive in a special edition blue box, and it should be something extraordinary!

I urge you, if you don’t already subscribe, CLICK THIS LINK NOW!  For only $19.95 plus tax, it is really one of the best deals out there, no coupon needed.  When you subscribe by the 10th, you’ll receive the special edition March kit.

Then, each month you will get a truly creative craft kit; filled with all the supplies you need, color photos and instructions, and an exclusive stamp set and ink spot, to make one of a kind projects, shipped right to your house.

Subscribe to Paper Pumpkin here. 

You’ll be glad you did!

Nancy