HUGE YEAR END SALE STARTS TODAY!

CM100300BStampin’ UP! has just announced a YEAR-END SALE  with dozens of our retiring favorites from the Holiday Catalog, along with some other retired merchandise just in time your last minute shopping & gift-giving.  AND I’m giving you permission to give those gifts to yourself, too!

Some of the deals are too big to pass up!  But everything is “While Supplies Last”  so don’t delay!  My Favs:

2014-2016 In Color Backgrounds Designer Series Paper Stack by Stampin' Up!
2014-2016 In Color Backgrounds Designer Series Paper Stack Price:  Reg. $21.95 SALE $13.17
Black Glimmer Paper by Stampin' Up!
Black Glimmer Paper Price:         Reg $5.00 SALE $3.50
Oh What Fun Tag Project Kit by Stampin' Up!
Oh What Fun Tag Project Kit Price:  Reg $21.00 SALE $14.70

Don’t forget about our WEEKLY DEALS either;  you can score some good deals on a few different item each week; new deals are revealed every Tuesday.

The 10th of the month is also the last day to subscribe to Paper Pumpkin to get that months kit delivered to your door.  Sign Up Here today.  Not sure what Paper Pumpkin is:  Watch this video:

Paper Pumpkin also makes a great gift for that crafter in your life, and you can give that gift all year long if you choose to!  Prepaid Paper Pumpkins can be purchased in 1, 3, 6 or 12 months.  Click here to shop Prepaid Paper Pumpkins – NO SHIPPING either!  You’ll receive an e-mail certificate to give, the recipient just follows the included instructions to redeem.  Sweet!

Happy Shopping and Happy Saving!

Nancy

Pals Blog Hop: Winter Wishes

2015badge-3

Welcome to the Pals Blog Hop for December; we are thankful you stopped by.  This month we are showcasing projects that feature Stampin’ Up! products that should be on everyone’s wish list. We hope you enjoy our creations.

You may just be starting the Blog Hop or may have come from the previous link from the Line-up on the Pals Blog Hop listing shown below.  The full lineup will help you move along from blog to blog so you may see all the projects.

My project features the Holly Jolly Greetings  stamp set and a classic winter color combination of white with blues.

IMG_6014 (2)

The white is hard to photograph so that the picture does the project justice.  Let’s try another background:

IMG_6016Hard to see, but this card features 3 layers, yet it is made from just one sheet of cardstock!  I like to feature quick & easy cards this time of year.  I showed the gals at my first ever Sip & Stamp class the other night how easy it is to make this card.

First, I cut an 8-1/2″ x 11″ sheet of Whisper White cardstock in half to create the card base.  Then I cut a 4″ x 5-1/4″ piece which we ran thru the Big Shot with the Gently Falling embossing folder.  Lastly I cut another piece 3″ x 4-1/4″.  On this layer we stamped the background snow flakes with Lost Lagoon ink several times in the upper right corner.  On top of this we stamped the bold snowflake in Island Indigo ink.  We mixed and matched words to create whatever sentiments we wanted on the lower portion, again in Island Indigo ink.  IMG_6018

The finishing touches included tying a 3/8″ Lost Lagoon ribbon around the top  layer.  The top layer was adhered to the embossed layer using stampin’ dimensionals,  then glue that to the card base.  (The ribbon is retired but is available on our Clearance Rack – SCORE!)  We had our choice of Iced Rhinestones or Metal Rimmed Pearls to embellish the snowflake.

Did you notice that I used one of each on the two cards above?  Pay close attention and you’ll see that I even have two different sentiments, too!

Thanks for visiting. To continue with the hop, please refer to the Blog Hop Line-up below. We hope to see you on next month’s Pals Blog Hop!

  1. Nicole Everitt at Stamp Scrap Love
  2. Nancy Gleason at My Stampin Space —YOU ARE HERE! —
  3. Tricia Chuba at ButterDish Designs
  4. Maggie Mata at Maggie Made Cards
  5. Beth McCullough at Stamping Mom
  6. Jane Knudsen at see jane stamp
  7. Jackie Diediker at Stampin’ Jackie
  8. Susan Itell at Simple Stampin
  9. Kim Jolley at Stampin’ Artfully
  10. Lynn Kolcun at Avery’s Owlery
  11. Mary Fish at Stampin’ Pretty
  12. Katy McGloin at Just Fun Stamping
  13. Peggy Noe at prettypapercards
  14. Jennifer Michalski at Stampin’ Serenity
  15. Ronna Butt at www.cardstockcastle.com
  16. Kalyn Shubnell at The Stamping Chronicles
  17. Shawn de Oliveira at ShawnStamps
  18. Becky Volpp at InkBlossomwithBecky
  19. Wendy Klein at Doggone Delightful Stampin’
  20. Lisa Ann Bernard at Queen B Creations
  21. Rae Harper-Burnet at WildWestPaperArts.com

If you’d like to order any of the supplies used here to recreate this card yourself, click here to go to my online store.

Thanks for stopping by.  Leave me a comment and let me know which embellishment you like best; the pearl or the rhinestone.

Nancy

Winter Wonderland

One of the stamp sets that I am enjoying the most from the 2015 Holiday Catalog is Wonderland. (Stampin’ UP! posted a list of retiring items from the Holiday catalog and this will be retiring.  I strongly urge you to add this to your collection before it is gone.)   I guess the folks at Merry Monday Christmas Challenge knew that when they challenged us to use Blue, White & Texture to create a Christmas card.  winter wonderlandThe beautiful tree image, heat embossed in Pewter Embossing Powder, shines against the dark blue background.  This made me pull out some Midnight Muse cardstock from my retired paper stash!  I’m so glad I stocked up on this color before it was retired 🙂  A few snowflakes stamped in White Craft Ink fill in the night sky behind the trees.

The inside was the perfect place to add another sentiment: winter wonderland insideThis sentiment is from the Versatile Christmas stamp set, which is also slated for Retirement.

A touch of shine from the Silver Foil sheets adds the perfect mat layer to showcase the beauty of this card.  TIP:  To save as much of the foil sheet as possible, I cut a piece to 5″ x 3-3/4″ for my mat layer.  Since much of this layer would be covered by the image panel, I cut out a hole 1/2″ in from each edge so I could use the foil sheet that wouldn’t be seen.  The Stampin’ Trimmer makes this so easy to do.   This is what is looks like from the back:winter wonderland tip

To see my project on the Merry Monday Christmas Challenge, and all the others, click here.

I hope you enjoy this project and will consider making it yourself.  Although I used retired colors from my stash, consider using Night of Navy Cardstock and Silver Embossing Powder to recreate this.

To see the list of RETIRING ITEMS – click here.

TH_Ecard_OnlineX_demo_11.23.15_ENGDon’t forget, the Online Extravaganza is still in full swing:  Click Here to shop the sale.

You can see the items needed to create this card below. Clicking on any of the images will take you right to the page where you can add the item to your shopping cart.   Thanks for shopping with me and don’t forget to shop the sale.

Happy Stampin,

Nancy


Not just for Rednecks!

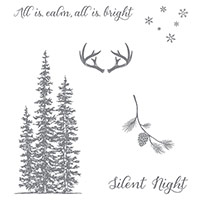
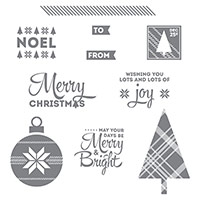
I have to admit when I first saw the Wonderland stamp set in the 2015 Stampin’ Up! Holiday catalog, I did like the trees and especially the sentiments, but I wasn’t really digging the antlers.  Well, I finally caved, and ordered the set, because I thought that my son, who is a big Duck Dynasty fan, and self-proclaimed redneck, might like it.

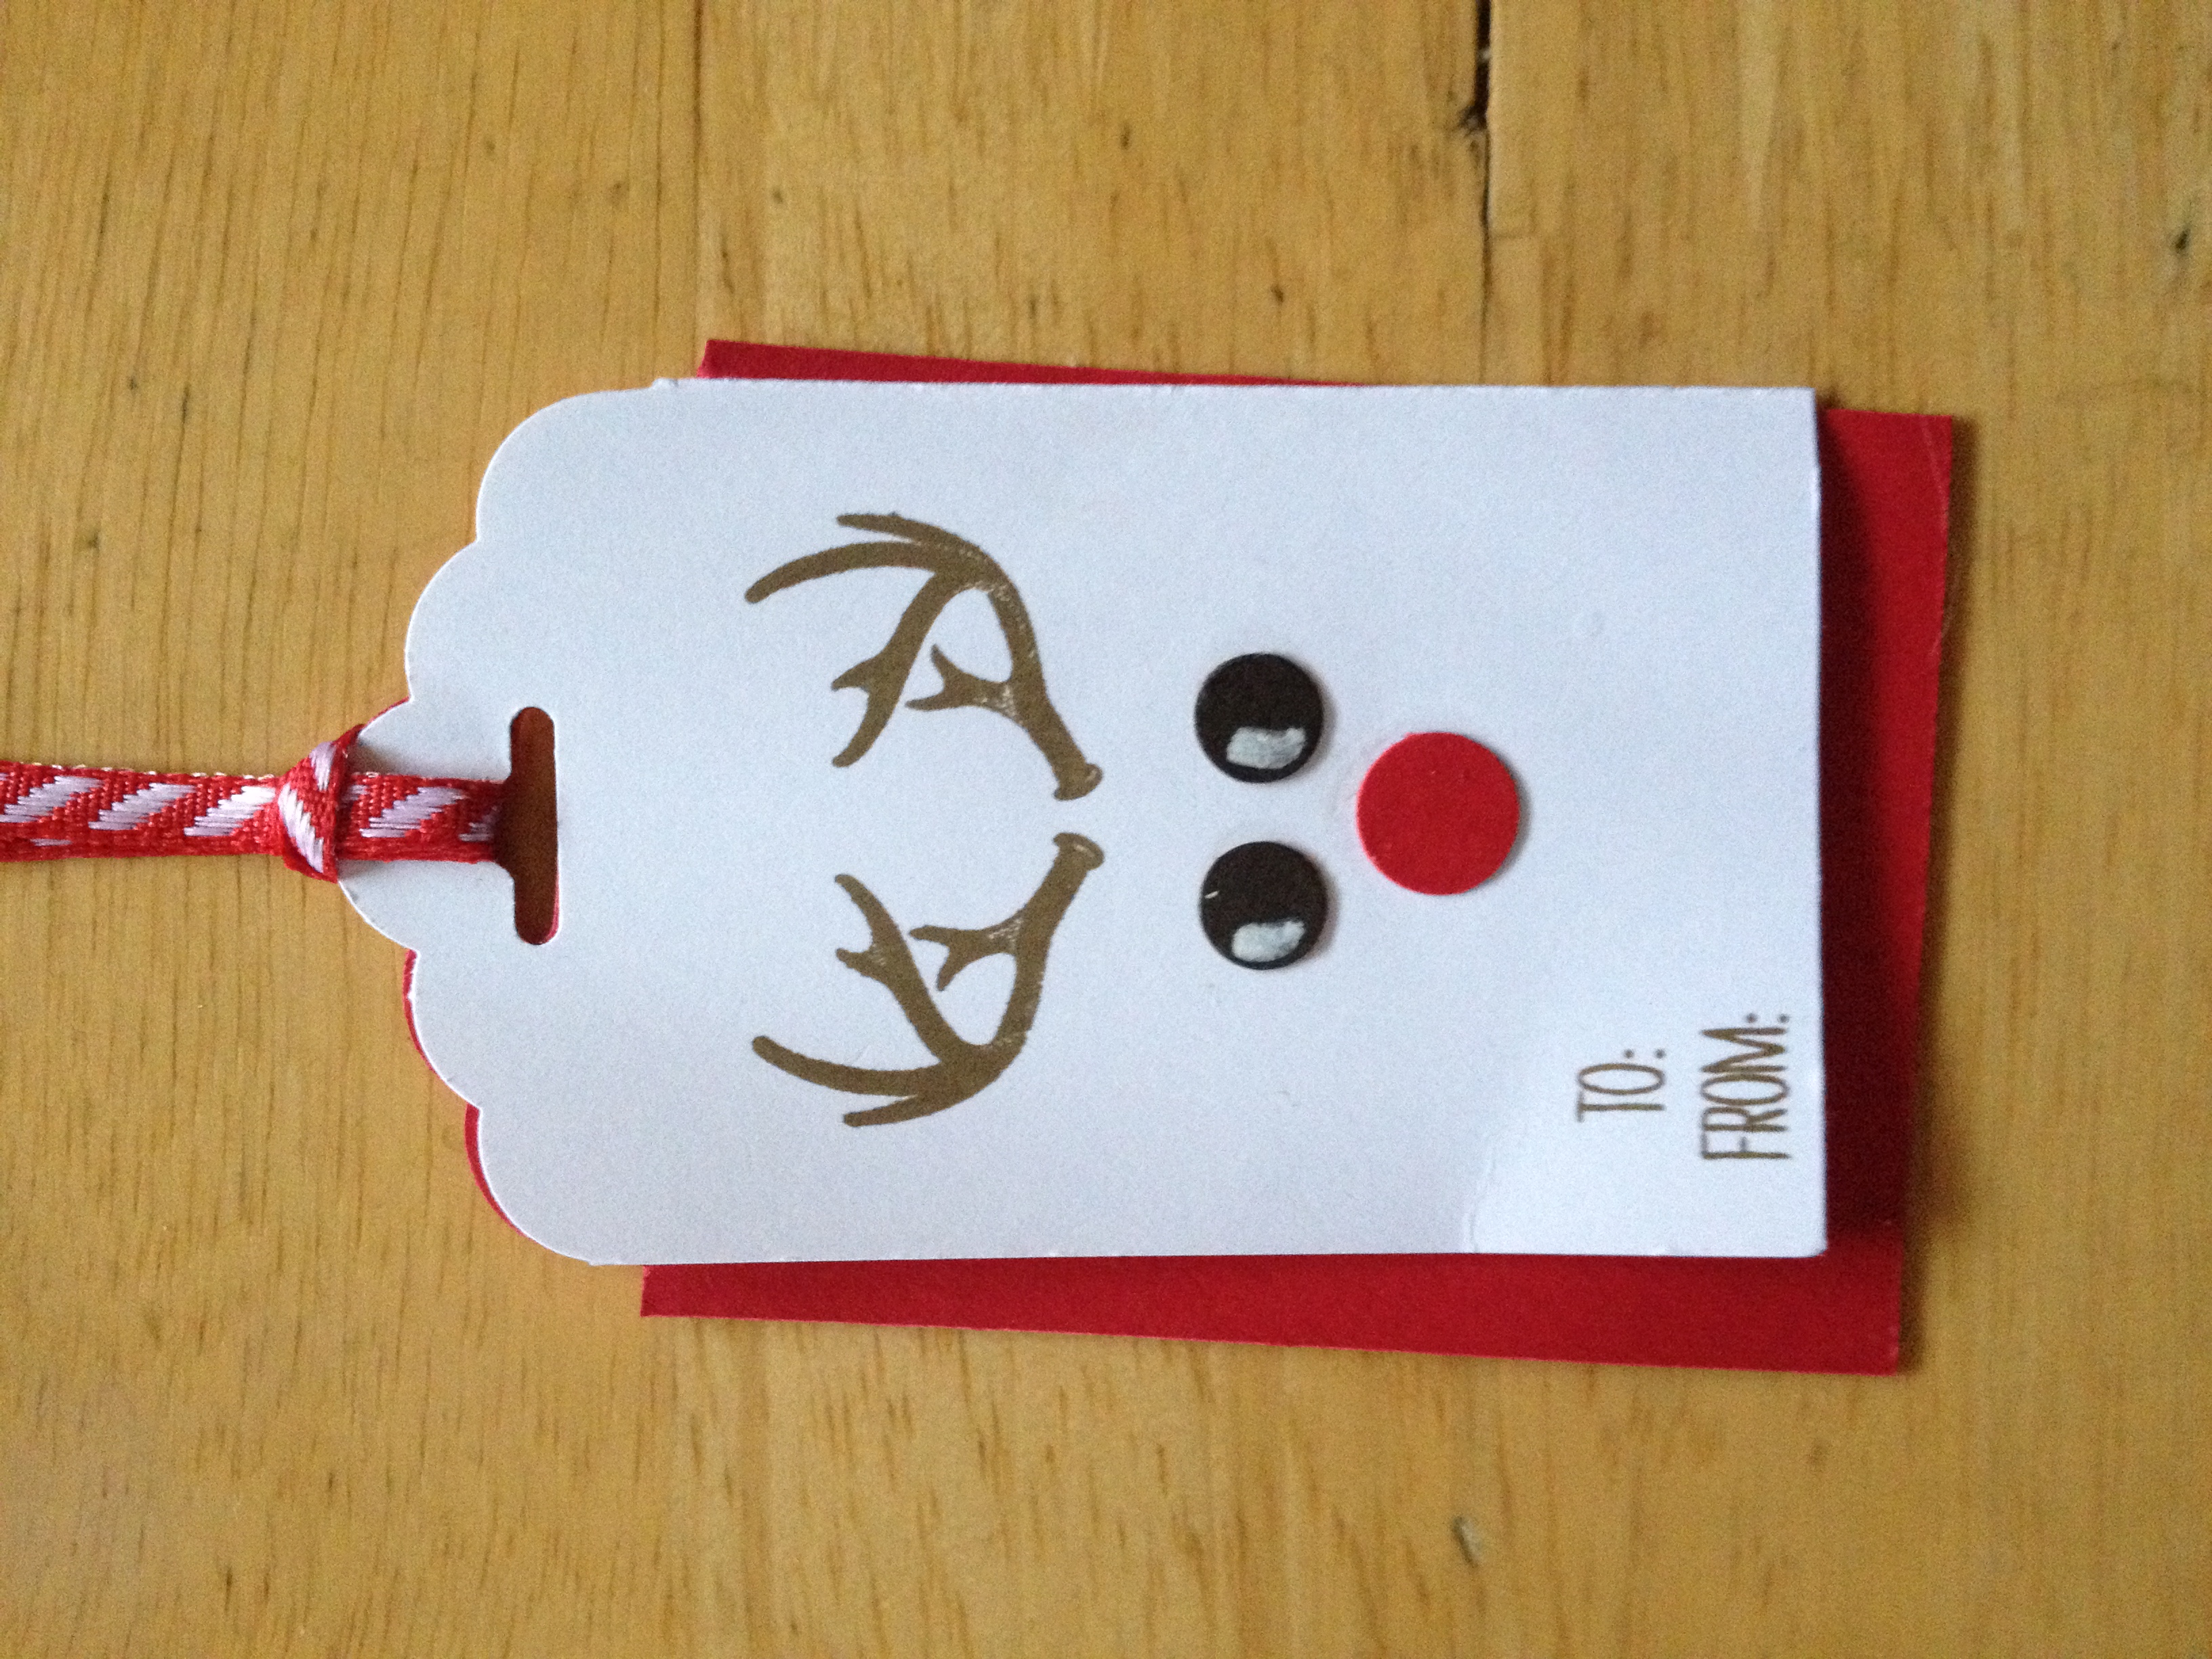
Well, I found the cutest way to use the antlers!  I’m sure you’ll agree, these antlers are not for rednecks, but for Rudolph the Red-Nosed Reindeer!

IMG_5789
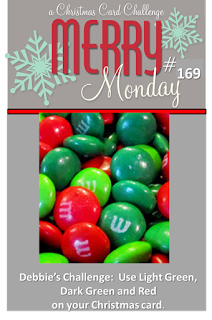
Adorable, right?  I made this in my last class and the girls LOVED it!  It is so quick and simple to make too.  And the folks over at Merry Monday Christmas Challenge decided this week to include a deer in your card, so I’ll be submitting this to their challenge too.

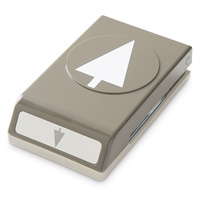
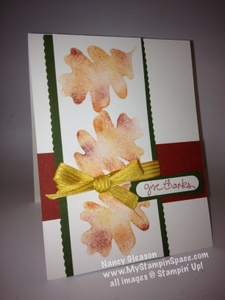
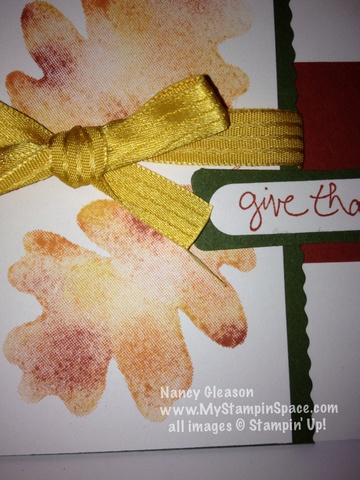
Whisper White paper cut to 2″ wide and 4-1/4″ long was shaped in the Scallop Tag Topper Punch.  The Antlers from Wonderland are stamped with Soft Suede ink, as well as the To/From from Festival of Trees stamp set.  The eyes are punched from Early Espresso cardstock using the Owl Builder Punch.  The nose in this sample was punched with Real Red cardstock, but in my class, we used the larger dot from the Home For Christmas Enamel Dots.  A little white hi-light on the eyes using the Signo White marker and your done!  We added a 2-1/4″ x 4-1/4″ strip of Real Red cardstock and tied them together with the 1/8″ Real Red Ribbon.  Easy Peasy!

I know you are going to want to make this yourself, but you’ll have to hurry.  Stampin’ Up! just released a Retiring Products List from the Holiday catalog and this stamp will be retiring 🙁

No worries, you can still get it now, but pretty soon it will be too late, and then you’ll just be sad that you missed out.  Now would be the time to snag this stamp set and stock up on the Enamel Dots and ribbon too!

So, shop the RETIRING PRODUCTS LIST, while you’re there, check out the WEEKLY DEALS and the CLEARANCE RACK for some great deals, too!

Check out my facebook page;  I’ve created a photo album of projects using the Wonderland Stamp set.  This set is so versatile and so much fun, that I’m having a hard time putting it down!  You’ll be inspired by the many projects you can make with this set.

Thanks for stopping by My Stampin Space!

Stamp On,
Nancy

Built for Free Using: My Stampin Blog

“So Thankful” for the Pals Blog Hop

Pals November Blog Hop BadgeWelcome to the Pals November Blog Hop, we’re so thankful you stopped by!  This month we’re showcasing projects that feature Stampin’ Up! Thanksgiving and “Thank You” products.  We hope you enjoy our creations.

You may just be starting the Blog Hop or you may have come from the previous blog on the Pals Blog Hop listing shown below.  The full lineup will help you move along from blog to blog so you can enjoy each and every beautiful project.

I have SO MANY things to be thankful for: a wonderful husband (we just celebrated 27 years of marriage!), our son, our home, good health and jobs, etc.  I am also thankful to be involved with Stampin’ UP!  I have met so many wonderful people and the friendships I have because of Stampin’ Up!  I am so thankful to be part of the Stampin’ Pretty Pals and to be part of their monthly Blog Hop.   ‘Nuf said, let’s get on to the stampin’:

Acorny Pillow BoxI’ve been hosting Thanksgiving Dinner for several years now, and I love having my family over!  Each year I make a special party-favor item (usually filled with chocolate!) for each of my guests.  This year, I plan on using the popular Square Pillow Box for my treats.   Can you tell that I also embossed the Soft Suede cardstock with the fabulous Woodland Textured Impressions Embossing Folder?

Acorny Thank YouI kept the decorations simple and to the point.  A circle punched from the 2″ circle punch serves as the backdrop for the awesome acorn.  The acorn is stamped and punched using the Acorny Thank You stamp set and coordinating Acorn Builder Punch (Bundle & Save 15%).  Soft Suede and Cajun Craze inks were used for the acorn image while Hello Honey ink was used to stamp the banner.  Bitty Banner Framelits  made easy work of cropping out the sentiment banner.

Thanks for visiting.  To continue with the hop, please refer to the Blog Hop Line-up below. We hope to see you on next month’s Pals Blog Hop!

  1. Jennifer Michalski at Stampin’ Serenity
  2. Shawn de Oliveira at Shawn Stamps
  3. Katy McGloin at Just Fun Stamping
  4. Kim Jolley at Stampin’ Artfully
  5. Becky Volpp at InkBlossomwithBecky
  6. Peggy Noe at Prettypapercards
  7. Rae Harper at Wild West Paper Arts
  8. Kelly DeTommaso at Kelly’s Creative Corner
  9. Beth McCullough at Stamping Mom
  10. Wendy Klein at Doggone Delightful Stampin’
  11. Kalyn Shubnell at The Stamping Chronicles
  12. Jackie Diediker at Stampin’ Jackie
  13. Susan Itell at Simple Stampin
  14. Lisa Ann Bernard at Queen B Creations
  15. Pamela Sadler at Stampin Pink Rose
  16. Karen Hallam at Karen’s Stampin’ Habit!
  17. Mary Fish at Stampin’ Pretty
  18. Debra Simonis at Deb’s Stampin’ Grounds
  19. Nancy Gleason at My Stampin Space —YOU ARE HERE—
  20. Brian King at Stamp with Brian
  21. Dawn Tidd at Tiddbits from Dawn
  22. Jane Knudsen at see jane stamp
  23. Sherrie Gross at Stampin’ Sunshine
  24. Tricia Chuba at ButterDish Designs

Don’t forget to come back again in the next few days.  I’ll be traveling to  Baltimore, MD to attend the Stampin’ Up! OnStage event.  I’ll be getting a sneak peek at the 2016 Sale-A-Bration catalog!  Like me on Facebook and sign up for my mailing list so you won’t miss a thing!

Thanks for stopping by My Stampin Space.  If you’d order any of the products I’ve used here, please feel free to shop my safe & secure online store.  Thanks!

Nancy

Come Stamp With Me

Two Classes have been scheduled for you to join me and make Christmas Cards.    Nothing says ‘love’ like a handmade card, and let’s be honest, we all love handmade holidays.  When you combine the two, handmade Christmas cards combine the best of both worlds.

Join me, for both classes if you can:

• Monday, Nov. 16th

• Thursday, Dec. 3rd *

*This class is a “SIP & STAMP”
– bring your favorite bottle of wine to sip while we stamp!

Both classes will be held from 6:30-8:45 PM at Walden Pond Wellness Center at 540 Gleason Drive, Moosic.  Conveniently located off I-81 between Exits 180 (Moosic) and 182 (Davis St./Montage Mtn.)  Cost is $12 per person and it includes all supplies for students to take home finished projects.  You’ll learn a new technique, or tool, at each class to improve your paper crafting skills as you   have fun and make new friends.

Email me to RSVP.  Space is limited and are available first come, first serve basis.

Curious?  Shown below are two cards that we made at the last Stamp Club;  the first one features a resist embossing technique using the Holly Jolly Greetings stamp set and Christmas Greeting Thinlits dies (Bundle and save 15% when you purchase these two items together!)

Peace The next card features textured embossing and ‘stamp on, stamp off’ technique using the ever versatile Wonderland stamp set.

Wonderland Peace & LoveFor more ideas using this gorgeous stamp, check out my Facebook page, and check back here often.  I’ll be sharing several project that I’ve made with this stamp set over the next few days and weeks.

Check out the latest Stampin’ Up! catalogs for lots of ideas and inspiration for your own holiday projects.

I hope you’ll join me in a class, but if you can’t make it in person,  schedule your own in-home workshop and I’ll bring the class to you!  Or ask me about a class in the mail option.  Either way, I hope that we’ll be stamping together soon.

Keep your ink on the paper,

Nancy

This is What Inspired Me

Yesterday I shared a photo of something that inspired me to make a cute little Frankenstein-styled card.  Today, I want to share another project with you.  This was made by one of Stampin’ UP!’s Artisan Design Team.  (You can see the original blog post here).WickedI just absolutely LOVE the color combination!  Tradition says we should pair Orange & Black for Halloween.  Maybe throwing in a splash of green or purple is in order, but no orange?  Just black & green?  YES, it works!  And works wonderfully.  Yes, I loved this so much I wanted to copy it for myself!  But I didn’t have the WICKED sentiment, or the Owl from the Howl-o-ween Treat stamp set but that wasn’t going to stop me!  I did have the Spider Web Doilies and my trusty Owl Builder Punch, Basic Black & Cucumber Crush card stock and Cucumber Crush Dotted Lace Trim Ribbon.  Here’s what I came up with:

hershey bar holder

I wanted to make something to hold a full size Hershey Bar.  So my Pillow Box Thinlits die would come to the rescue.  To make it work, I had to do some finagling.  (That’s a very technical term which means I alter it to fit what I needed!)  I actually cut a black pillow box part in half, spread the two pieces apart, and use the green piece to  ‘bridge the gap’ to create the length I needed.

My sister is just going to LOVE this when it arrives in her mailbox.  She loves Hershey bars and she enjoys getting little treats in the mail from me too.  But, shhh, don’t tell her it’s for her.  I want it to be a surprise!

Look for opportunities all around you to inspire you in your paper crafting projects.  Look for color combinations in clothing, patterns in home decor.  You’ll be surprised at what you’ll see when you look at things with a discerning eye.

Just look outside, all the beautiful fall colors are inspiring too.  What will you make?  I hope you make something absolutely inspiring!

Nancy

Don’t forget to shop our Weekly Deals, they update every Tuesday.  And our Holiday Catalog is filled with Bundles to help save you money.  And beginning today until Nov. 9th, earn extra Stampin’ Rewards when you place a qualifying order of $300 or more.


Built for Free Using: My Stampin Blog


Will You Be Getting My Free Gift?

Hey Stampers,
Great News!   I am going to be giving a special gift to my Mailing List Subscribers!  If you have signed up to receive my newsletter, then you will be getting a special “12 Weeks of Christmas” newsletter designed to inspire you with projects to make your holidays special.

Each week beginning Wed., Sept. 30th, you will receive an email containing a project idea for cards, gifts, tags & gift wrapping, along with step by step directions.  Projects will feature products from the 2015 Stampin’ UP! Holiday Catalog and/or holiday items from the Annual Catalog.

arrow-clip-art-Arrow-clip-art-16This is EXCLUSIVELY for my mailing list subscribers!  If you aren’t already signed up, join now before its’ too late!  Click the sign-up box to your right.

If you are not on my mailing list by Wednesday,you won’t receive these exclusive project tutorials designed to inspire you!

Sign up now!  I promise you won’t want to miss the projects that I’ll be sharing!

Nancy


Did This Make Your List?

When the new Stampin’ Up! Holiday catalog made its’ debut, I ooh-ed & ahh-ed at almost every thing in it!  But only a few items made it to the top of my “Must. Have. NOW!” list.   The Festive Flower Builder Punch and Coordinating Reason for the Season stamp bundle were at the top of this list.

The flower punch makes this incredible 3-D flower, and the stamp set puts just the right accent onto each petal.

Tonight I brought my computer into My Stampin’ Space and was creating and surfing; when I saw the Pals Paper Arts sketch challenge #268, and I had this flower already assembled just waiting to be turned into something awesome.  It was a match made in heaven!  Add the Merry Moments DSP that was practically sitting in my lap and a star was born!

IMG_5584This beautiful patterned paper was just right to show off the 3-D flower, and since I didn’t want anything to take away from anything, I chose a soft neutral, Sahara Sand, for the card base.  I didn’t even put a sentiment on the front, I want the flower to be the star of the show!  I did use a little bit of the Gold Metallic thread which helps the flower pop out without taking your eye away.

I used the sentiments from Versatile Christmas on the inside.  While these sentiments are great ‘inside, outside’ stamps, I used both parts on the inside:

IMG_5585I love that you can see how full the flower is from this angle.

Here’s another angle that shows the flower,

IMG_5586

So, now that you’ve seen this, is the Reason for the Season Stamp set and Festive Flower Builder Punch on your list too? Remember, you can Bundle & Save 15%!   If it is, you can order it here.  If you do, please use host code ZA4DG2A9 when you place your order.  (If your order is $150 or more, please do not use the host code).  You can also click on any item in my supply list below to order that item.

If you want it all, but your wallet says, “HELP!”, you might want to consider joining Stampin’ Up! as a wholesale customer.  You’ll get a discount on every order.  You can join here; select $125 worth of products for only $99 plus tax.  I’d be happy to answer any questions you have about becoming a wholesale customer.  Email me and we can set up a time to talk!   Joining Stampin’ UP! was one of the best things I’ve ever done!

Nancy

The Holiday Catalog is Here!

It’s finally here; the 2015 Stampin’ Up! Holiday catalog  is here!  Click on the catalog cover below to view the catalog.

20150901TH_HolidayMini_en-USStamp sets, papers, & framelits, oh my!   Where to start?

My advice:  bundles are always a great place to start, and to save.  Make a wish list, go thru the catalog again, add to wish list.  Go thru catalog a third time, prioritize wish list (I make an A, B, C wish list).

One of my favorite bundles is the Embellished Ornaments Stamp Set and Delicate Ornaments Framelits die Bundle – Wood Mount # 140856 $48.25, or Clear Mount # 140857 $ 41.50 which I used to make this card:

IMG_5439

You can begin ordering today right here.   You can view the catalog here, or on the sidebar.  Do you want a paper catalog to have in your hands?  If you are my customer, or would like to be, I’ll be happy to send you a catalog.  If you already have a relationship with a demonstrator, I respectfully ask that you request a catalog from him/her.

Is you wish list now bigger than your budget?  Do you want it all?  Consider using the starter kit to fill your wish list.  Choose $125 worth of merchandise for only $99 (and it ships free!) which is like a 30% discount.  And that’s just to start!  You’ll receive a 30% discount off your first order (within 45 days) and 20% off all products after that from now until Dec. 31st with no obligation to sell anything, host a party or anything else.  Just fill your personal wish list at a discount, get all the perks (like attending OnStage Live in November, a bi-monthly magazine filled with ideas & tips, our private Facebook chat groups, and more!)  Click here to get started.

Enjoy the new catalog!

Nancy


Christmas, Here I come!

Christmas is just a few short months away, so now is the best time to start getting ready.   I did just that.  The new Stampin’ Up! 2015 Holiday catalog is here (sales period begins Sept. 1st) but as a demo, I have been able to order from that catalog already.   This catalog is filled with so many new and exciting things that will make a stamper’s heart go pitter-patter!   And, yes, I do offer Gift Certificates 🙂   SPOILER ALERT:  The catalog is also filled with some pretty nostalgic items too that will take you back to Christmases of long ago.
Our Annual Catalog has some pretty nice Christmas stamps & papers too.  Today’s project features the “Lots of Joy” stamp set, “Merry Moments DSP” from the annual catalog and the coordinating Tree Punch.

Lots of JoyWhisper White card stock formed the foundation for my card.  A piece of plaid DSP cut 1/4″ smaller created the background.   I used my Oval framelits and cut 2 ovals; the larger from Mossy Meadow card stock, the smaller in Old Olive  card stock.    I punch a Mossy Meadow tree (TIP:  To save paper, I punched this out of the center of the oval I just  made – the lighter oval will cover it and no one will know!)

Then I stamped the plaid tree in Old Olive ink on Whisper White and punched that out and adhered on top of, but offset from the solid tree.

Cherry Cobbler ink was used for the sentiment and the 1-3/4″ and 2″ circle punches cropped the circles which I layered together and offset at the bottom of the oval.  A few stars in Gold Glimmer Paper were cropped using the star die from the Mini Treat Bag Thinlits set added some sparkle.  The plaid tree was finished off with a bow tied from the new Gold Cording Trim which will be available Sept. 1st.

Don’t you just love the plaid tree in this stamp set?  I do.   It reminds me of a Charlie Brown Christmas and I am looking forward to stamping this tree in some funky colors like Bermuda Bay, Melon Mambo and the like!

I took my color palette from the colors in the Merry Moments DSP.  Here is another card I made using the same layout but I switched out the DSP in the background.  IMG_5467 A whole different feel just by changing the paper.

And the best part of this card;  after I made it I realized it fit the requirements for the Merry Monday Christmas card challenge:Merry Monday Christmas 169It’s been a while since I played along and I’m really glad to take part this week.  Hop over to the challenge to find inspiration from other crafters as you look forward to getting started with your own Christmas cards.

Listed below are the supplies I used for my card.  You can order any of these items by shopping my online store, or by clicking the item below.

If you need a 2015 Holiday Catalog, and you are my customer, or don’t currently have a demo and wish to choose me as your demonstrator, request your Holiday catalog here.  If you already have a relationship with another demonstrator, please be respectful and contact him or her for a catalog.


Thanks for stopping by My Stampin’ Space.  Please know that I love when you stop by and leave me a comment.  I also appreciate when you order from me very much!  I have set some sales goals for myself and and just a few dollars away from my goal for the month.  I would certainly appreciate if you could help me reach that goal by shopping with me today.  (You know you want more stamps anyway!)  And you’ll be helping me in the process!  Thanks!
Don’t forget our Weekly Deals and Clearance Rack items either.  Or start your gift giving and order a few Paper Pumpkin Subscriptions.
Have a good day and have fun shopping!
Nancy

Penguin Party

When I saw the theme for the Merry Monday Christmas challenge, I just had to participate!

I had snow much fun creating these little punch art penguins on this card I made last winter that I just had to do a ‘remember when’ post!

Punch Art PenguinThe Owl Builder Punch is used to create these darling penguins, and dazzling diamonds paper gave them the snowy hills to play on!  I don’t make a lot of cute & whimsy cards, but these little cards were so much fun, I may just be making more soon.

I’ll be putting together a step-by-step tutorial so you can make these little darlings too.  Stop back for those instructions.

Nancy

Don’t forget to shop the Weekly Deals today, either.


Built for Free Using: My Stampin Blog

SAVE BIG ALL WEEK LONG!!!

Just announced:   Stampin’ Up!’s Online Extravaganza!  Savings start on Monday, Nov. 24 and run through Dec. 2nd.   Stampin’ Up! likes to do things big so they don’t limit their Black Friday sales to just one day!  You’ve got a whole week to save.

The PDF file lists 3 pages worth of savings- Check it out here:

2014_Online_Extravaganza_Products_US

Be sure to watch the headers:  some deals are one day only deals!  You’ll save big on embossing folders, ribbon, tools (like the gift box punch board & magnetic platform for the Big Shot), Paper Pumpkin refill kits, Project Life by Stampin’ Up! and more.

I’ll have links direct to the savings posted 6:00 AM on Monday so go make your list, remember to shop for yourself too with savings this big, and come back on Monday.

Increase your savings!   Join the Stampin’ Up! Family of demonstrators Nov. 24th – Dec. 2nd.   The starter kit is reduced to $74.25 and contains $125 worth of your choice of products and ships free!  Then save 30% on your first order and 20% on all your  Stampin’ Up! orders after that.   Click here to join the fun!

Click here to go directly to my online store.

Email me if you have any questions!

Happy Stampin’ & Happy Shopping,

Nancy


November Pals Blog Hop

Welcome to the November Pals Blog Hop, we are thankful you stopped by!  This month we are showcasing projects that show our thanks, including both thank you and Thanksgiving themed projects.

2014novhop_backYou may just be starting the blog hop or may have come from Sherrie Gross at Stampin’ Sunshine on the Pals Hop. If you get off track at any time, the full lineup below will help you move along from blog to blog so you see all of the amazing projects.

Question?  What do baby wipes, styrofoam plates & ink refills have in common?  And what do they have to do with Thanksgiving, or being thankful?  Don’t ready any further or scroll down until you’ve had time to ponder that question.  Are you ready?  Are you sure?

Well, just to be sure, I won’t give that answer just yet.  I’ll show you my projects first.  Yes, I did say projects, plural.  I have not one, but two projects to show off today.

fall leaves 2

Fall LeavesTwo projects, but one technique.  The leaves in both projects are made the same way.  In the top card, I stamped the leaves onto Whisper White card stock and used my paper snips to fussy cut the leaves out.  In the second project, I stamped directly onto Very Vanilla card stock.

I used the “For All Things” stamp set for the leaf image.  “Good Greetings” was used for the sentiment in both cards – I sure hope you earned that set when it was available as a Host Promotion last month!   The Color Me Autumn DSP makes the colorful background.  These items can be ordered by clicking on their respective links, or click here to go to my on-line store where you can shop safely.

For All Things Clear-mount Stamp SetColor Me Autumn Designer Series Paper

So now for my answer:  Baby wipes, a styrofoam plate  & ink refills are used to create the beautiful, mottled effect I used for my leaves in my projects known as the baby wipe technique.  And my mailing list subscribers will learn exactly how to do this when I send a video lesson directly to them later this week!  Wait, you’re not a subscriber?  Well, go to the Mailing List Sign-Up box on the top right and sign up!  I’ll wait.  You’re finished already?  That was quick.  Now you’ll get this video lesson and learn how to do this too!

See the variegated, mottled effect this technique creates?  I taught the ladies in my Monday night class how to do this, and they LOVED IT!   I’m sure you will too so make sure you don’t miss my video class!

close up of leafThanks for stopping by My Stampin Space.  I hope to see you here again real soon.  In the meantime, continue the hop by following the line-up below.

Happy Stampin’

Nancy

2014novhop_nextThe next stop is Candy Ford at Stamp Candy on the Pals Blog Hop! Thanks for visiting and I hope to see you next month.

  1. Candy Ford at Stamp Candy
  2. Angie Valle-Peters at Paperluxuries
  3. Brian King at Stamp with Brian
  4. Beth McCullough at Stamping Mom
  5. Susan Itell at Simple Stampin
  6. Rae Harper-Burnet at WildWestPaperArts.com
  7. Amy L. Lazzell at Just A Thought…Cards by Amy
  8. Natalie Bradley at Natalie Bradley Events
  9. September Gray at septembergray.com
  10. Jane Knudsen at see jane stamp
  11. Nicole Watt at Pixel Maven’s Retreat
  12. Amy Whelan at Amy’s Inklings
  13. Amy Hoptay at Inking of You!
  14. Peggy Noe at Pretty Paper Cards
  15. Martie Pollard at The Crafty Bandit
  16. Kerry Willard Bray at Peonies and Paper Chains
  17. Katy McGloin at Just Fun Stamping
  18. Mary Fish at Stampin’ Pretty
  19. Susan Lankford at Stamp and Create With Susan
  20. Debbie Mageed at Secret Stamper
  21. Beth Beard at My little craft blog
  22. Lisa Ann Bernard at Queen B Creations
  23. Patti MacLeith at Papercrafts By Patti
  24. Wendy Klein at Doggone Delightful Stampin’
  25. Jackie Diediker at Stampin’ Jackie
  26. Dawn Tidd at Tiddbits from Dawn
  27. Debbie Crowley at expressivelydeb…
  28. Kim Jolley at Stampin’ Artfully
  29. Sue Becker at RnR Stamping
  30. Becky Volpp at Inkblossomwithbecky
  31. Kalyn Shubnell at The Stamping Chronicles
  32. Sherrie Gross at Stampin’ Sunshine
  33. Nancy Gleason at My Stampin Space – – – YOU ARE HERE! – – –

Happy Halloween!

I promised a treat on Halloween and I plan to deliver!  One lucky blog reader will take home the Tee-Hee-Hee stamp set, tonight!  But first, my most favorite card that I’ve made this Halloween season.

Stamp  Class Sept 2014Don’t you just love this?  It is made using the same brayered background technique we used for my Snowy Night card featured in the October Virtual Stamp Club.  (Which by the way, you can still join my Virtual Stamp Club if you’d like – just click on the link and sign up!)

I started with So Saffron cardstock, and punched a circle from a sticky note to cover up the ‘moon’.  I used Daffodil Delight, Crushed Curry & Rich Razzleberry inks on my brayer to color the background and create the dark, spooky sky!  I removed the sticky note and it looks the moon is glowing against the dark sky.  This piece was then adhered to a Basic Black card base.  The homes were made using the Holiday Home stamp set and coordinating framelits die.  (Yes, another bundle and save!)  I used white embossing powder on Basic Black cardstock to get a crisp look.  I used Momento Tuxedo Black ink to stamp on the bats, trees, & lamp posts onto my main layer.  The ghost was stamped on Whisper White cardstock and my paper snips made cutting out the ghost an easy task so I could tuck him behind the chimney.

Now, what you’ve been waiting for…..the winner!   Drumroll please!

#5 – Kim Jones!  Congratulations, Kim!  Please email me your address so I can get your stamp set out in the mail to you.

If you’d like to order any of the items used to make this card, I’m listing the items below.  Just click on the image to go right to my online store where you can order securely 24/7.  Your order will be shipped right to your home.

Again, congrats to our winner, Kim Jones!  Happy Halloween to all 🙂

Happy Stampin,

Nancy