Friendship: It’s what Stampin’ is all about!

One of the things I love most about this world of stamping (well, besides stamping) is the chance to make new friends. I love to introduce people to their first stamping experience and see the joy on their faces when the create something. With blogging and social media, some of the friends I meet are on-line, and I never really get to stamp with them but still enjoy the world of stamping with them.
Well a few weeks back I had the privilege to meet one of my on-line stamping friends in person. Lucky me!
A few days off of work, and jonesing for a road trip, I decided to drive down to the Carolina’s to see some family. Knowing I was going that way, I let one of my blog followers/fellow stamper know I would be in her neck of the woods to see if we could fix a time to meet. And meet we did.

We spent a wonderful afternoon having lunch together and sharing some of our creations with each other. I know you want to meet her too, so here she is: (And guess what? Her name is Nancy too! How cool is that?)

IMG_2843
Nancy Easler and me (I’m in the yellow shirt)
IMG_2844
Me, Nancy Easler and my step-mom Edie having lunch at the Clock Restaurant in Spartanburg, SC. Oct 2013. Yes, we were all drinking sweet tea! (When in Rome!)

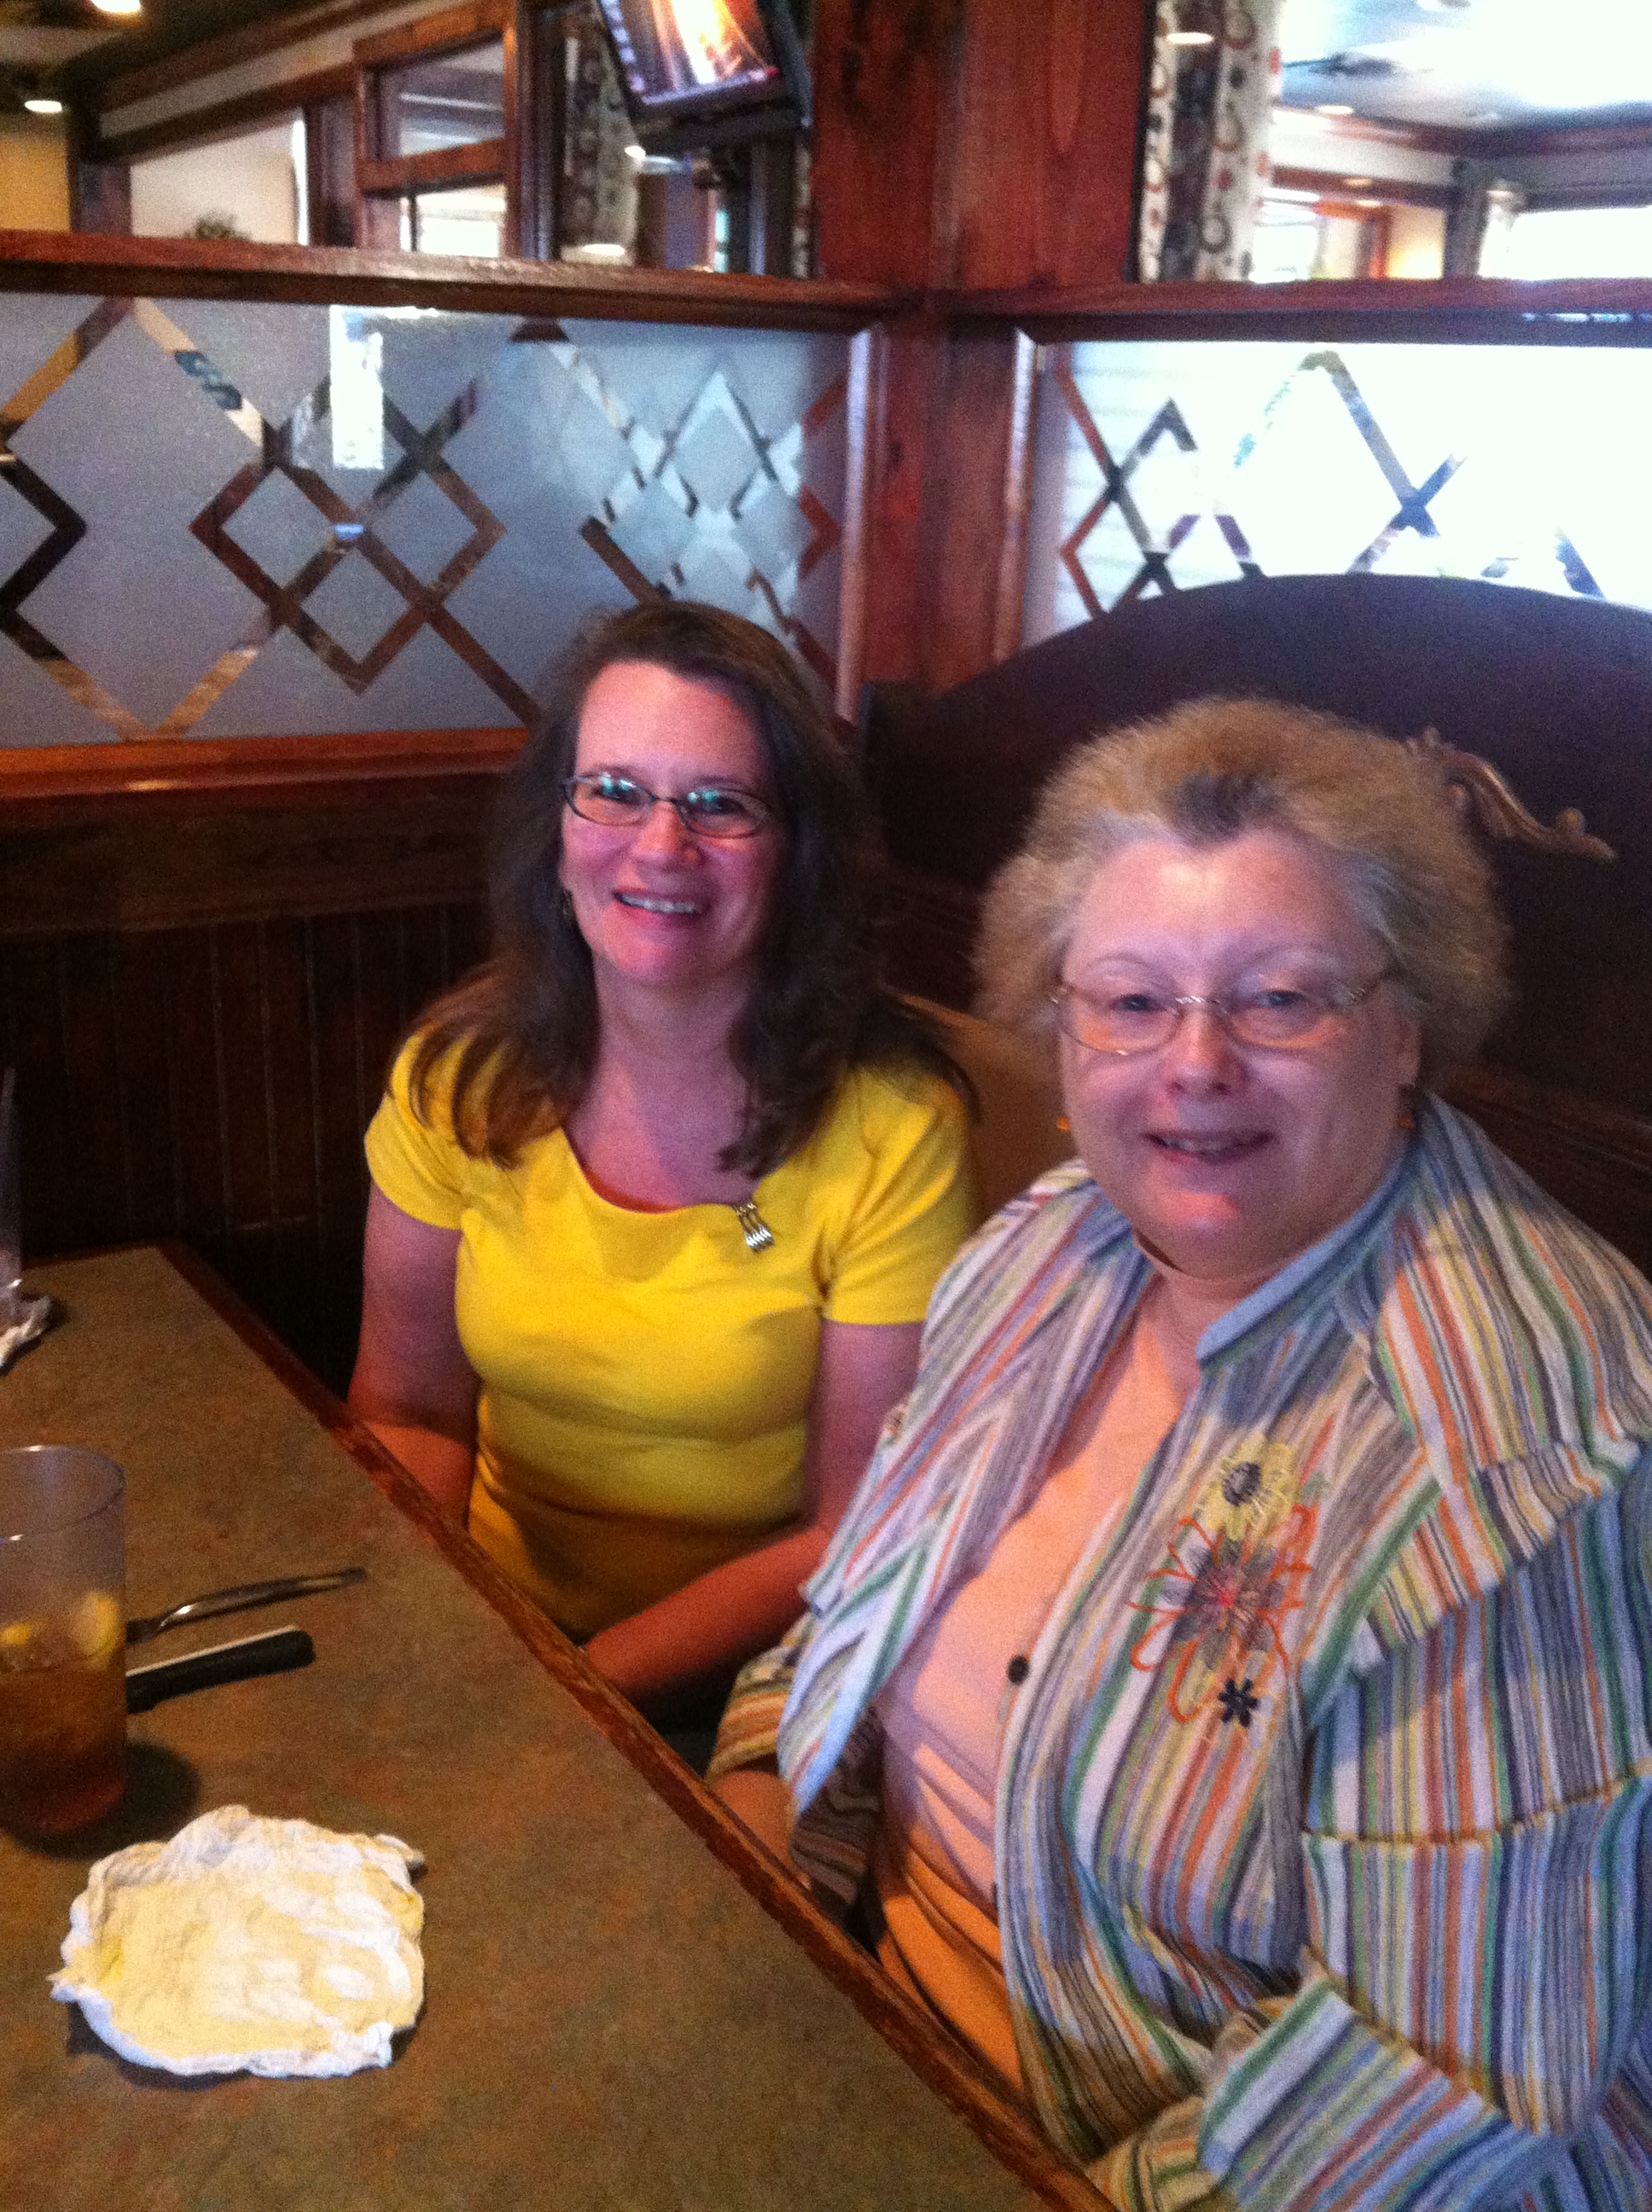
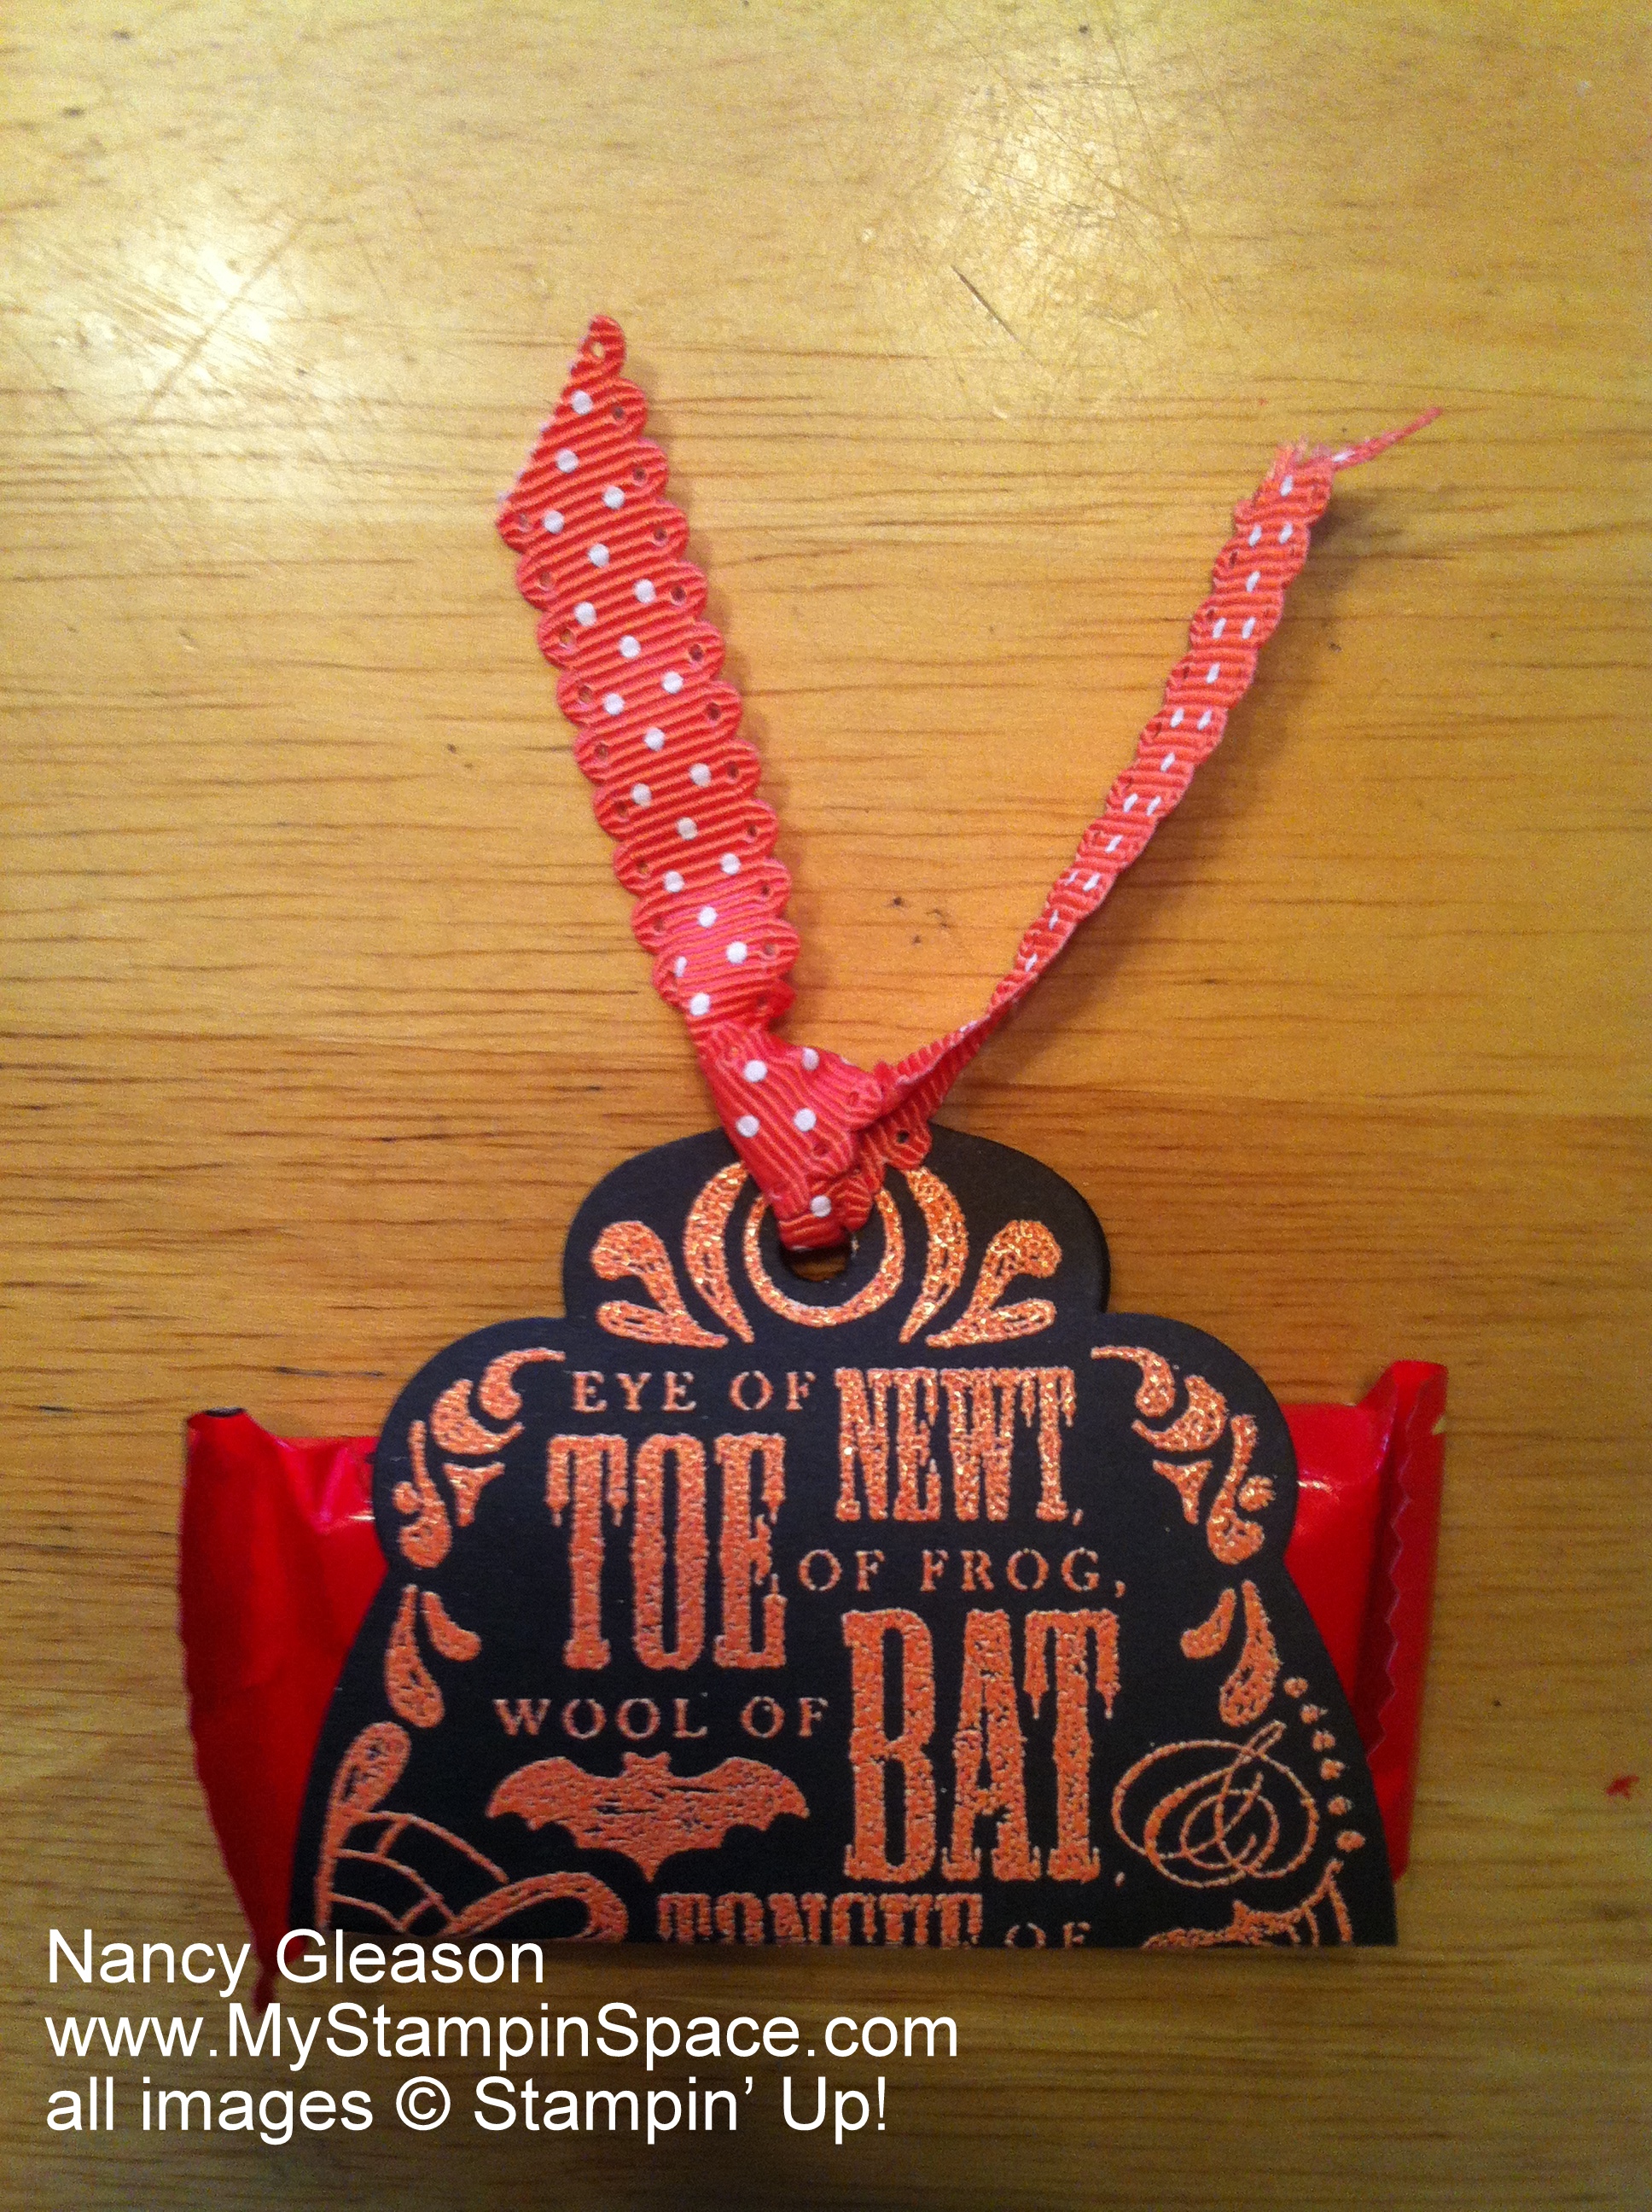
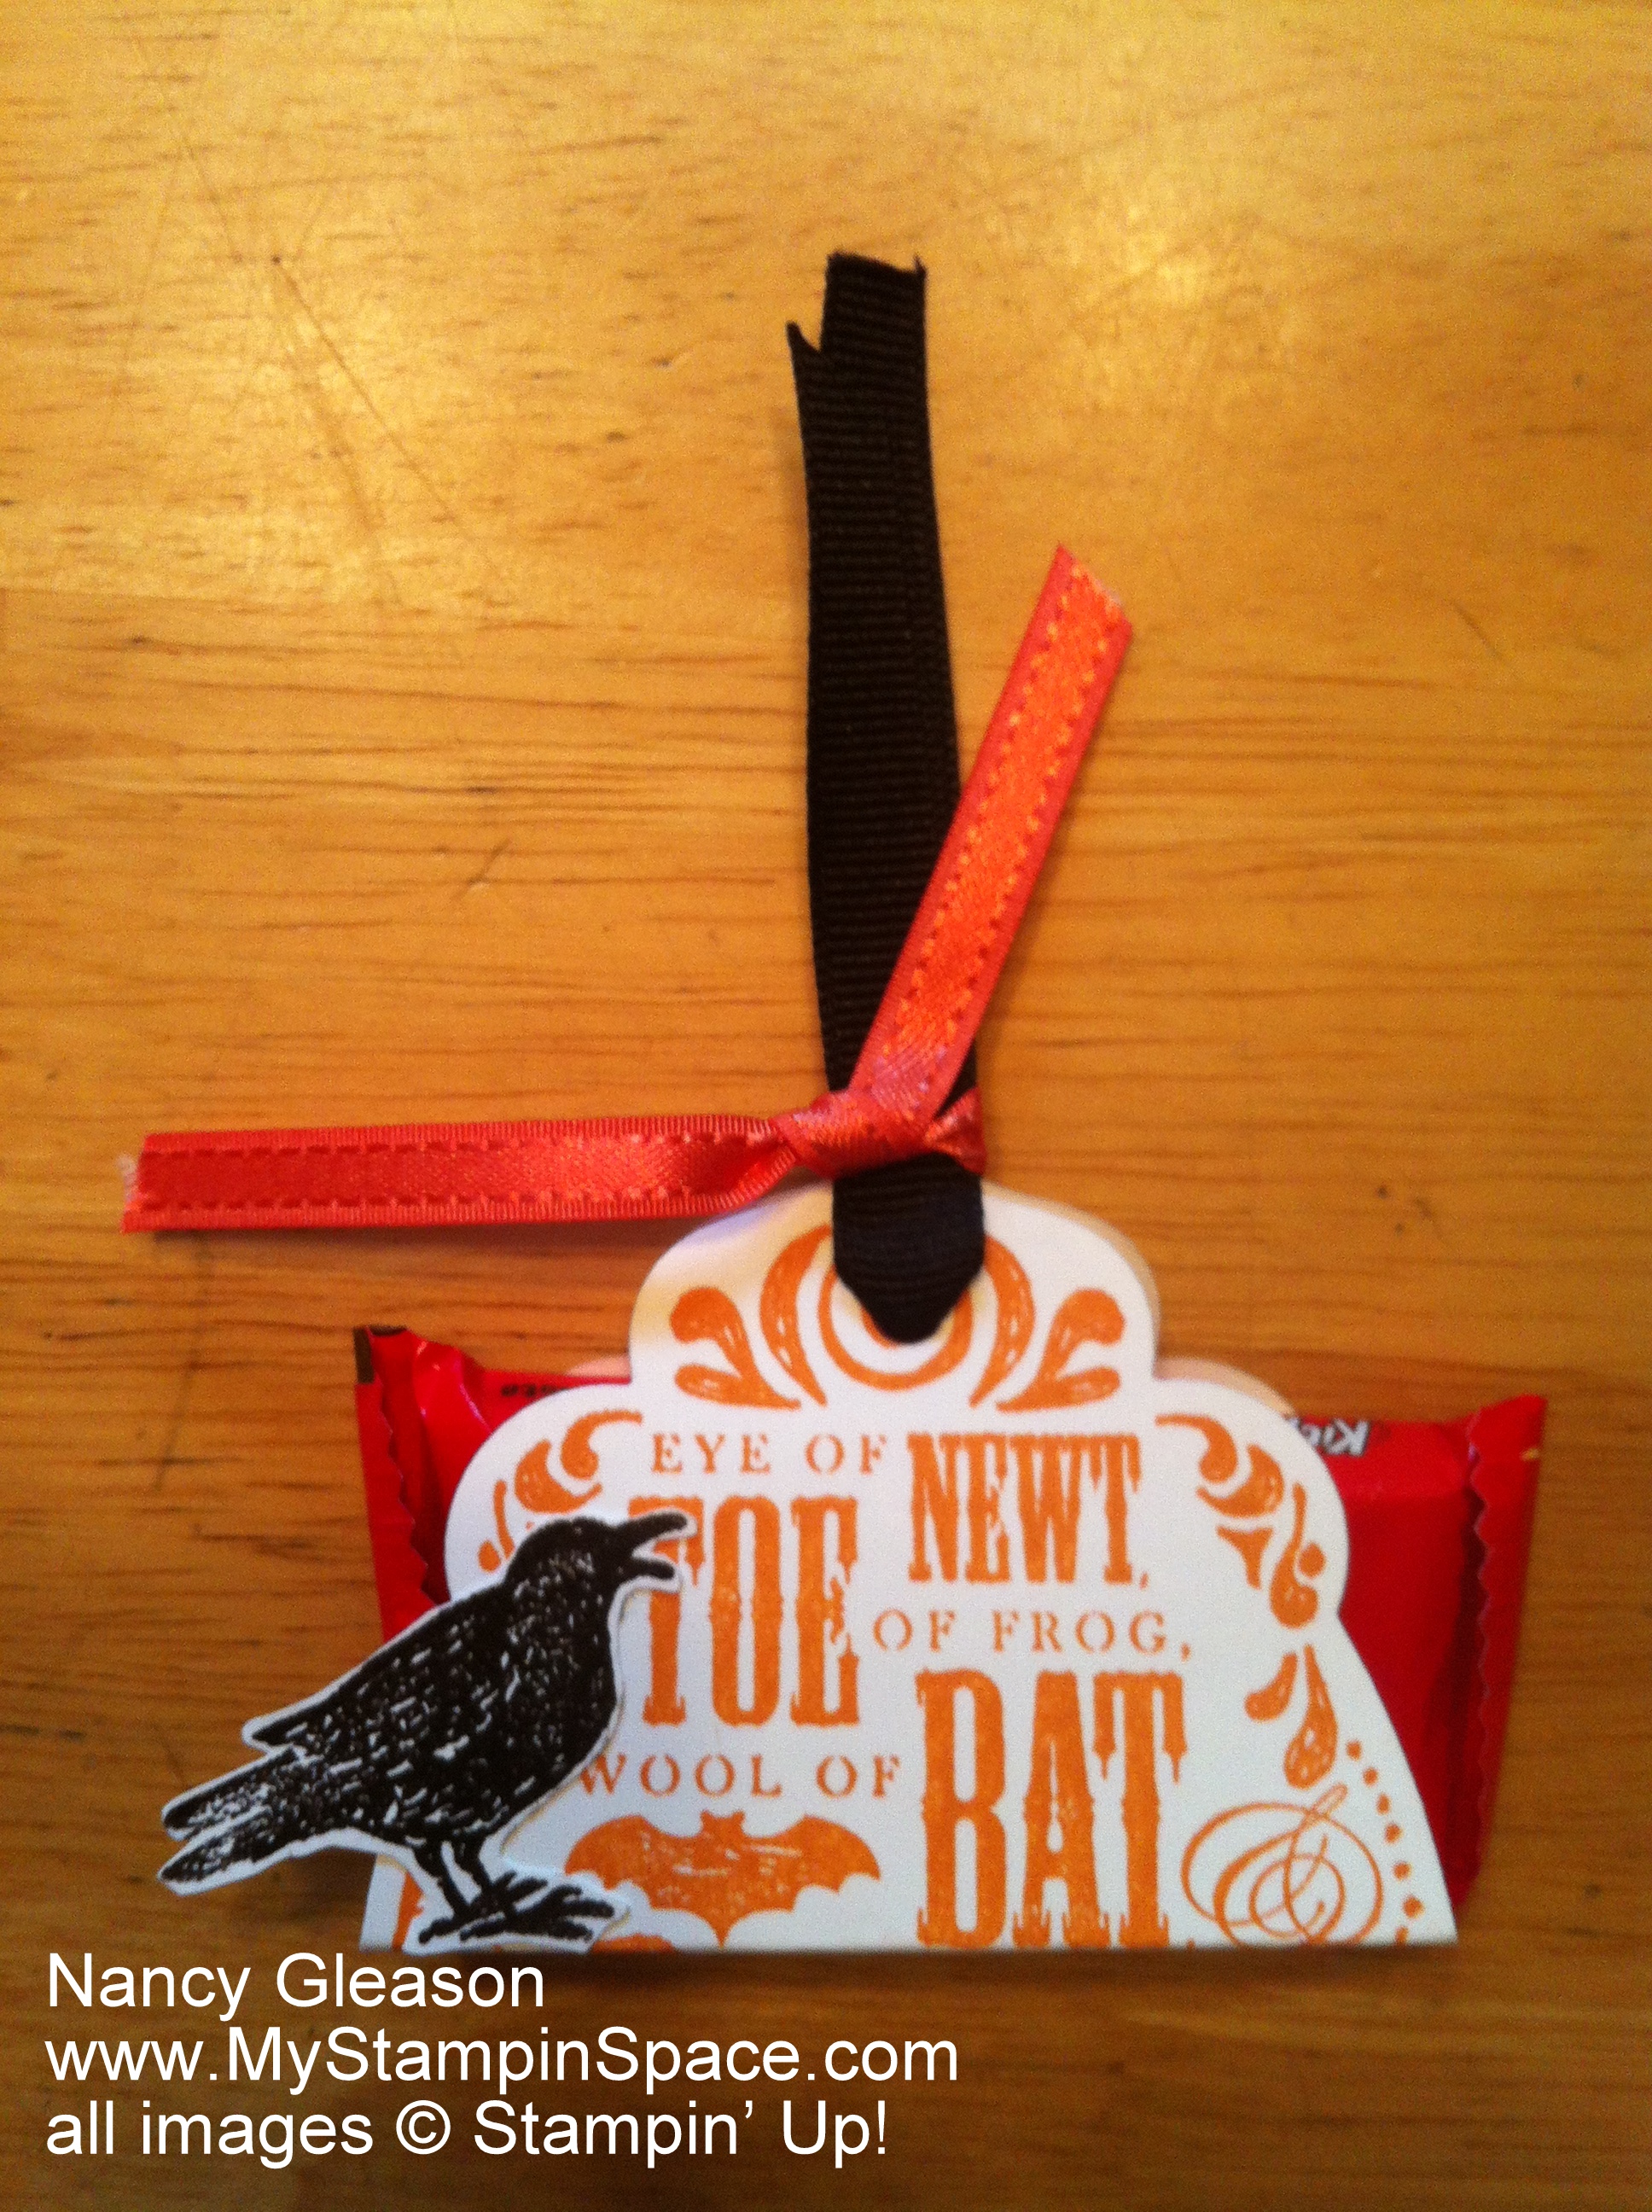
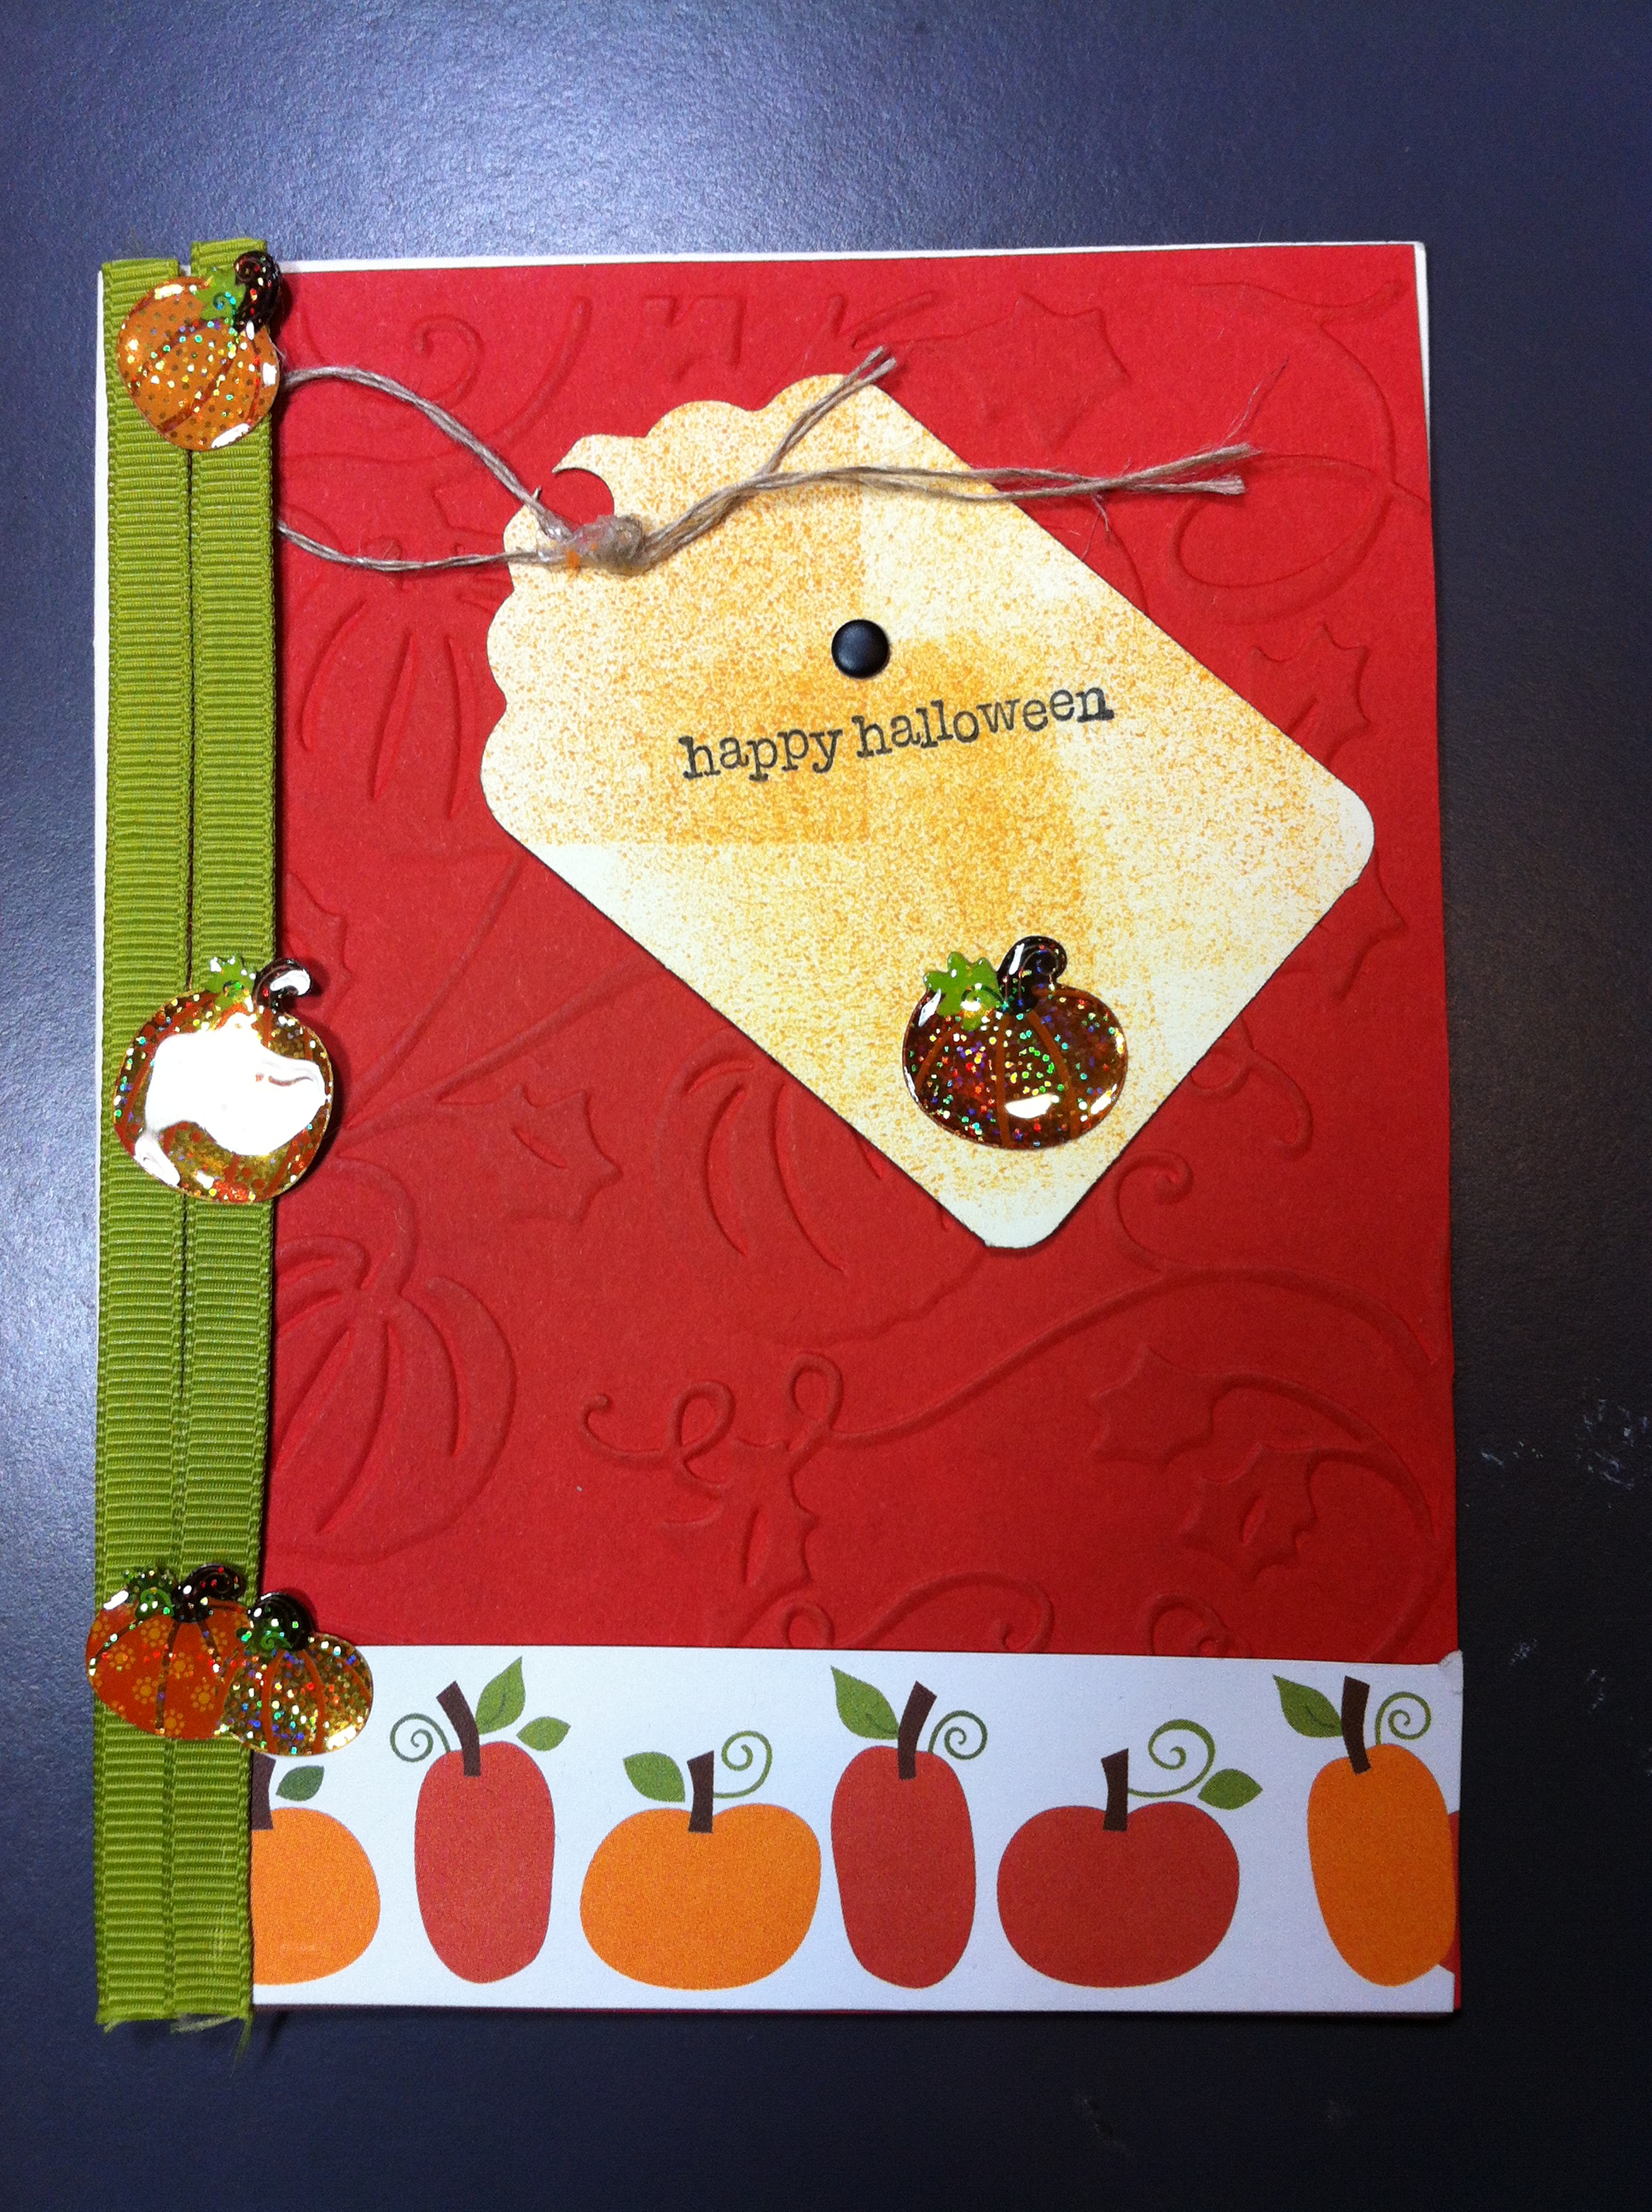
Nancy Easler and I together in Spartanburg, SC. Here are some of the creations that Nancy gave me. (She also gave me permission to post them on my blog for all the world to see.)

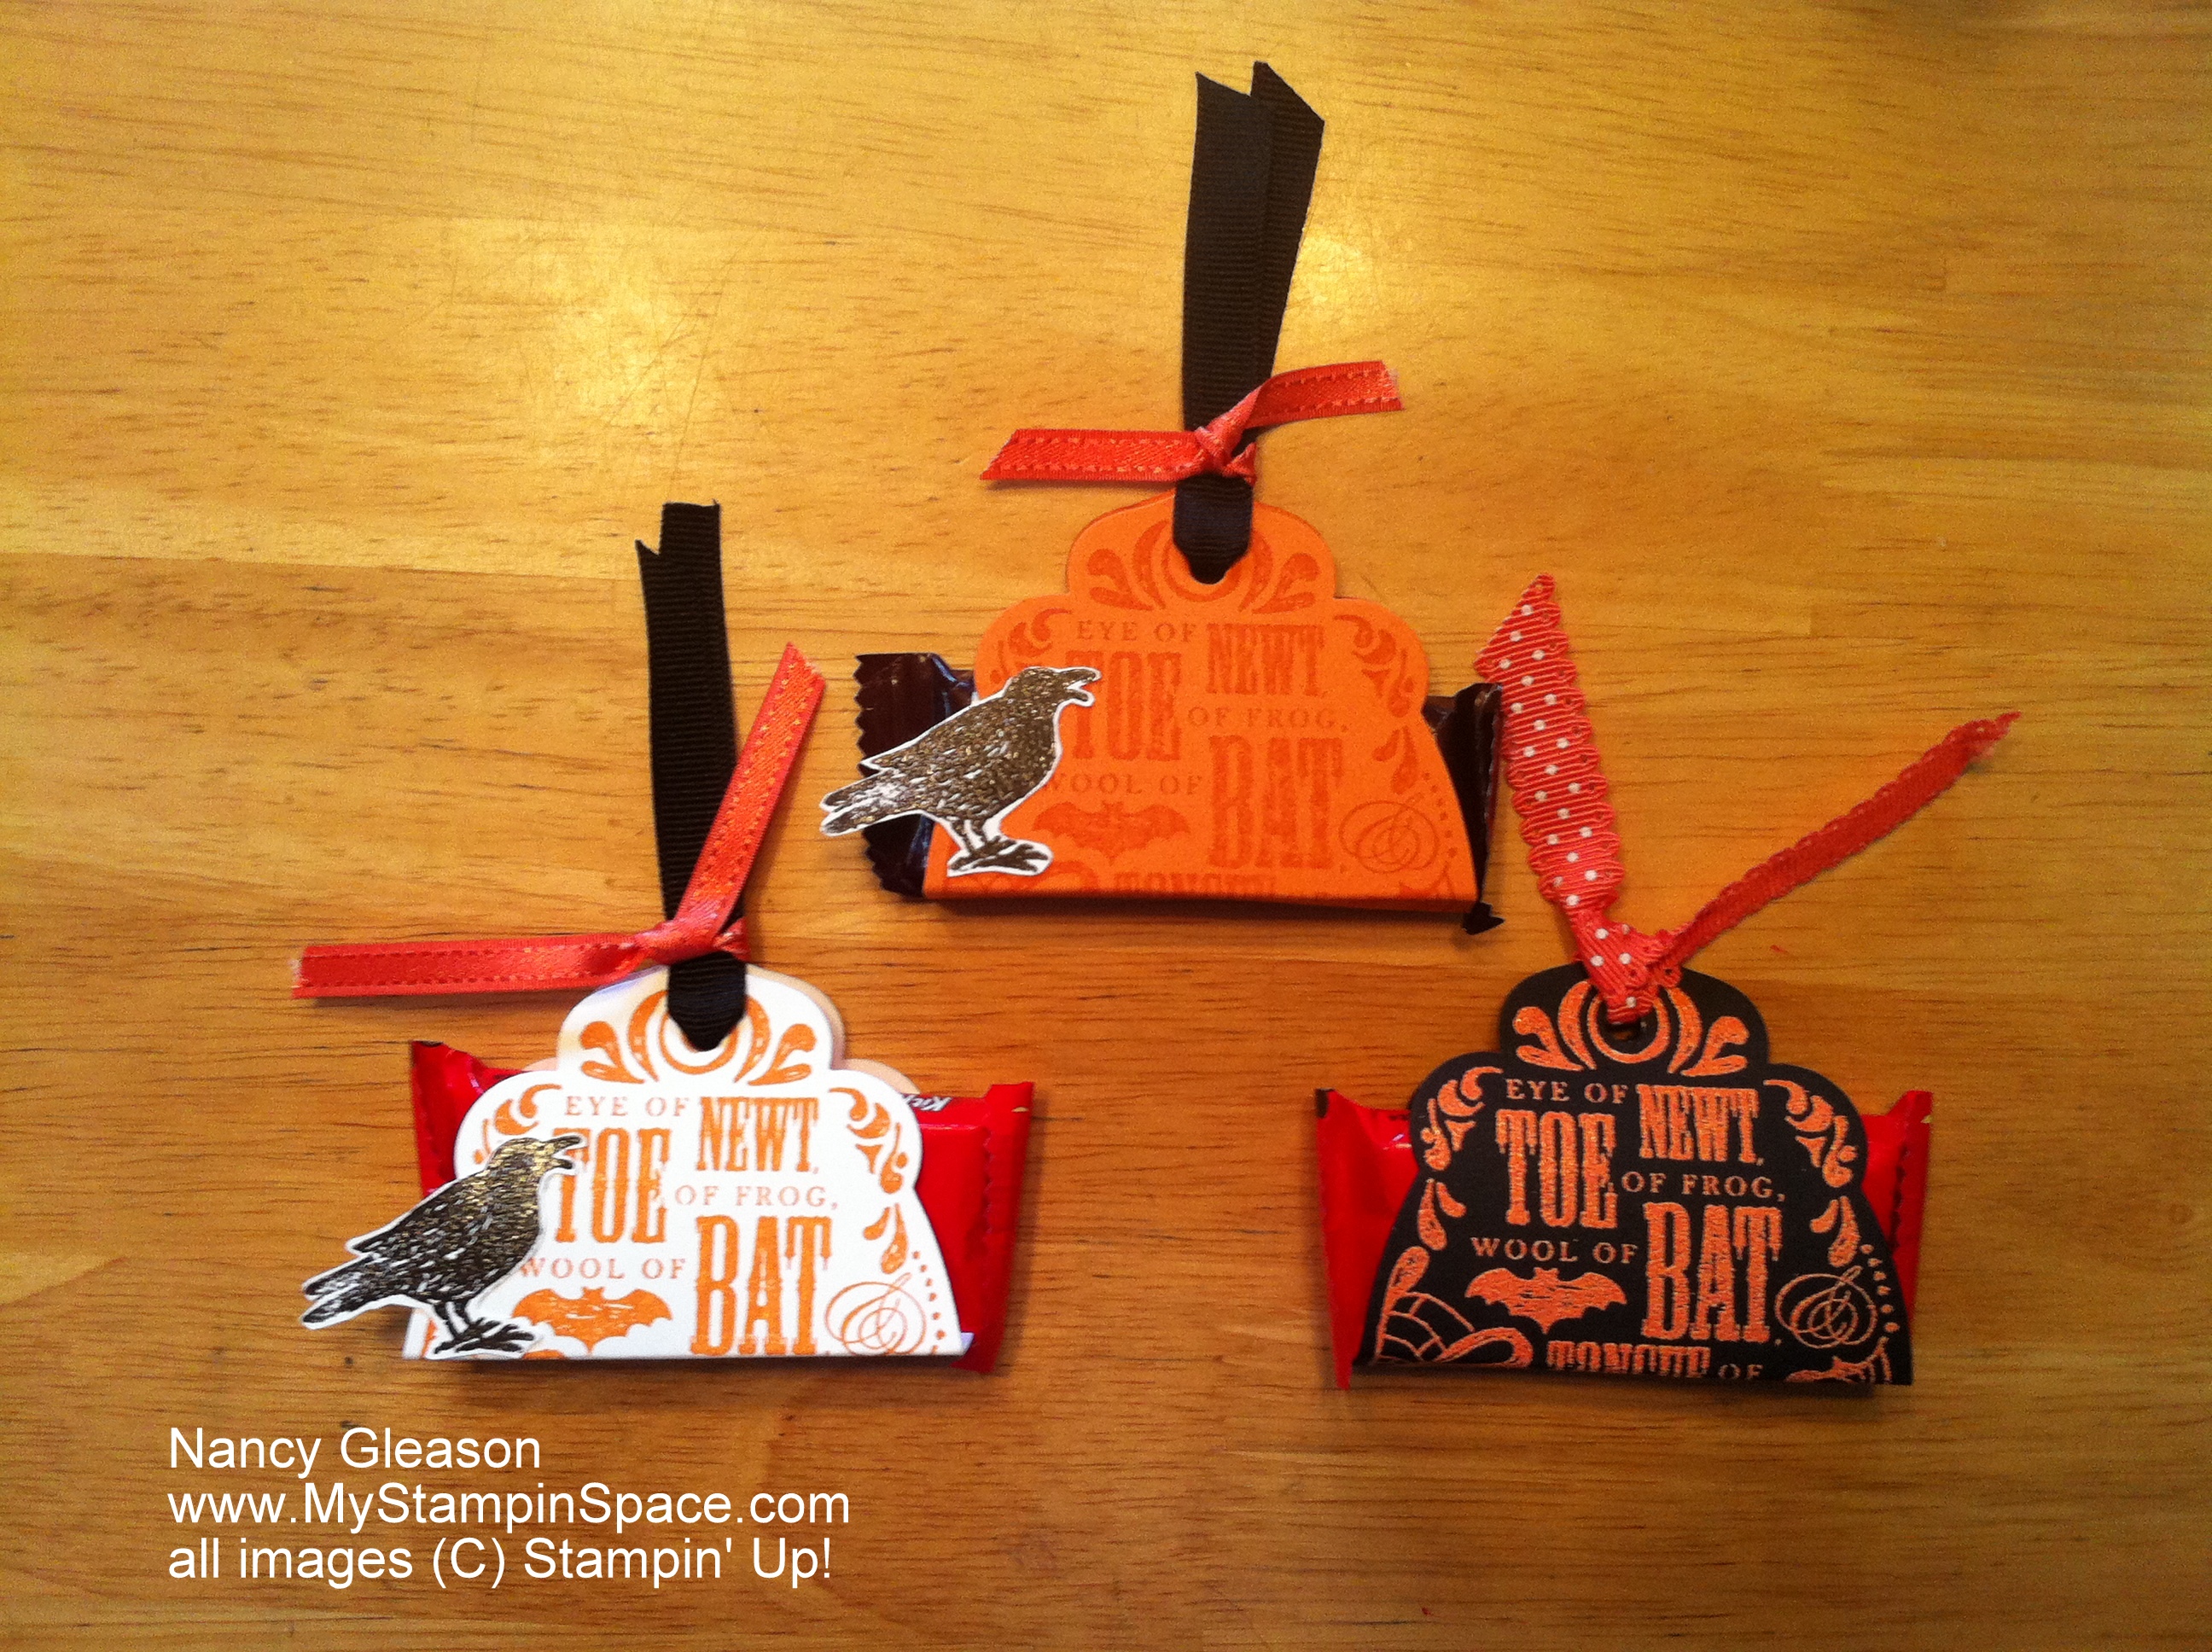
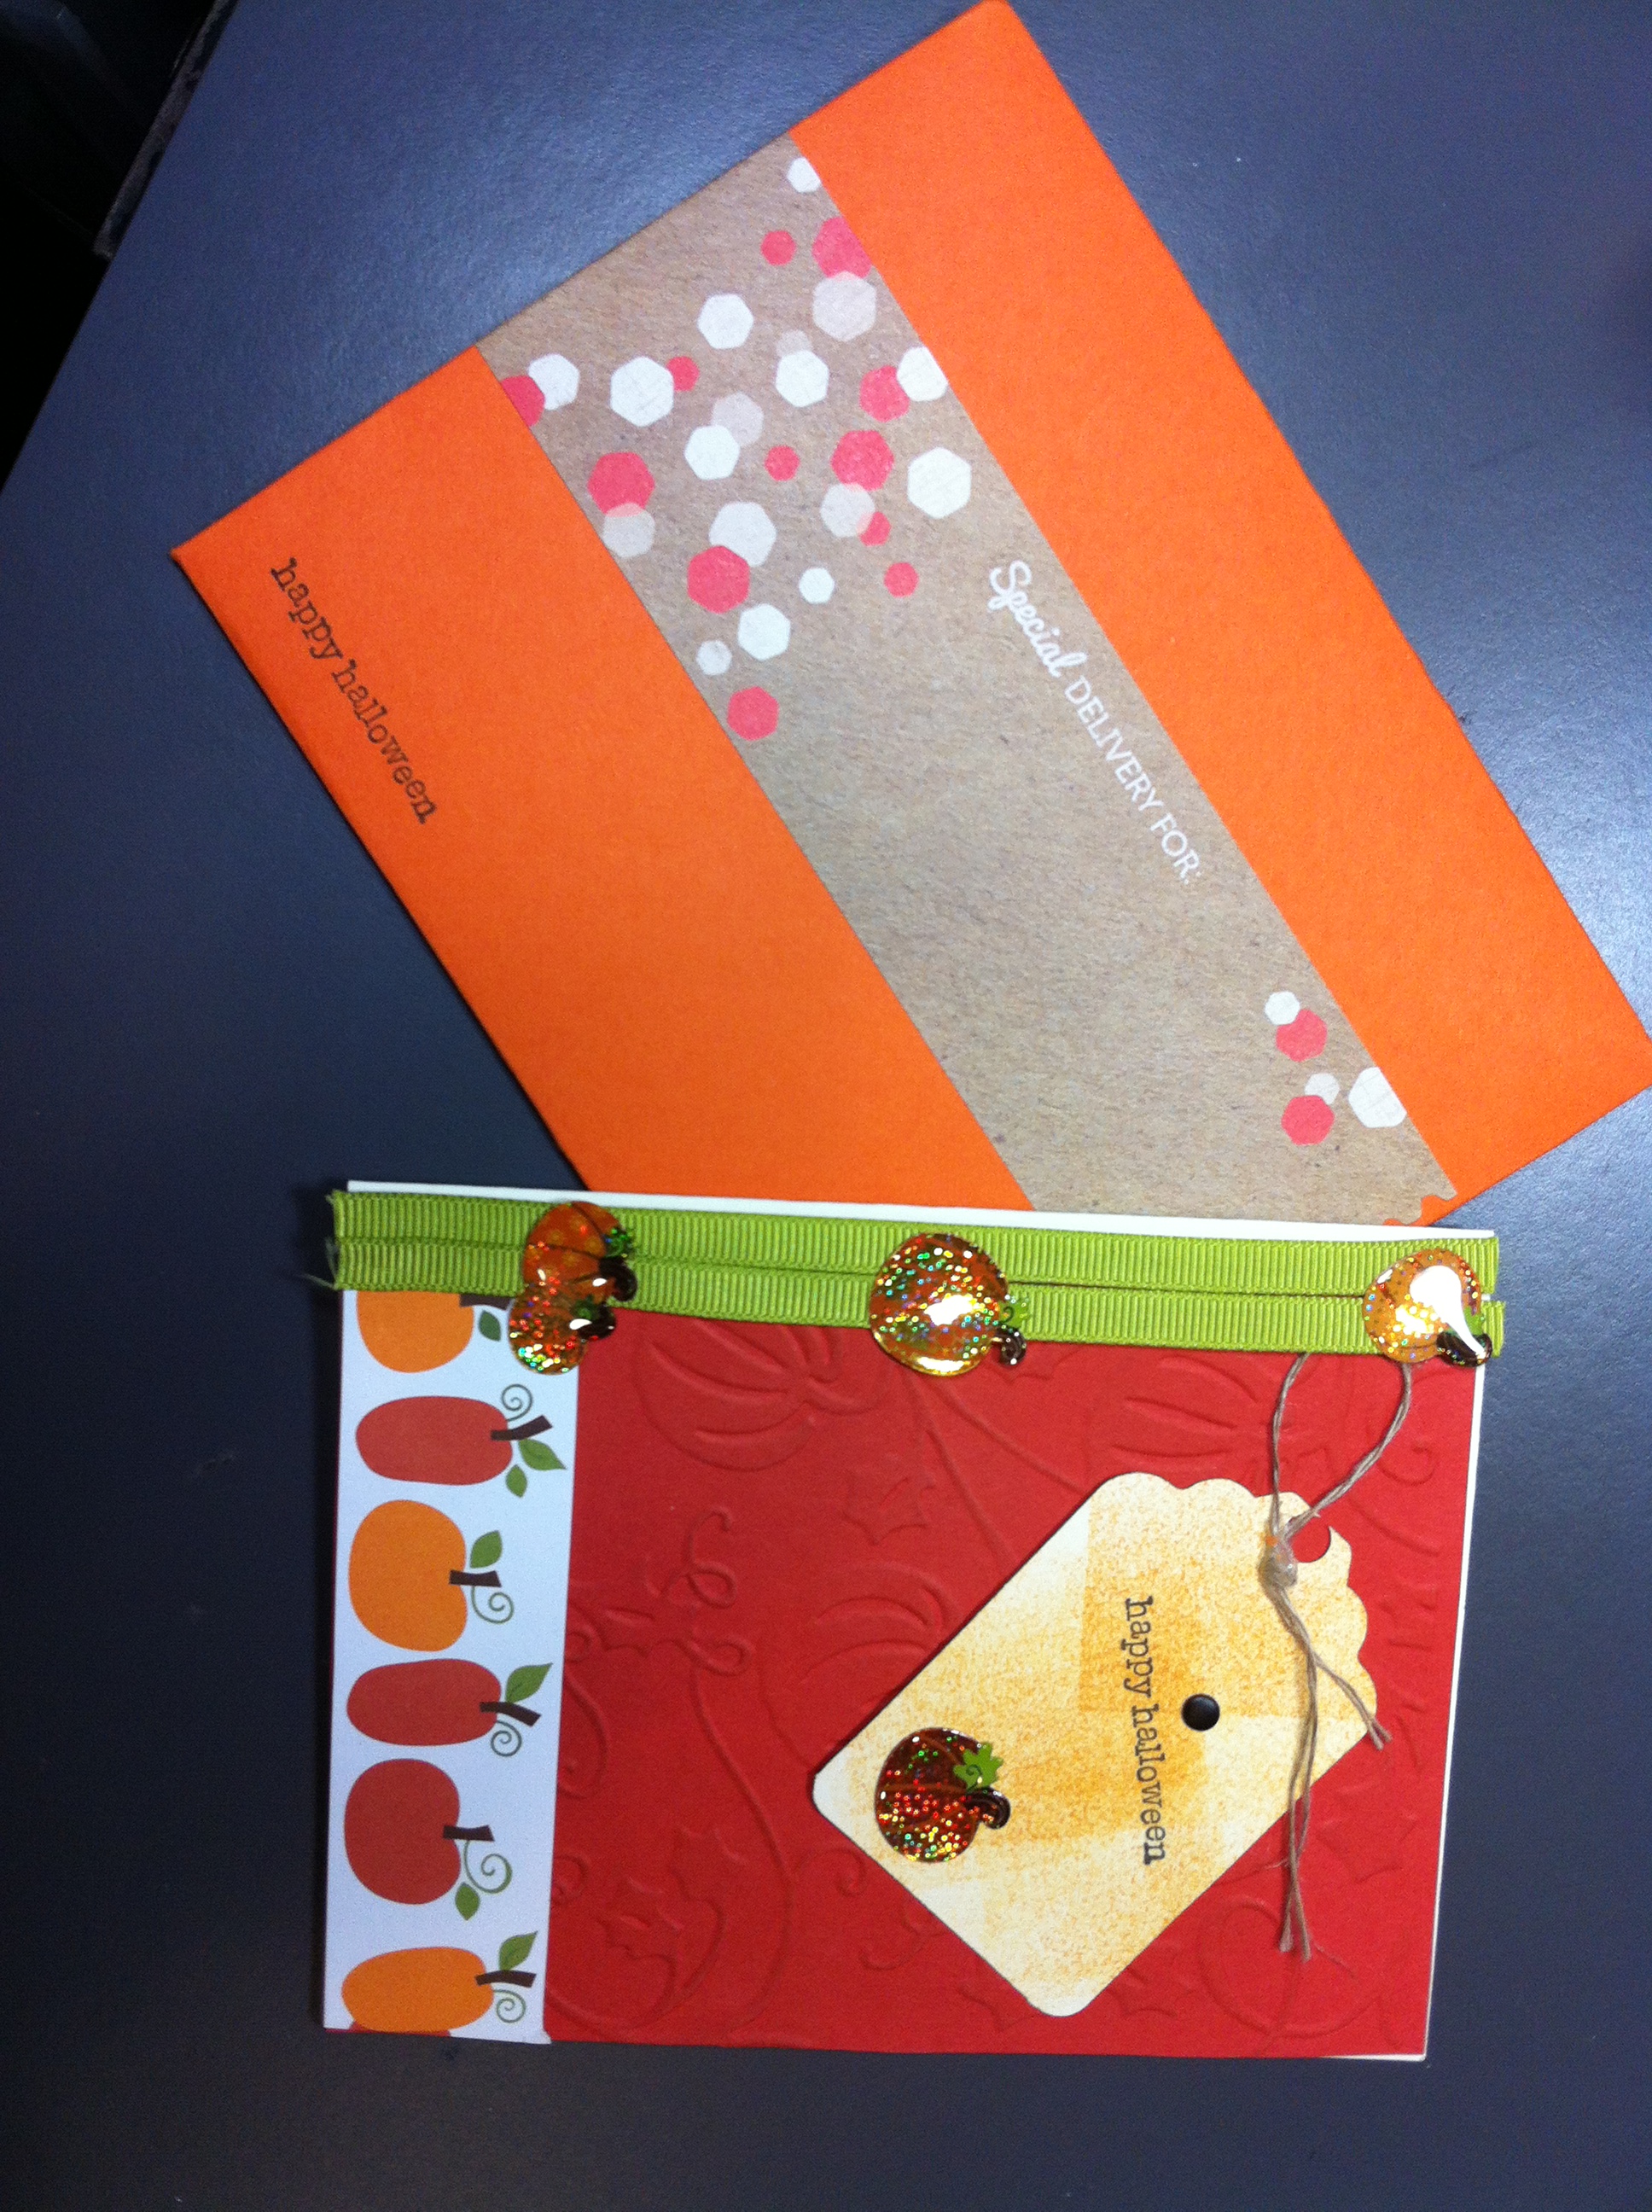
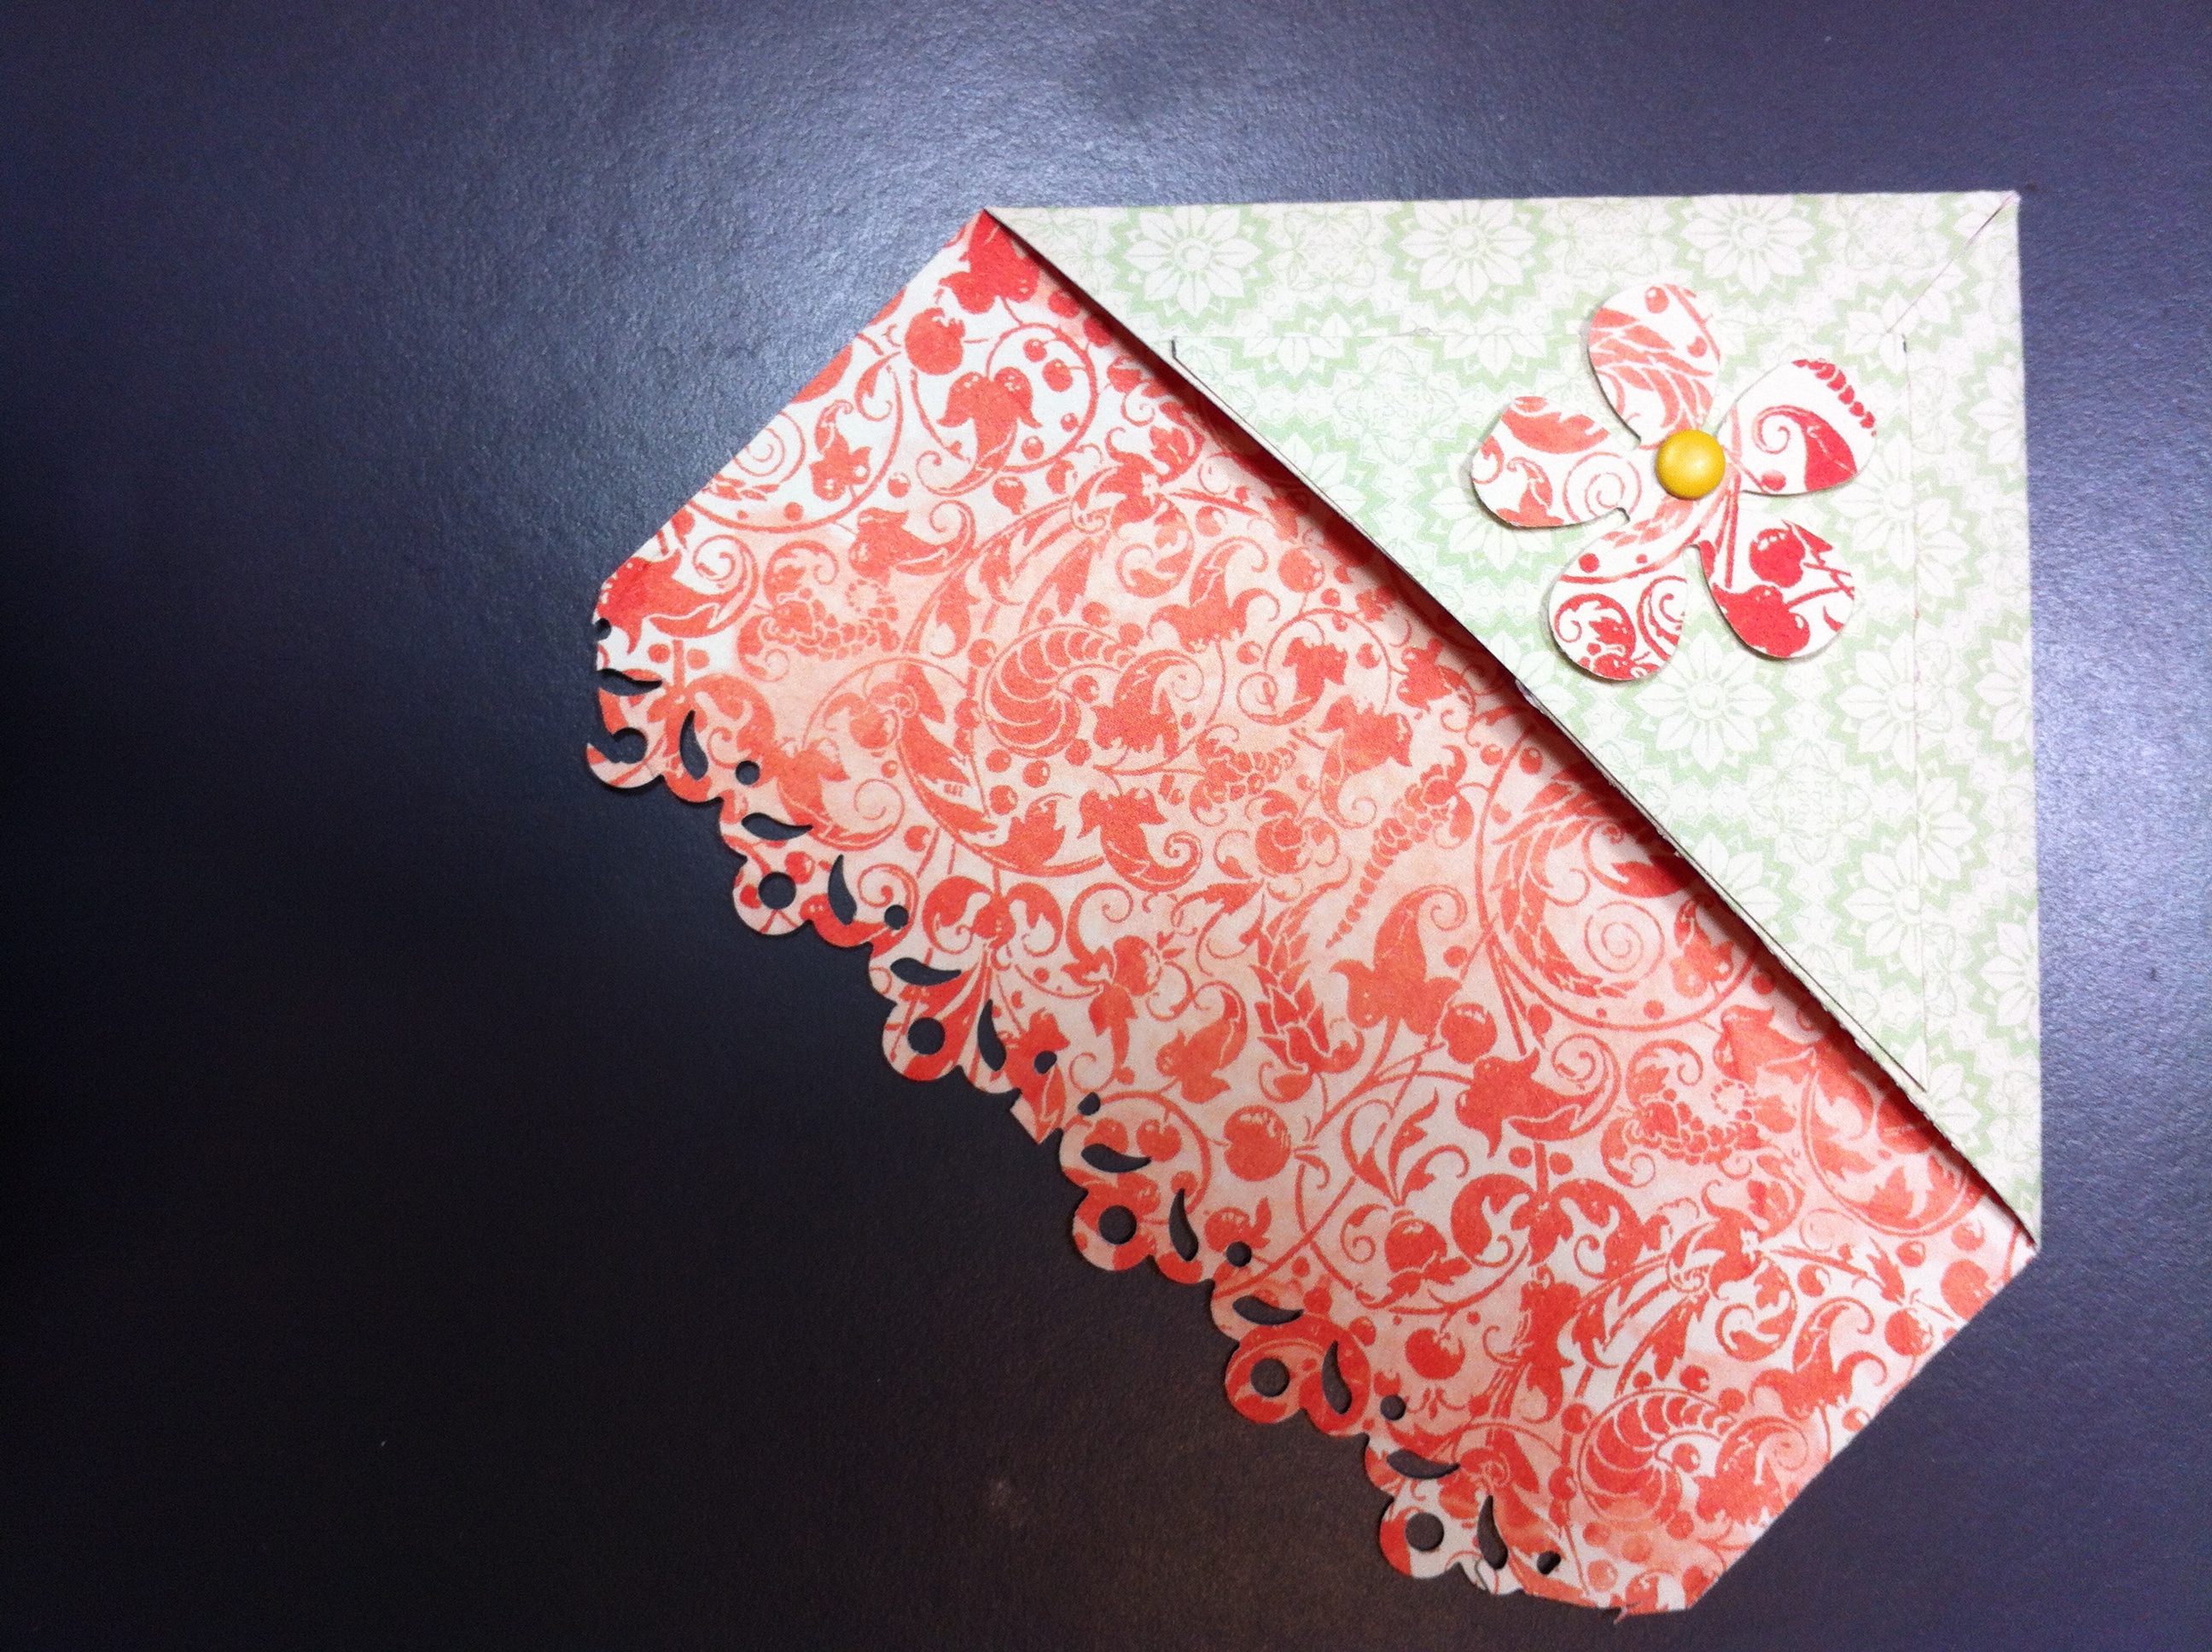
An adorable Halloween card, and a matching envelope!

2013-11-10 20.29.032013-11-10 20.28.54


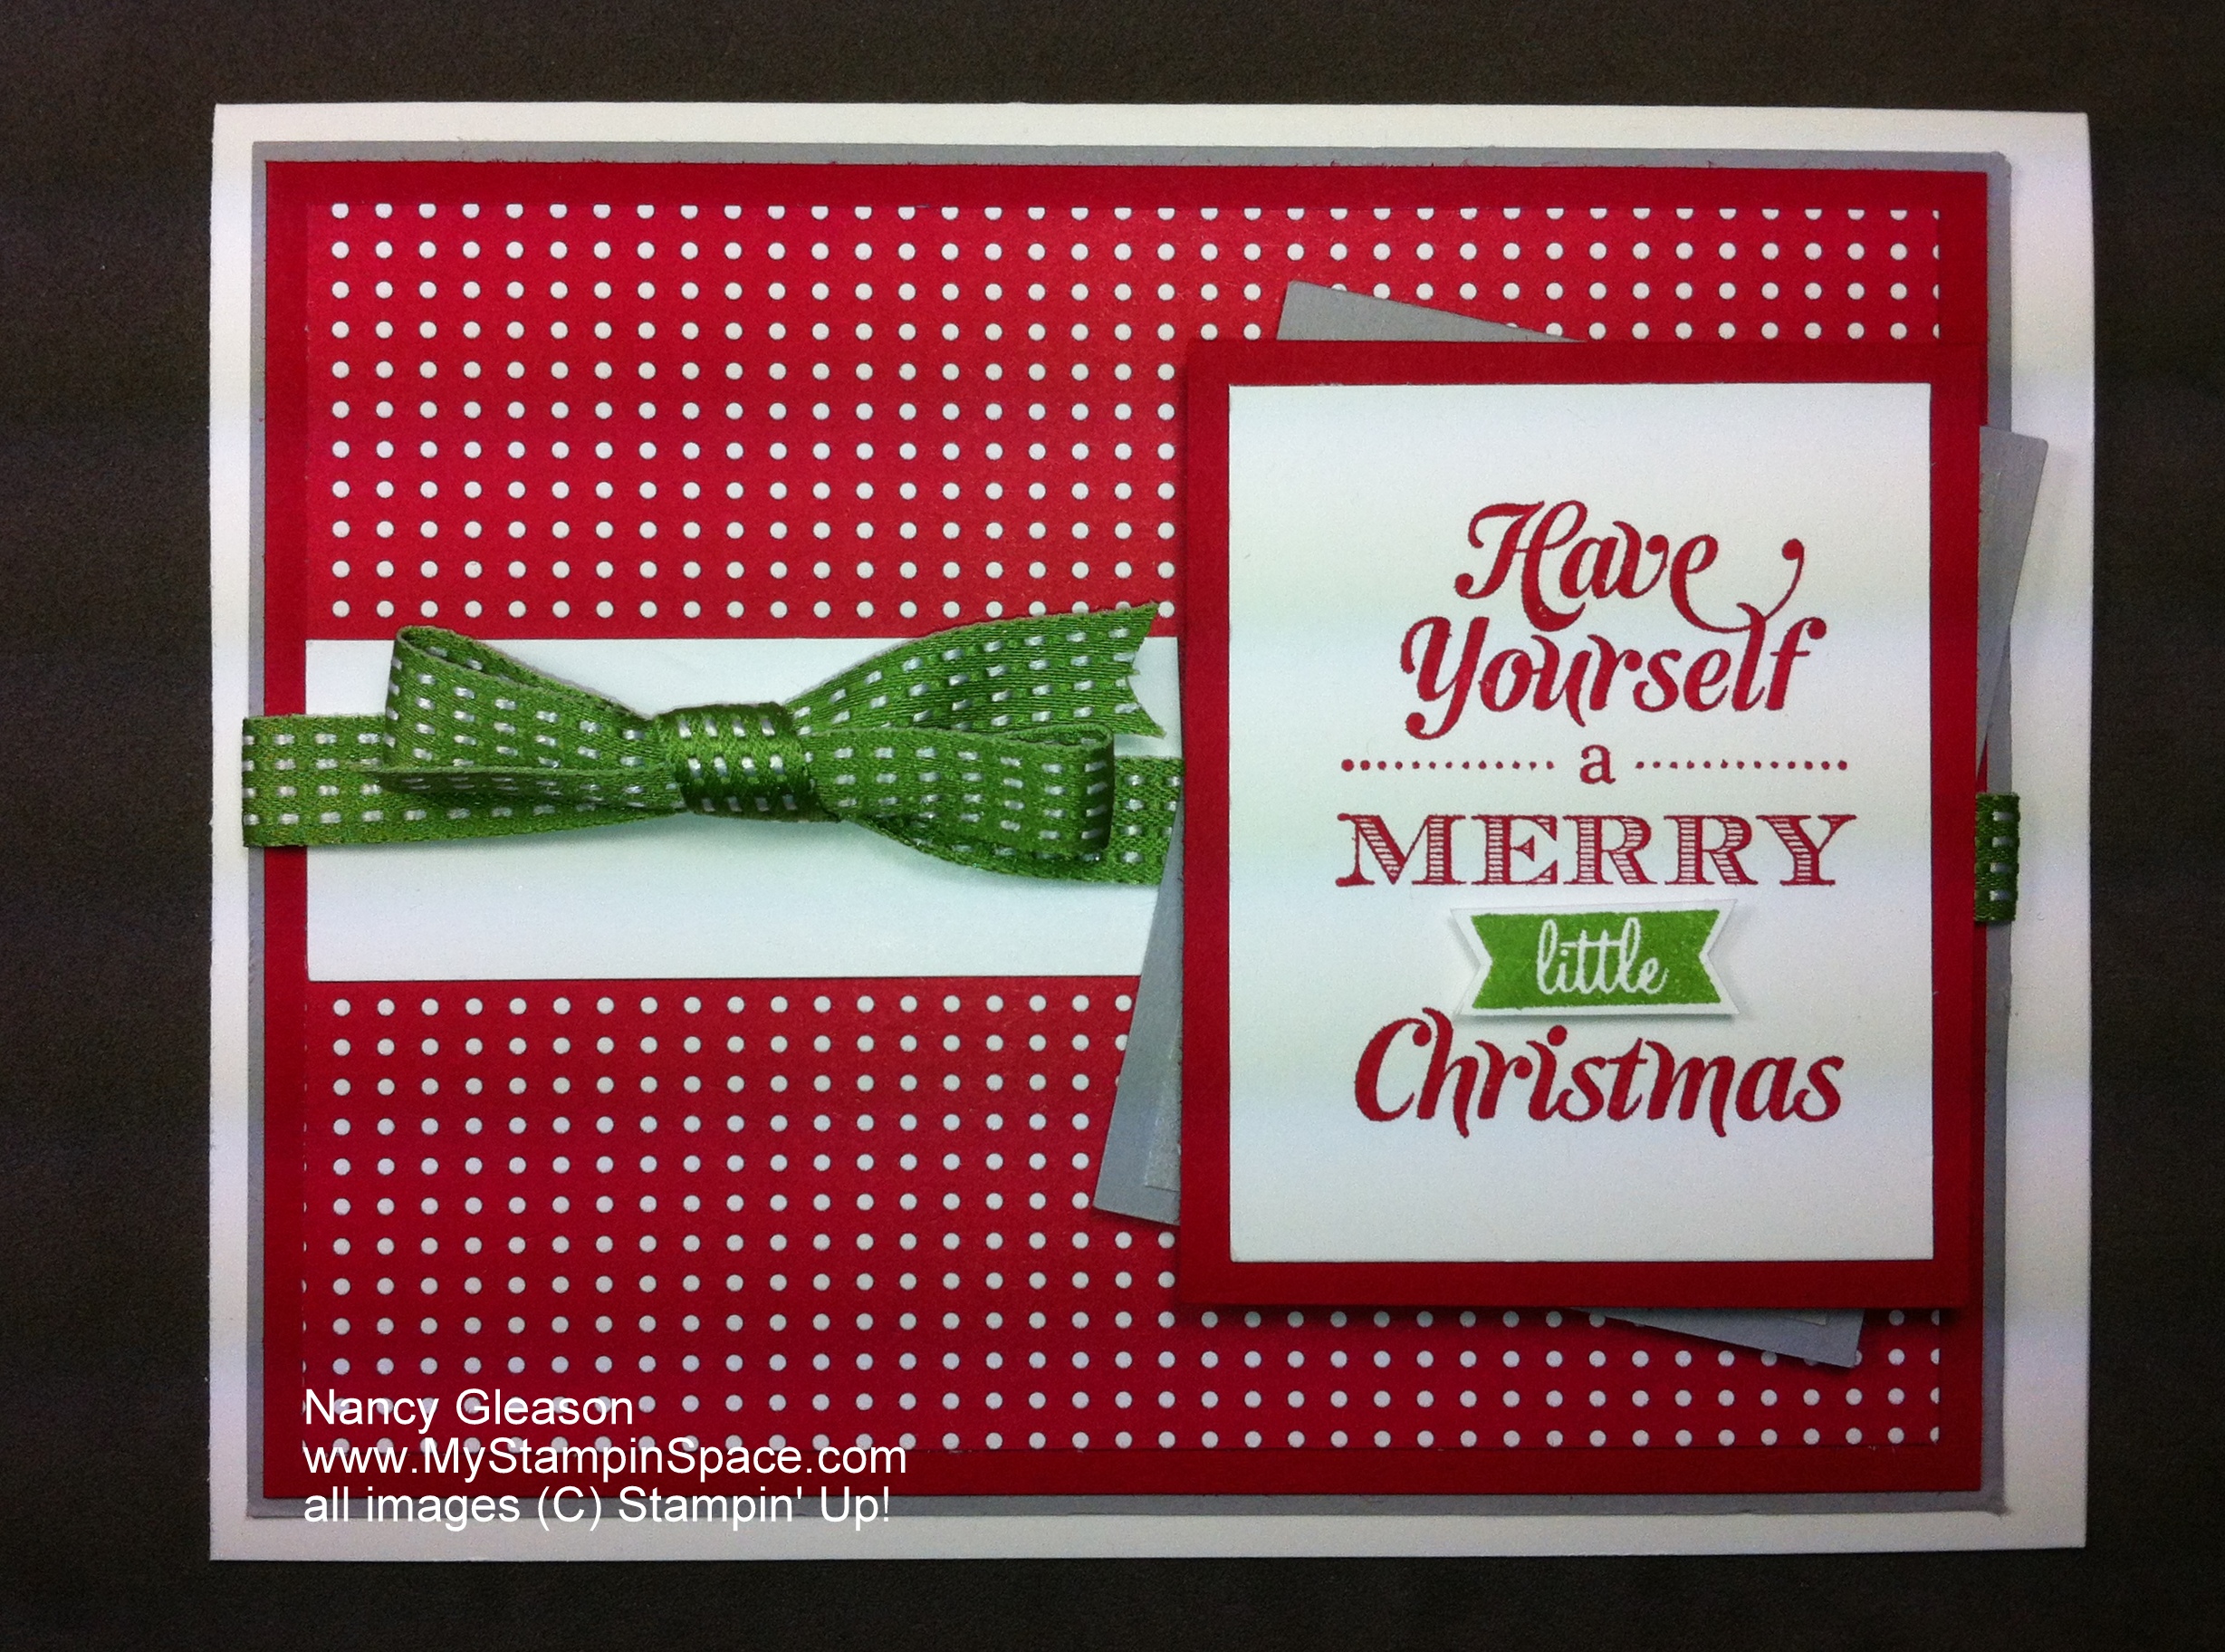
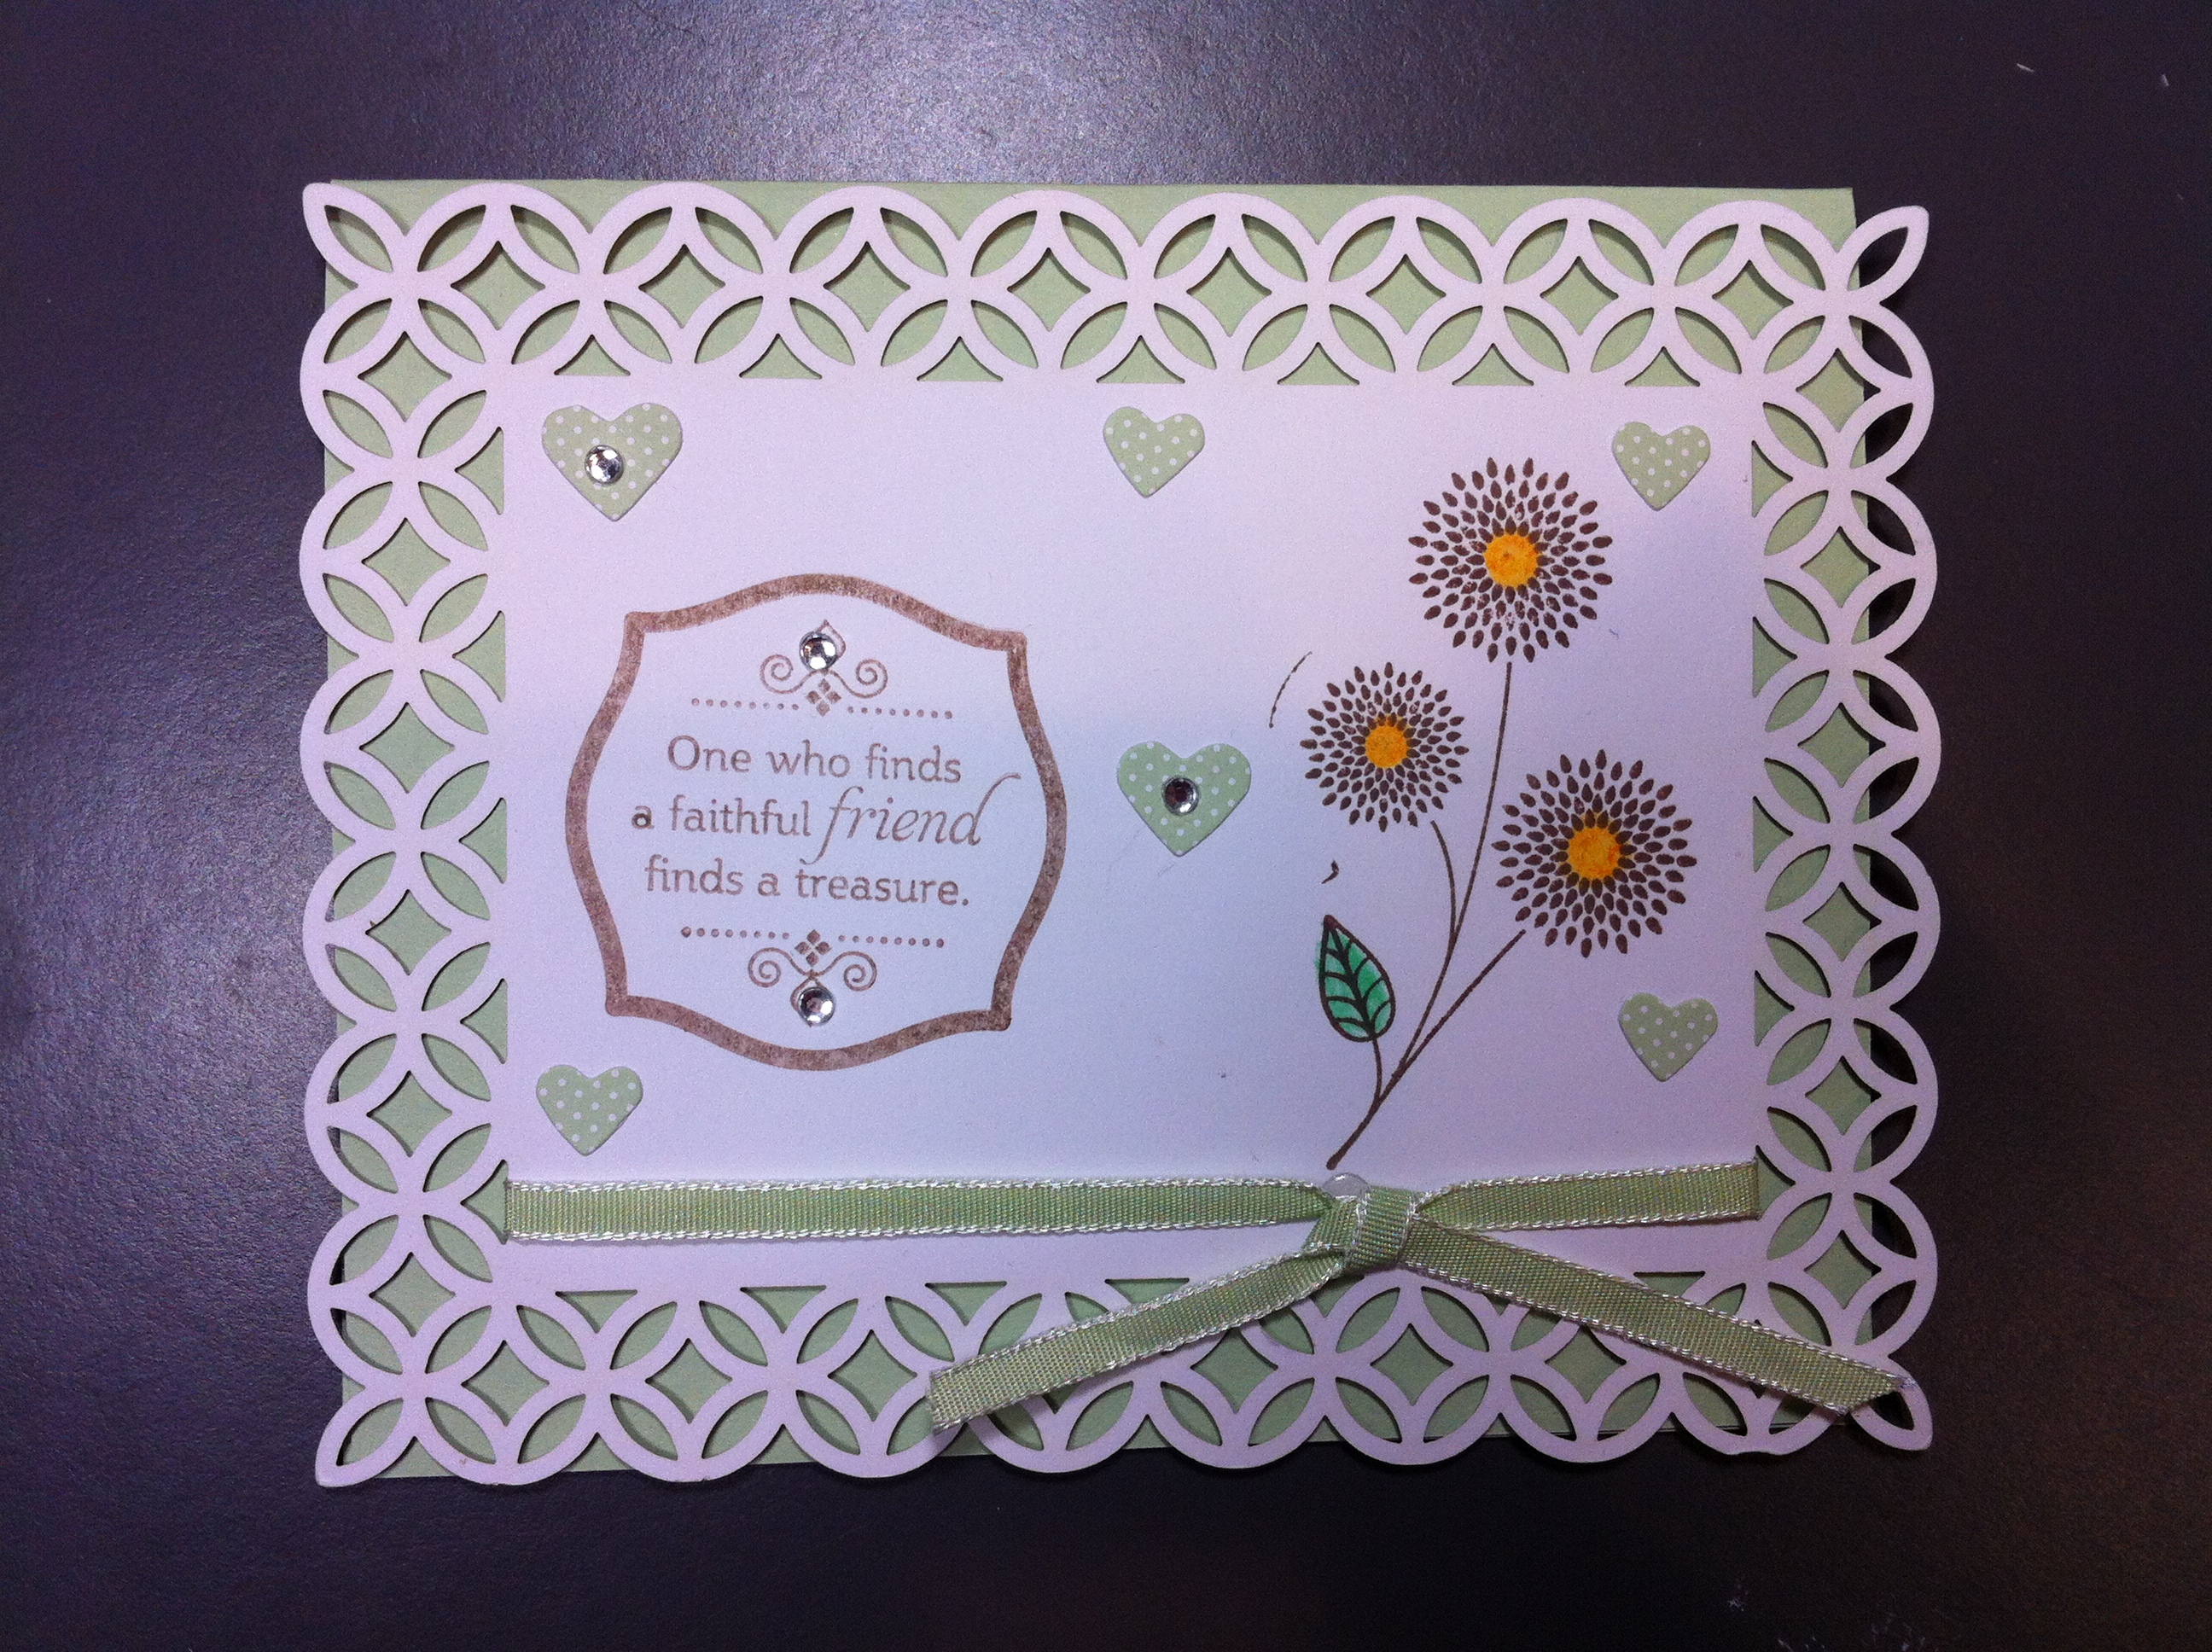
And a gorgeous card crafted from the Simply Fabulous Simply Sent card kit (#126925 – page 161 of the Annual Catalog).

2013-11-10 20.28.05


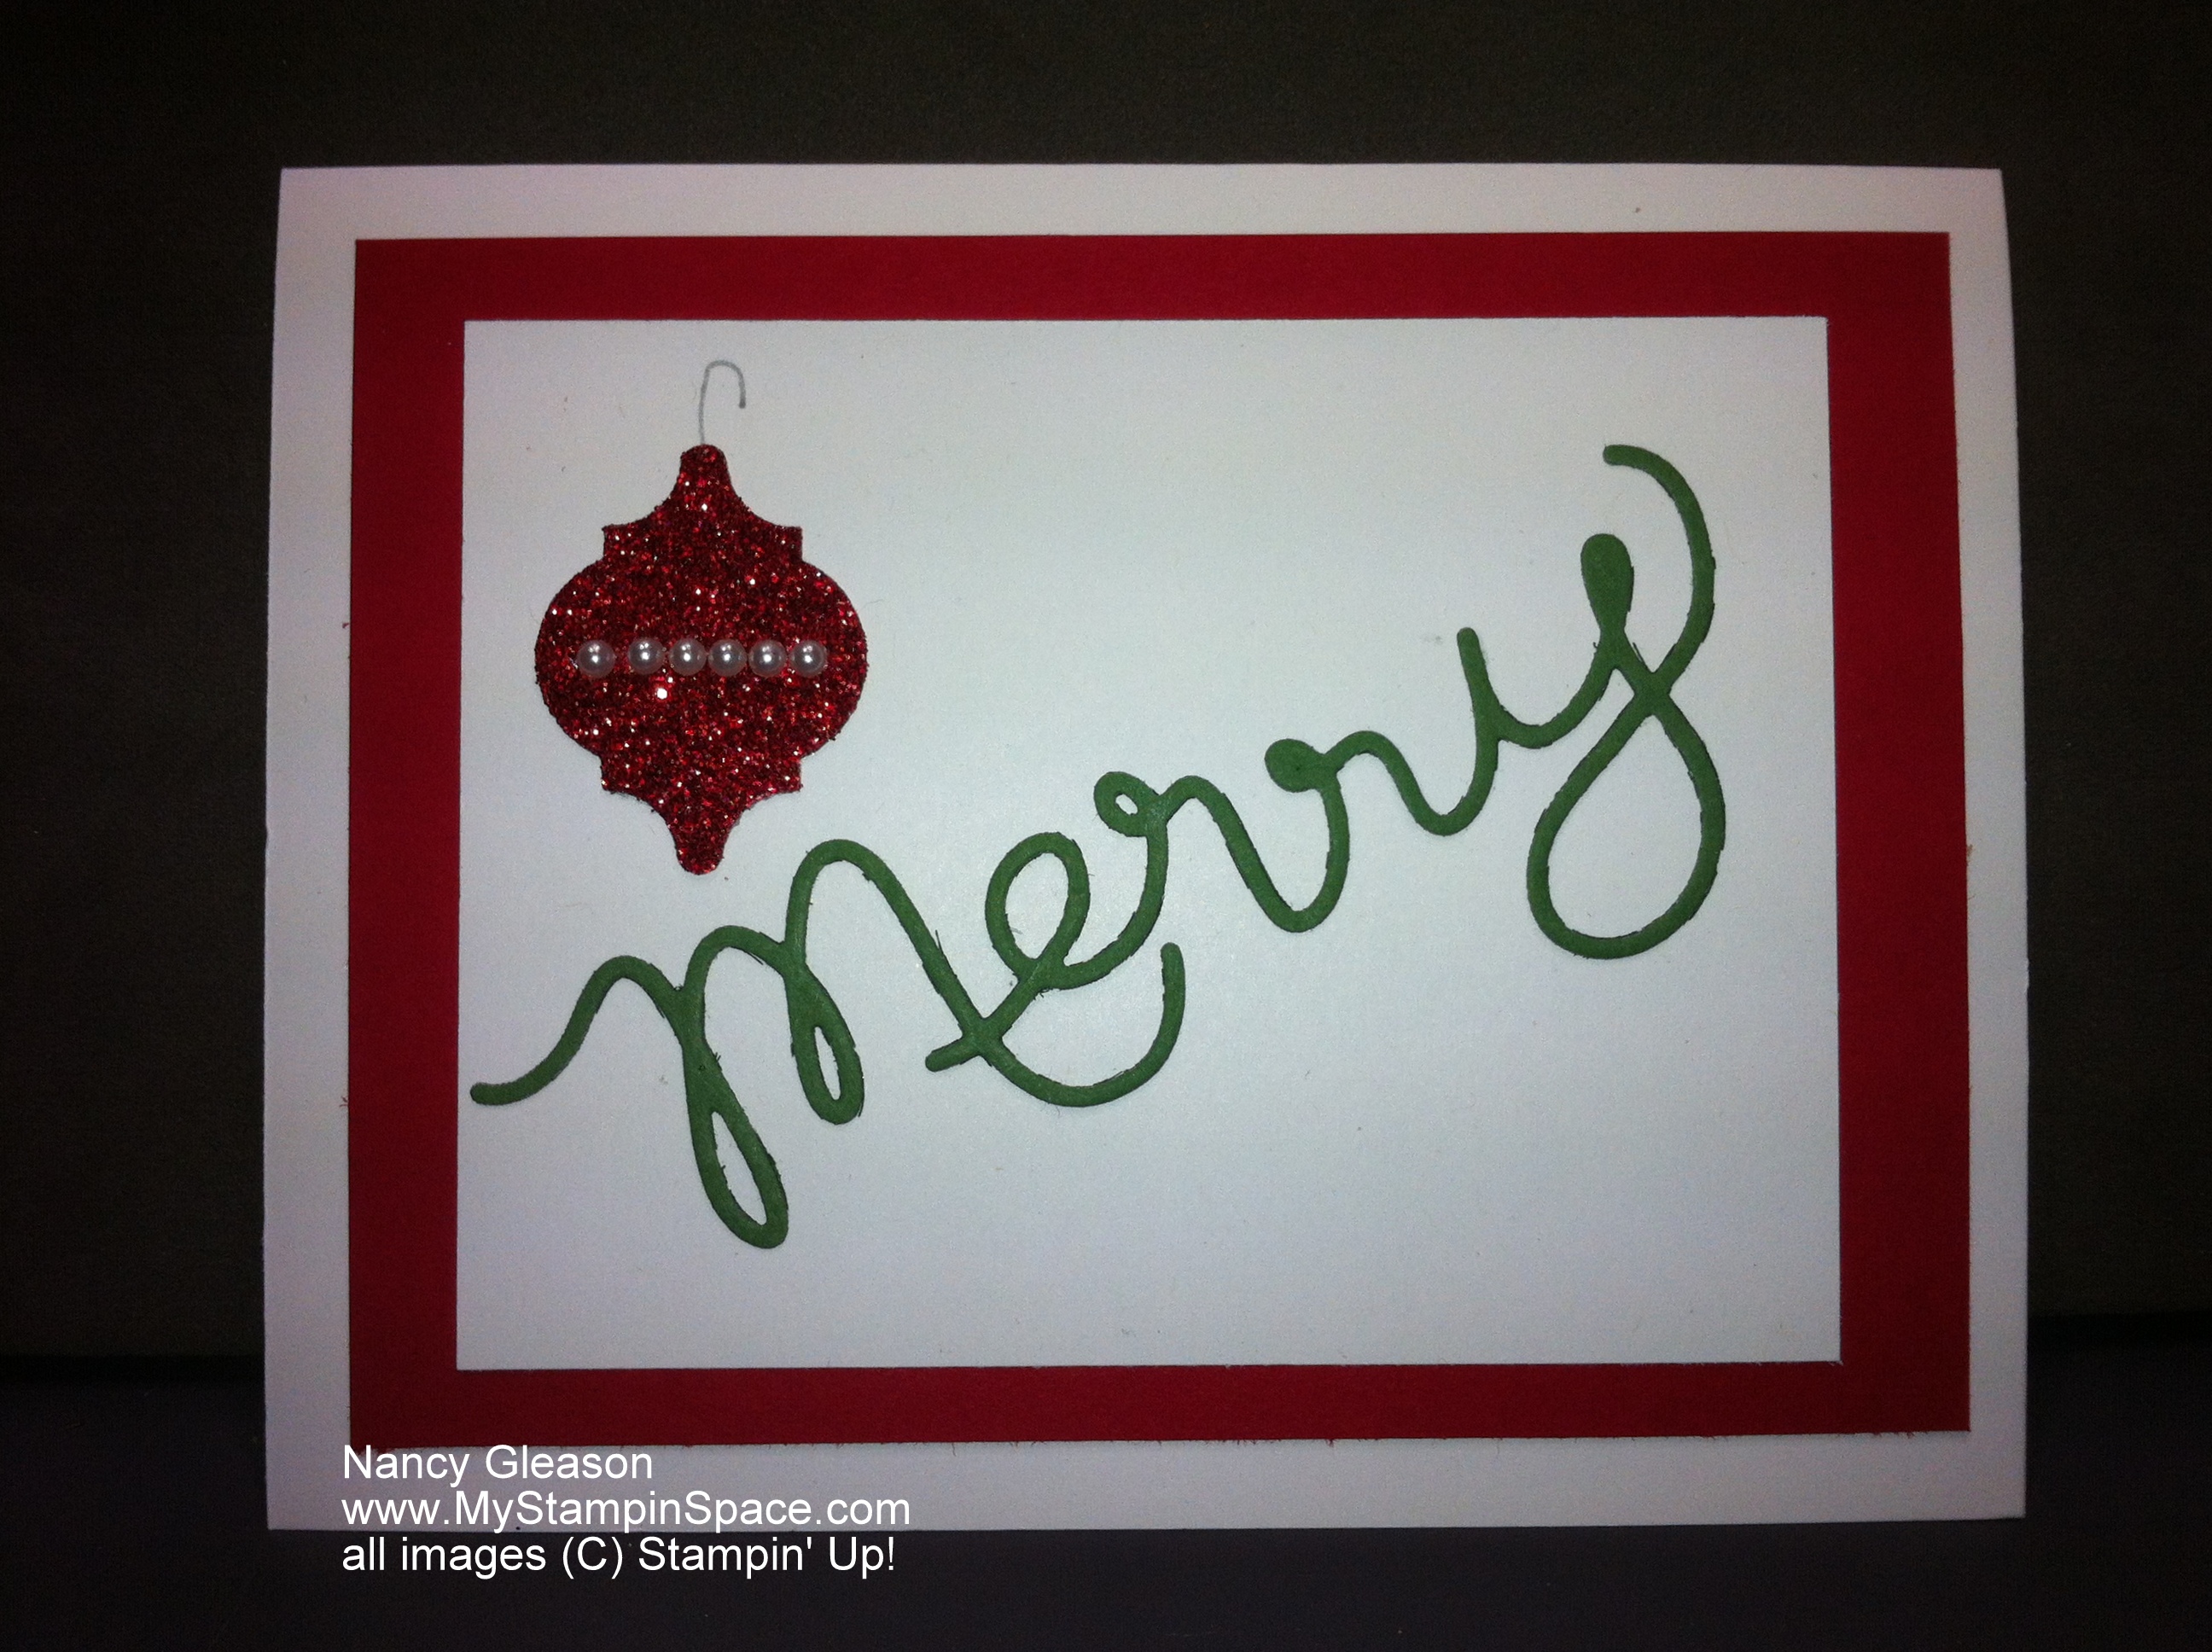
and matching bookmark

2013-11-10 20.29.20

See why I love stamping?  Making fun things with paper, meeting people and making new friends.  What isn’t to love?  Want to be a part of this awesome world?  Join my team and become one of us!  It’s easy and your life will never be the same.

Happy Stampin!

Nancy


Trick or Treat? Pals October Blog Hop


Thank you for joining us for the Pals Halloween Blog Hop. We hope you enjoy our virtual trick-or treat hop where you will either learn great tricks for your creative projects or enjoy a blog candy treat.
You should have just left stop number 14 on the Pals Hop – Nicole Watt at Pixel Maven’s Retreat. If so, you are in the right spot. If you get off track, the full blog lineup below will help you move along from blog to blog so you see all of the amazing creations.

Toil & Trouble Treat Holders

These adorable little treat holders, crafted from the Toil & Trouble stamp set and coordinating Apothecary Accents Framelits dies are the perfect way to present a candy bar to all the goblins & ghouls at your door on Halloween!  (These are holding snack size KitKat bars and a snack size Hershey bar and are headed for my co-workers).

Here are some “tricks” to help you re-create these yourself.  I created 3 different versions:   I stamped the image in Pumpkin Pie ink onto Pumpkin Pie cardstock, in Tangerine Tango ink on Whisper White cardstock, and Versamark ink onto Basic Black cardstock.  This piece was then covered with Tangerine Tango Embossing Powder and heat embossed.  This looks striking, don’t you think?  I could not have achieved that dramatic look with ink alone but embossing powder transforms the whole look.  Strong colors pop against the black background.

Tip:  Always use your embossing buddy, especially when using dark cardstock.  Embossing Buddy This helps so that stray embossing powder doesn’t stick to the cardstock.


Tip:   When using a large stamp, always tap your ink pad onto the stamp, rather than tapping the stamp into the ink pad.  IMG_2796


Tip:  Did you know that Stampin’ Up! upgraded their heat embossing tool?  It now has 2 heat settings.  High works great for heat embossing and low for drying ink.   Just thought you’d want to know. Heat Tool


Tip:  Coordinating dies & stamp sets make papercrafting SO MUCH FUN!!! If you have been reading my blog for any length of time, you know that I buy any stamp set with a coordinating punch or die.  The Toil & Trouble stamp set coordinates with the  Apothecary Accents Framelits dies that I already had so it jumped to the top of my wish list when the Holiday Catalog was released.

After the image is stamped, cut it out with the Framelits dies.

Magnetic PlatformTip:  The magnetic platform for the Big Shot is your new best friend when using the framelits dies.  Trust me, if you don’t already own, this, you must have this.  You will thank me for telling you that.  The magnetic platform holds the framelits die in place so it stays perfectly aligned when you finish creating your sandwich.


IMG_2801

Tip:  If however you don’t yet have the magnetic platform, then a few well placed pieces of a sticky note will help keep things from moving around.

IMG_2803


This shape is 5″ long.  To create the pocket, I used the Simply Scored scoring tool and found the center (2-1/2″) point.


Nancy Gleason www.MyStampinSpace.com all images © Stampin’ Up!I then scored a line 2 grooves BEFORE (2-1/4″) and 2 grooves AFTER (2-3/4″) the center point.  This allows me to fold the shape in half but with enough thickness to gently cradle the candy bar!


A hole punched  in the top and a piece of ribbon are all that is needed to tie things together.

IMG_2810IMG_2809IMG_2808


The bird image is from the same stamp set and this was heat embossed using Black Embossing Powder.  It was fussy-cut using our Paper Snips.

Tip:  When fussy-cutting an intricate shape like this, move the paper; not the scissors.  It seems counter-intuitive but it really works!

So, please leave me a comment and tell me which color combo you like best.  (And what kind of candy you would like in your candy holder!)

If you are considering ordering any of the products to  make this, you should really check out our $25 Starter Kit promotion.  See my post from yesterday for all the details and why it makes more sense to Join now rather than place an order.

Thanks for stopping by My Stampin’ Space.  Now hop along to see all the other projects the Pals have in store for you.  But make sure to come back and hang out in My Stampin Space again soon.  Thanks!   Nancy

The next stop is Beth Beard at  My little craft blog , stop number 16 on the Pals Blog Hop! Thanks for visiting – and I hope to see you next month!

2013octhop_back

2013octhop_nextThanks to the talented Nicole Watt for creating our blog hop badge and buttons!

  1. Lynn Kolcun at Stamping with Avery’s Owlery 
  2. Angela Curry at Kindred Stampers 
  3. Maggie Mata at Maggie Made Cards 
  4. Kelly DeTommaso at Kelly’s Creative Corner
  5. Debbie Crowley at  expressivelydeb… 
  6. Rae Harper-Burnet at Wild West Paper Arts 
  7. Julie Trevett-Smith at The Stampin’ Affair! 
  8. Kerry Willard Bray at  Stampgoodness 
  9. Mary Fish at Stampin’ Pretty 
  10. Martie Pollard at The Crafty Bandit 
  11. Colleen Mollema at My Crafty Habit 
  12. Lisa Davis at Cherry Street Paper Treats 
  13. Lisa Ann Bernard at  Queen B Creations 
  14. Nicole Watt at Pixel Maven’s Retreat 
  15. Nancy Gleason at  My Stampin Space –YOU ARE HERE! —
  16. Beth Beard at  My little craft blog 
  17. Linda Callahan at Stampin’ Seasons 
  18. Sherrie Gross at Stampin’ Sunshine 
  19. Peggy Noe at  Prettypapercards.com 
  20. Debbie Mageed at  Secret Stamper 
  21. Katy McGloin at Just Fun Stamping 
  22. Susan Itell at Simple Stampin’ 
  23. Shirley Sumption at Look at my Cute Stuff 
  24. Sandra Conner at Pretty Provisions 
  25. Carmen Sublasky at The Creative Stamptuary 
  26. Margaret Moody at Margaret Moody 

August Pals Blog Hop


Thank you for joining us for the August Pals Blog Hop. Even though it’s only August we want to provide some inspiration for your upcoming holiday projects. This month’s blog hop will showcase new products from the 2013 Stampin’ Up! Holiday Catalog. We hope you enjoy seeing how we use the new stamps, new punches and other accessories!

You should have just left stop number 14 on the Pals Hop – Nicole Watt at Pixel Maven’s Retreat. If so, you are in the right spot. If you get off track, the full blog lineup below will help you move along from blog to blog so you see all of the amazing creations.

Have Yourself a Merry Little Christmas


“Merry Little Christmas” (#131826-wood, #131829-clear) was a stamp set that went straight to the top of my wish list my first trip thru the 2013 Holiday Catalog.  Why?  Because it’s part of a bundle!  Anytime I see a product bundle, I know that A)  the products will coordinate well together, and B) I’ll save money!

This catalog is full of kits, great for the busy crafter!  This stamp set comes bundled with a card kit for easy card-making without a lot of fuss and includes everything except ink & adhesives (basic supplies you probably have on hand).

For this card, I used a gray, red & green color combo.  There’s a layer of Smoky Slate card stock, then a layer of Real Red followed by a piece of DSP  (retired – I am bound & determined to use as much of my retired DSP as I can!)  .  The image is stamped in Real Red onto Whisper White cardstock.  I then stamped the image again on Whisper White using Gumball Green and snipped out the ‘little’ banner using my paper snips and popped it up on stampin dimensional.  The little bit of grey behind it offset gives it some flair.  The finishing touch is the Gumball Green ribbon.

The next item I had to have were the Expressions Thinlits Dies #132171.  I loved the font and the size of each word.  IMG_2601Check out the spread on pages 10-11 in the catalog for some great ideas with this die.

These two cards were whipped out in minutes!  (Thanks to the Pals for the great tip about using wax paper to help get the cardstock out of the die! – No thanks to my family for leaving an empty roll in the wax paper box in my cabinet and not letting me know we were out!  – But that’s a different story!)

Red Glimmer Paper and Silver Glimmer Paper and punches created the designs.  (The Mosaic Madness punch and a line of mini pearls makes a great ornament, don’t you think?)  Need a quick card that you can mass produce but doesn’t cut corners on cuteness?  These thinlits will get the job done for you!  Another reason I like this set – it spans 3 holidays.  Plus I could see using the Love sentiment for more than just Valentine’s Day.

IMG_2602You can order any of these products from me.  Just click here to go directly to my store and start shopping!


The next stop is Beth Beard at My Little Craft Blog, stop number 16 on the Pals Blog Hop! Thanks for visiting – and I hope to see you next month!
2013aughop_back

2013aughop_next

  1. Colleen Mollema at My Crafty Habit
  2. Peggy Noe at Pretty Paper Cards
  3. Lisa Ann Bernard at Queen B Creations
  4. Angie Blake at Angie’s Musings
  5. Debbie Mageed at Secret Stamper
  6. Diane Roberts at Score at Four and a Quarter
  7. Barb Furlong at The Love of Stamping
  8. Mary Fish at Stampin’ Pretty
  9. Debra Simonis at Deb’s Stampin’ Grounds
  10. Laurie Chilton at Stampin’ Ink
  11. Penny Nichols at Sierra Stampin!
  12. Amy Williams at Stampin’ on the Range
  13. Shannon Jaramillo at Ezpeasycards
  14. Nicole Watt at Pixel Maven’s Retreat
  15. Nancy Gleason at MyStampinSpace
  16. Beth Beard at My Little Craft Blog
  17. Linda Callahan at Stampin’ Seasons
  18. Patti MacLeith at Papercrafts by Patti
  19. Sherrie Gross at Stampin’ Sunshine
  20. Kerry Willard Bray at Stampgoodness
  21. Brian King at Stamp With Brian
  22. Nicole Picadura at Scraps & Stamps
  23. Kim Czenszak at Live Love Stamp
  24. Rae Harper at Wild West Paper Arts
  25. Michelle Gleeson at Stampin Mojo
  26. Shannon Hokanson at Paper Works
  27. Dawn Tidd at Tiddbits from Dawn
  28. Lynn Kolcun at Stampin with Avery’s Owlery
  29. Susan Itell at Simple Stampin’
  30. Martie Pollard at The Crafty Bandit

Thanks to the talented Nicole Watt for creating our blog hop badge and buttons! This month’s badge and buttons feature the most excellent color combo featured in the Winter Frost product suite: Bermuda Bay, Coastal Cabana, Island Indigo, Pool Party and Smoky Slate.

And thanks to you for stopping by My Stampin’ Space today.  If you liked what you saw, please leave me a comment or sign up for my mailing list.  Please come back again!  See you soon!

Happy Stampin,

Nancy

Fore!

A good friend of ours just retired after 39 years on the job.  A very festive Retirement Gala was held in his honor.  I know that Larry will be planning to spend alot of time on the golf course in his retirement (he had an 8 AM tee-time scheduled for the next morning!) so I made this card just for him.  Inside was a gift card to a local golf shop.

Fore!

I don’t do too much punch art but I really had fun making this card, and it was so simple.  A piece of our new Soft Sky was used as the card base.  A piece of Wild Wasabi was repeatedly snipped with Paper Snips to create the grass look.  I ran a piece of Whisper White thru the Polka Dot textured embossing folder and used what would typically be the back, the depressed side, and punched it out to create the golf ball.  I hand snipped the Cherry Cobbler paper for the tee.  The Pennant punch created the flag which I mounted on a thin strip of Smokey Slate.  The clouds were punched with the Build-a-Cupcake punch.  A little bit of Smoky Slate was sponged around the edges of the clouds.

I used the new photopolymer stamp set Designer Typeset Stamp Set #132956 for the custom lettering and number on the flag.

This was the first time that I used that stamp set and it was really fun to put the letters together to make a custom message.  The fun part is that they don’t have to be perfect.

Want to learn more about Stampin’ Up!’s new Photopolymer Stamps?   I thought so.  Watch this video and find out everything you ever wanted to know about Photopolymer stamps (including just what photopolymer is) but were afraid to ask!

So now you have some inspiration to make something for the golfer in your life.  Please leave me a comment and let me know what you think.  I appreciate all of your comments and love to hear from you and know what you like.

And remember, you can order Photopolymer stamps, or anything else from Stampin’ Up! directly thru my secure site, 24/7.  Just click here to go to my store.  Thanks,
Nancy

So Grateful, for Mom!

A Grateful Heart

This is the card that I gave to my ‘mothers’ for Mother’s Day.  I am so grateful for both my Step-Mother and my Mother-in-Law; even more so the longer my own mom is gone.  Since I didn’t have a sentiment that expressly said “happy mother’s day” I opted for one that expressed how I felt.  Being grateful for these woman that the Lord has placed in my life, I thought this sentiment from  “Pursuit of Happiness” fit the bill.  Raspberry Ripple and Pool Party markers let me isolate the words to stamp the sentiment as shown to stamp on the Whisper White card base.

I used our Oval Framelits dies to create the cut-out in the Pool Party cardstock which I then ran through the Big Shot with the Perfect Polka Dots embossing folder.  Secret Garden provided the stamp set and coordinating framelit dies for the flowers.

After stamping the flower outlines with versamark ink, I heat embossed with White Embossing Powder.  Then I used Primrose Petals ink on a sponge dauber to add color to the large flower, Raspberry Ripple on the lower flower and Wisteria Wonder on the top flower.  Since the flower centers are smaller than the sponge daubers, I used a Q-tip to apply Summer Starfruit ink to the flower centers.  The leaves were cut from leftover DSP I had in Pear Pizzaz – a color coming back!  (See Color Refresh chart here).

My finishing touch was with the help of some strategically placed Dazzling Diamonds.

Pursuit of Happiness Stamp Set - by Stampin' Up!
Pursuit of Happiness Stamp Set
# 121907 Wood Mount, # 121970 Clear Mount

Pursuit of Happiness is a stamp set that is being retired; it will only be available until June 3rd.  If you are considering getting this, please don’t wait.

Secret Garden Bundle Clear
Secret Garden Stamp Set and Coordinating Framelits Die Bundle
# 131100 Wood Mount Bundle, # 131099 Clear Mount Bundle

You can order any of these items directly from my online store by clicking the item links or click here to go directly to my store.

Please let me know how you like this card.  Leave a comment for me on my blog.  Subscribe to my blog so you’ll never miss a blog post from me again.

Thanks for stopping into My Stampin Space.  Please come back and hang out with me again.  Thanks,

Nancy


Baltimore, baby!

If you are seeing this post on Saturday, then I am in Baltimore, MD at my first ever Stampin’ Up! corporate event!  I’m so excited to be going.

One of the things people do at these events is swaps.  So I made the following card for my swap.  I made this as a tribute too, to some colors that will be moving out of the way to make room for newer colors to return.    thank you with rolled roses

The background is a layer of Bashful Blue cardstock with a layer of Whisper White which was stamped in Bashful Blue with the En Francis background stamp.  An oval of Basic Gray provided a good contrast to hold the Bashful Blue shape which was stamped in Basic Gray with a sentiment from Perfectly Penned.

The leaves are actually punched out from Certainly Celery using the build-a-bird punch.  The Pretty in Pink flowers started life as a scallop circle punch and after some cutting, rolling & gluing, were transformed into these roses.

An assembly of line was formed to create the multiple cards needed for the card swap.  My dear hubby helped by doing all the punching for me!

As you can see, alot of scallop circles needed to be punched out!  Thanks, hubby!

stack o' scallops     lots of flowers

You can see the stack o’ scallops and the roses all finished.  I love the color combo of Bashful Blue, Certainly Celery and Pretty in Pink.  Since these 3 colors will be retiring, this card is also a tribute to the colors.

rolled roses

What do think of this: do you like my swap card?  Please leave me a comment and let me know.  Thanks!

And stay tuned to my facebook page all day as I’ll be keeping you posted with all the goings on at Stampin’ Up! Convention!  www.facebook.com/mystampinspace

A Tribute

My post tonight is a tribute to my father-in-law, Stanley Gleason, and also to my family.  I have been blessed to marry the best man in the whole wide world!  Sorry, all you girls out there who are looking for Mr. Right – he’s taken!  When I married him, I also married into his family; he had 3 daughters, his parents, and grandparents (on his mother’s side).  His parents welcomed me into their family as if I were their own.  I have been blessed to have the worlds best in-laws, too!

Last week, my father-in-law passed away after suffering from a multitude of health problems over the past few years.  We were told on 5 different occasions that he probably wouldn’t live through whatever health issue he was facing at the time.  But, he always pulled through.  In November he entered the hospital with an infection so bad it was spread thru his whole body.  Again, we were told he most likely would not make it thru, but amazingly he did.    No one planned on hosting Thanksgiving Dinner because we thought he wouldn’t be with us and we were taking life one day at time.  Well he got out of ICU and I cooked a turkey and we celebrated Thanksgiving grateful he pulled through.  But it seemed to take such a toll on him, and he told us what we all seemed to know; that he was dying.  He wanted to die at home so on Dec. 1st, we brought him home, with hospice, to die.

Everyone, especially Dad, thought it might only be a few days at best, and again, no one made any plans or preparations for Christmas.  Just taking life one day at a time. Christmas came and New Years came and Dad was still with us.

A hospital bed in the living room, hospice nurses each morning, taking turns sitting with him, became the norm.  Wonderful friends, neighbors, and people from our churches bringing meals kept us nourished without having to think about planning meals and cooking.  Dad was unable to do much, or eat much and became increasing agitated if left alone, even for a few minutes.  So we took turns, staying over, just so Mom could shower, sleep, and take care of basic household chores.   Nightime was hard because Dad wouldn’t sleep at all so whoever was there didn’t sleep either. Mom found it difficult to go into the bedroom and leave Dad so most nights she didn’t sleep either.  Needless to say, we all were exhausted & sleep deprived.

But the last weekend of January, Dad was getting especially weak, Mom was so exhausted we thought she was going to collapse so we decided to move Dad to the inpatient hospice unit for 5 days of respite for Mom.   That morning Dad stopped being able to swallow and it was the beginning of the end.  God, in His providence, placed Dad where he needed to be, and removed a burden that was too great from Mom.  On Jan. 30th, Dad celebrated his 83rd birthday, although he was unable to do anymore than just open his eyes and squeeze your hand.  Early the next morning, Dad left this world to go home.

I made the following video as a tribute to him; it was shown at his memorial service.  Stanley W. Gleason – A Celebration of Life

It is not good-bye, but until we see you again!

2013

Happy New Year!

Well, a new year is upon us.  Where did 2012 go?  And how did it go by so fast I wonder.  While part of me is still asking that question, the other part of me is glad that 2012 is over and a whole new year is upon us.  A fresh start, a clean slate, a new beginning.

While, I’m not usually one to make New Years Resolutions, I do love the fresh start.  New files (and my P-Touch labeler just quit right in the middle of printing a label, I tried not one but 4 sets of new batteries and still nothing!  This is a office supply junkie’s nightmare!  But I’m trying not to panic….”Breathe, Breathe”…Staples should  have lots of label makers on sale this week so I’ll get by I’m sure. )  New calendars (yes, plural.  I have several; wall calendars, desk calendars, electronic calendars – I told you I’m an office supply junkie so this really shouldn’t surprise you)

The last 2 months of 2012 have been so chaotic and stressful and busy beyond belief but also beautiful in a way;  I have a family member who is dying and it has been a process that has helped to refocus my priorities about life and family and what is really important.  Like a compass pointing to true north, the reality of death has a way of sorting out the important from the trivial.

And so, I am craving normalcy.  Getting back to a normal routine and schedule.  The new year does this and so I welcome 2013 with open arms.

And yes, I do want to do more this year.  I resolve to blog more frequently, and to interact more with you, my blog readers.  And yes, like so many others I resolve to lose weight.  Certain health issues cause me to gain weight with unprecedented speed when I’m not taking care of myself and I haven’t taken care of myself these past few hectic months.  So if you too are looking to lose weight, let’s do it together this year and hold each other accountable.  Let me know what you are doing and let’s lose weight together.

So here’s to a new year; may it bring you & yours health, happiness and a smaller pant size!

With love,

Nancy

It’s Election Day!

Vote

As American citizens, we have a privilege that many citizens around the globe do not have; that is the privilege to VOTE for our leaders.  Please exercise that privilege to vote and make your voice heard.  Due your due diligence and know the candidates and where they stand on important issues, and their track record.   Don’t be swayed by negative attack ads or what one candidate has to say about his/her opponent (they are usually half-truths at best).  Rather listen to what each candidate has to say for himself.  Then, make an informed decision and cast your ballot.

When you’re done doing your civic duty, come back here and check out the newest additions to our MDS2 digital offering.  (Hint:  If you are sports fan, you’ll love today’s newest downloads!)

Not using MDS2 yet?  Get a free 30-day no risk trial here or click on the button to the right.  (That’s something I wish we could do with our politicians!  Not living up to their campaign promises – 30 days later just give ’em the boot!)  If you like MDS2, you can purchase the software and continue using it.  Don’t like it?  Nothing lost.  It doesn’t cost anything, you don’t have to cancel, you don’t have to do anything.    All fun, no risk, what could be easier?

I’ll be posting a pic in the next few days – I made my Thanksgiving invitations using MDS2 and I’m so thrilled with the way they turned out.  Stay tuned to see that.

Celebrate Digital Scrapbooking with MDS2

OCT. 29 – NOV. 5. FREE MY DIGITAL STUDIO DOWNLOADS AND 50% OFF all MDS digital kits to celebrate Digital Scrapbooking Day.  Get details!

1  Go grab your FREE downloads here.

2.  Buy your favorite Digital Kits for 50% off – see them all here.

3.  Visit the MyDigitalStudio.net blog all week long for inspirations and challenges.

560792_4027885419568_1285493639_n

NEW FANCY FRIENDS PROJECT KIT NOW AVAILABLE:   The Fancy Friends Kit offers everything you need to make 6 quick and simple cards for only $15.95 (132319).  If six isn’t enough, add Stampin’ Up! Note Cards & Envelopes to your order (107311).  Excellent gift idea!  Take a look!

Sell-A-Stamp Spooktacular

Well this is unprecedented. In all the years I’ve been with Stampin’ UP!  I have NEVER seen them offer their stamps at a reduced price.  But for one day only, Monday, Oct. 29th, ALL of their stamps will be sold at 15% off!!!!  NOW IS YOUR TIME TO GET THOSE STAMPS THAT HAVE BEEN ON YOUR WISH LIST.

  • Starting at 12:00 AM (MT) and ending at 11:50 PM (MT), on MONDAY, OCTOBER 29th, almost every stamp we sell will be priced at 15 percent off.

This means all stamps in the current catalogs including:

    • Background stamps
    • Personalized name stamps
    • Cookie press stamps
    • Single-image stamps

This DOES NOT include:

    • Hostess sets
    • Bundled stamp sets
    • Digital stamp brush sets
  • There is no minimum purchase, and no limit to the number of stamps you can order.

Last week I told you about a new program Stampin’ Up! is trying out:  Single Stamps.  Due to it’s initial success, they’ve added several other stamps – including a few never before seen stamps.  So check out the single stamp offerings on the flyers below.

Here’s the scoop on the single stamp sets:

  • You can find the stamp item numbers on the flyers and the single stamps can be ordered in my online store.
  • These won’t be sent to you in our typical cases or packaging; they’ll be packaged in cello bags. If you’d like a case for your stamp, you can buy our Clear-Mount Stamp Cases that come in packs of four (item 119105).
  • This offer is available for clear-mount stamps only.
  • The stamps won’t come with a Clear-Mount Block, and you’ll need to buy a block separately if you don’t already have one. The recommended block sizes can be found on the flyers.
  • There’s no limit on how many pieces you can buy.

And mark your calendar and place your order for sale priced stamps and stamp sets on Monday, Oct. 29th.  Don’t miss it!

Mojo Monday 264

Well, this weeks’ Mojo Monday sketch challenge was such a great sketch – thanks to the great designers on the Mojo Monday design team!

I had so many ideas in my head; ideas for Halloween, for Christmas, for a birthday.  But when I sat down to make a card for my entry, I had a particular color scheme that I knew I wanted to use (Primrose Petals and Raspberry Ripple).  That made me decide to use two specialty papers:  Natural Composition Specialty paper and the Core’dinations Paper.  If you don’t already have these two specialty papers; you NEED to get them!  They are so much fun to work with and have such versatility.  Together they make a neutral color combination that can be used with any other color colors.

That led me on the path of wanting to use my Early Espresso heat embossing powder, and it just led me to the Pleasant Poppies stamp set.  That always happens to me; I start with something in mind and wind up on a different path but I’ve learned to ‘go with the flow’ and I’m never disappointed with where I end up!

So here’s my entry:  Mojo Monday 264


So what do you think?  I LOVE this color combination! I also LOVE the little dahlias – they are so cute and so super easy to use.  I think I am going to make another card just like this and use my blender pen to color in the poppies in Primrose Petals & Raspberry Ripple.  That will help with the continuity of color throughout the card.

Would you do anything different if you were making this card?

Click here to go directly to my online store and place your order today.  Or click on any of the hot-link items below to go right to that item in my store.

PaperNatural Composition Specialty paper#126917 , Core’dinations Paper in Early Espresso # 127848, Raspberry Ripple cardstock, Primrose Petals cardstock, Very Vanilla cardstock, Crumb Cake cardstock and Early Espresso cardstock.

Ink:  Versamark, combined with Early Espresso heat embossing powder #128980

Tools:  Heat Embossing Tool, Big Shot, Finishing Touches # 127010 Edgelits,  #2 Circles Die

Embellishments:  In-Color Dahlia’s #127556, 3/8″ Stitched Satin  Ribbon in Primrose Petals # 126844

Thanks for stopping into My Stampin’ Space.  Come back soon and until then, Happy Stampin’!

Nancy

Twisted Gift Card

One of the hottest trends right now is a twisted card; and since it is such a great way to give a gift card, it’s very timely too!  Well, I had a gift card to give – to my hubby; we just celebrated our 24th wedding anniversary!  So I thought I’d whip up a quick card to give him a gift card.  I gave him a gift card to the movie theaters so we could have a date night.  Yup, even after 24 years, I still LOVE going on a date with my hubby 🙂

Anyway, the card was quick & easy but in rushing, I folded the card closed BEFORE I let the ink dry, oops!   A little smudgy but, the good thing is my hubby loves me, smudges & all!

So twist cardthis is what I came up with.   I knew I wanted to use the champagne flutes from the  Embellished Events stamp set. And I wanted a simple, classy black & white theme.  I blinged it up a bit by stamping the image in Metallic Silver ink and embossing in clear embossing powder.  Rhinestones were used to create the bubbles.  Basic Black glimmer brads completed the touch.

(My mind always goes to food – when I created the circle, half black, half white to layer the champagne glasses onto – all I could think of was a black & white cookie!  Now I need to go to a good Jewish deli to get one – do I see a road trip to NY in my future?)

Making a twisted card naturally creates a pocket both on the front and the inside.  While I glued the front pocket closed, I took full advantage of this pocket to hold my gift card.  A sentiment from Hand Penned Holidays (now retired) provided the perfect sentiment to convey my feelings!  Twisted card inside

So what do you think of this “Twisted Card”?  Would you like to learn to make one?  I’m thinking of creating a video tutorial – please leave me a comment and let me know if you’d like to learn how to do this to give out your gift cards this Christmas.  If I get good feedback, I’ll make a tutorial.   Thanks for your input!

Supplies:

Stamp Sets:  Embellished Events # 126497 clear, #126495 wood, Hand Penned Holidays (retired)

Ink:  Basic Black classic ink, Silver Metallic ink (retired)

Paper:  Basic Black, Whisper White card stock

Tools:  Simply Scored Scoring Tool #122334, Big Shot# 113439,  Paper Snips # 103579, Chevron Embossing Folder # 127749, Circles #2 Originals die # 114526, Heat Tool # 129053 and Clear Embossing Powder #109130

Embellishments:  3/8″ Basic Glimmer Brads #121003, Rhinestone Basic Jewels # 119246

You can order any of these items by going to my secure online store.

Clearance Rack Re-Stocked

Clearance Rack

The Stampin’ Up! Clearance Rack has just been re-stocked and that means Savings, Savings, Savings!

Now is the chance to get your favorite, retired items at drastically reduced prices. Supplies are limited and are only offered on a first come, first serve basis so if you see something you like, don’t wait.  It could be gone in a few short hours.

Just in time for Halloween:

Bitty Bat Punch
Pick Your Poison Designer Series Paper - by Stampin' Up!
Pick Your Poison Designer Series Paper
Pumpkin Faces Sizzlits Die - by Stampin' Up!
Pumpkin Faces Sizzlits Die
Pick Your Poison Quick Accents - by Stampin' Up!
Pick Your Poison Quick Accents
Wicked Fun Designer Specialty Paper

So head on over the Clearance Rack and stock up on savings!